
When I started the project I’m about to share with you, I had no idea what I was doing or how it would turn out. Luckily, I am thrilled with the results:
This rustic looking pallet coffee table was made with just two wood shipping pallets. There had been a bunch of pallets stashed next door as they had just finished hauling new building materials in on them.
I walked by them for a couple of days, with ideas stirring around in my head.
I decided to nab them to create a coffee table of sorts and came up with a plan… but let’s be honest, I was totally making it up on the spot. I wanted something to match my stick vase tutorial and overall rustic vibe.
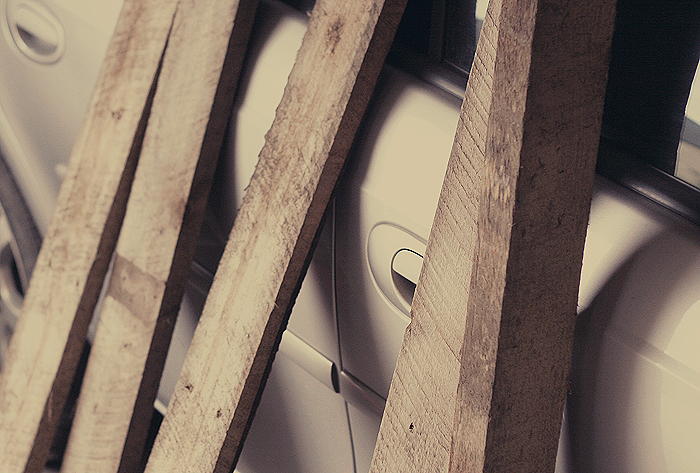
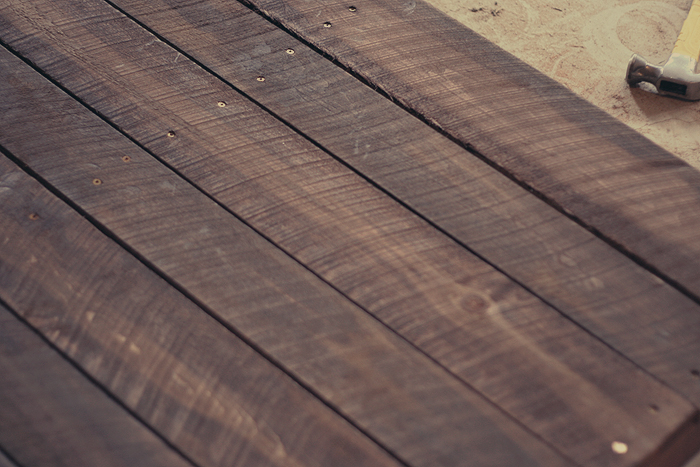
I started out with two pallets. I knew that I wanted to stack them to make a little magazine shelf and I wanted the gaps in the boards to be closed up. So first things first, I had to tear those babies apart.
Step 1: Obtain Pallets
Step 2: Remove boards from the top.
I hammered the boards off from the opposite side. I had a nice collection of rusty nails afterwards.
Afterwards I gave them a light sanding. Once all of the boards were off, I had to put them back on, only this time they would be side by side.
Step 3: Place boards back on frame, side by side.
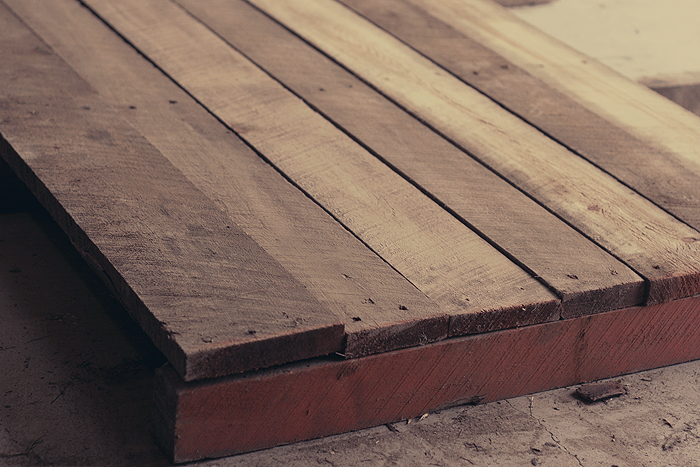
Since the boards were now side by side the width was smaller, so I just cut the remaining frame off of one side, which worked well because the size I ended up with was much better. Then I screwed the boards back in, using the existing nail holes and slightly larger screws.
Step 4: Cut off excess frame
Step 5: Screw boards down
I did this to both pallets. (Remember, I am using two so just do the exact same thing for both.)
Next came the legs. I just used the scraps of wood we had chopped off from the frame and cut them to size. My legs were about 8.5″
tall. Then they were simply screwed into the bottom pallet.
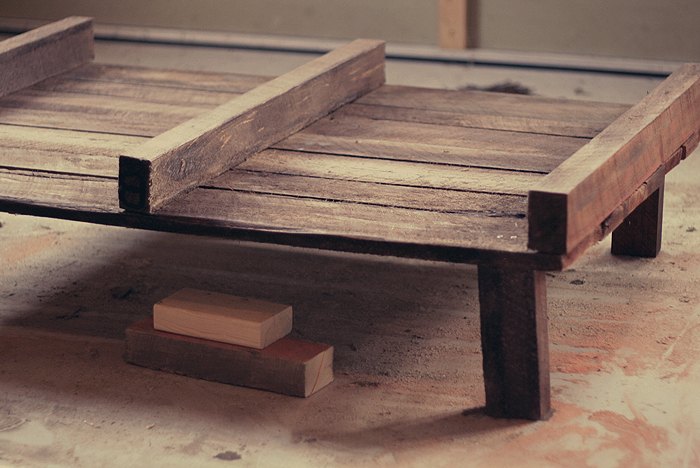
Step 6: Cut legs to size and screw into bottom pallet
Then came more sanding. Being that these are pallets, they are super rough and need lots of sanding. I used an electric sander for this part.
Once they were nicely sanded, I stained them! The hardest part of this project was getting the stain right. I originally tried using an ebony shade and it just turned out super black.
Then, I tried a reddish cherry stain (I wanted it to match my existing furniture) and again, it turned out super black.
I opted for a lighter red oak shade and it seemed to do the trick. Just remember that if you’re making one of these, the wood is untreated and soaks up the stain, so go a few shades lighter than what you really want.
Step 6: Sand and Stain
Step 7: Varnish
After the stain was dry, I covered it with a clear varnish. Once it was all pretty looking, all I had to do was put it together. I brought it into the house first (because this thing is HEAVY and it was easier to take it in 2 pieces).
Then just set the bottom half down, and placed the other pallet on top of it. You can screw it down but I left it for fear of having to move it again in the future.
Step 8: Put top pallet onto bottom pallet and you’re done!
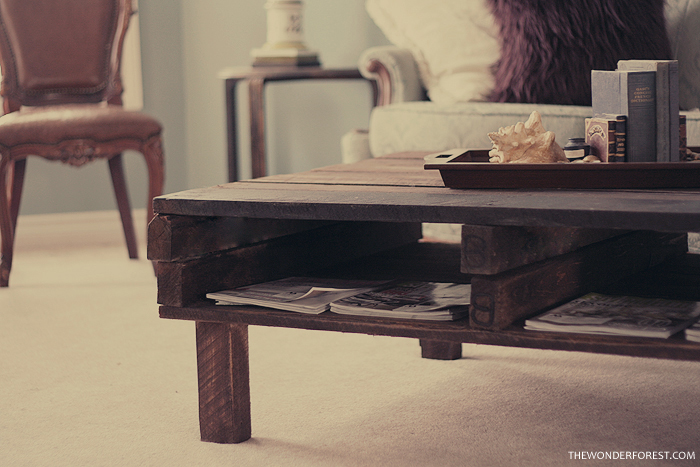
I am so happy with how it turned out. I love how it’s not perfect and has a bit of rustic charm.
It also perfectly fills the large space I made it for, and the stain matches our existing furniture!
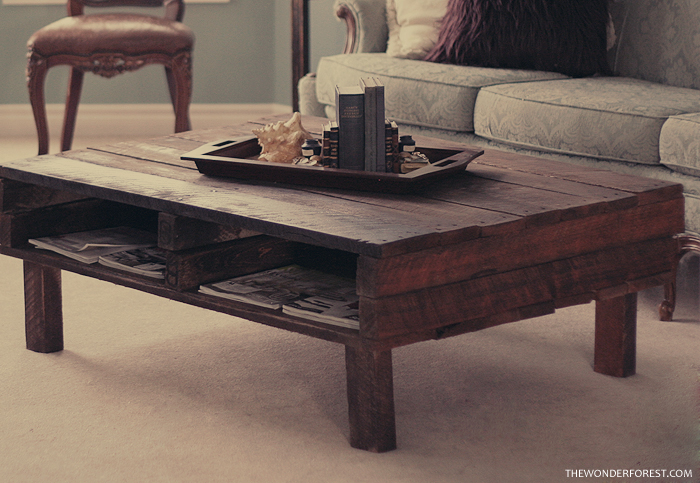
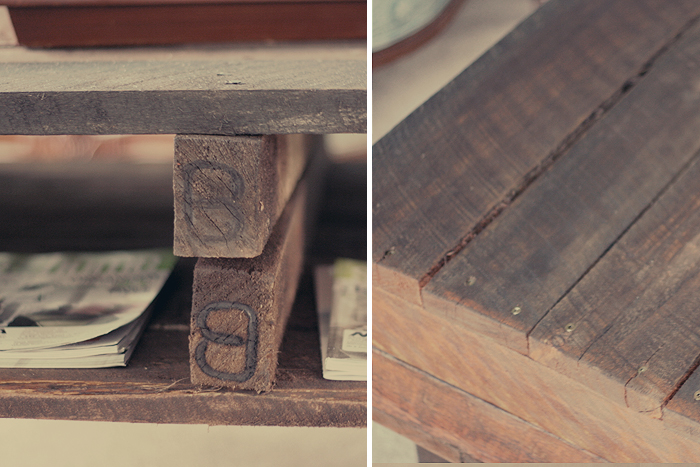
My favourite part is the little “B” detailing on the wood… and of course the magazine shelf!
What do you think of our table project?? The best part? It was completely free!!!!
Last Updated on
Love this, so versatile and so much scope to put your own stamp on it. Excellent.