
There always seems to be a big summer trend – something seems to be everywhere, whether it be in retail stores, on TV or on your favourite celebrities.
This coming summer, high waisted, destroyed denim shorts are on the top of the trend list, and had been occupying my thoughts for so long until I finally decided to cave and purchase a pair – that is, until I saw the price!
These summer must-haves can set you back a pretty penny, and I could not help but notice how simple they would be to re-create from a very basic pair of jeans.
 By Joelle of La Petite Noob
Read on to see how you can re-invent some of your old jeans into a pair of cute destroyed shorts in just a few simple steps, and using very minimal materials.
Materials
- One pair of high waisted jeans (a.k.a. “mom jeans” – you may have a super old pair laying around, or you can take to your local thrift store to scout some out. I found my pair for a grand total of $3.99)
- A sharp pair of scissors, able to easily cut through denim
- A pair of tweezers
- An old razer
Step 1 – Begin Cutting your Jeans
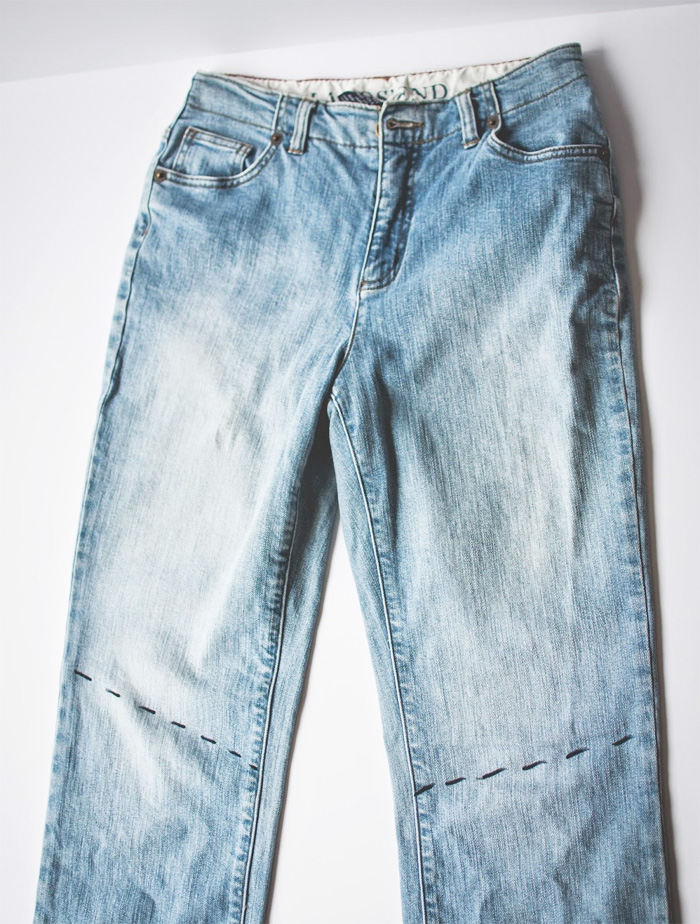
Start by taking your old jeans and laying them down on a flat surface. Mark your first cutting point, using an angled line where the outer edge of the lines are slightly higher than that of the inside (see above.)
By making your cuts on this angle, you help to make sure that the backs of your shorts properly cover you behind and also help to give the denim shorts a more flattering shape.
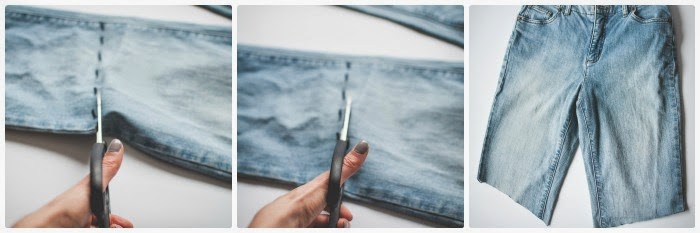
Start by cutting your shorts much longer than you would want the end result. The trick to achieving the perfect cut it to always err on the side of caution – cut longer than anticipated, try the jeans back on for reference, mark another conservative cutting point, and cut again.
Just as a reference, I tried on my jeans and made cutting adjustments twice to make sure that they didn’t end up too short.
**Note – if you plan wearing your denim shorts on the shorter side, make sure that you keep at least an inch and a half of space on either side of the crotch when you cut.
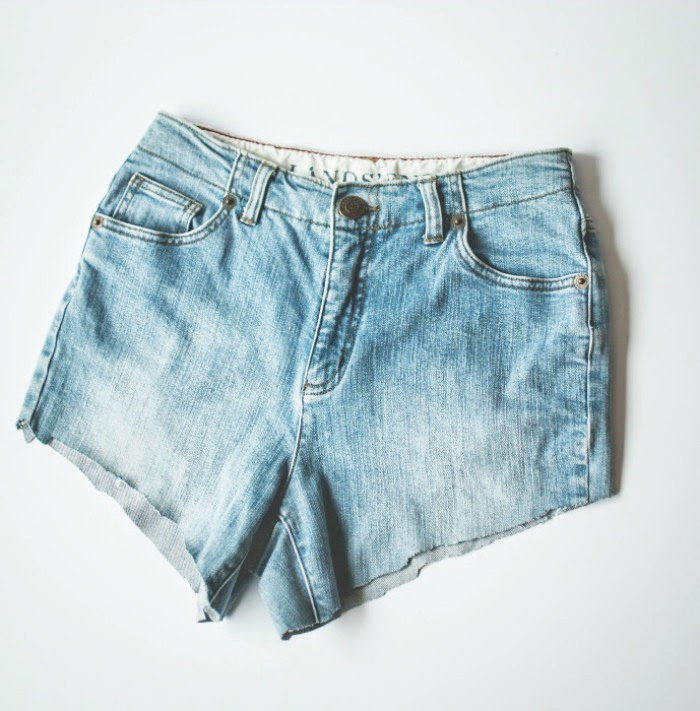
Once you have your desired length clean up your edges slightly, and make sure that you have the correct angles. Now you’re ready to start giving your high waisted, denim shorts that authentic distressed look.
Step 2 – Create Worn Areas
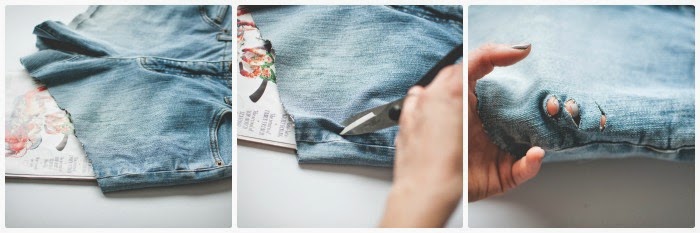
The first step in creating a perfectly distressed denim look is to decide where you want your worn-out holes to be.
Once you’ve decided the areas, wedge a magazine in between the pant leg of the shorts – this will make sure any cuts you make in the denim are on one side only.
Start by cutting a series of small slits about a centimetre or two apart. The more slits you cut out, and the longer you make them, will dictate how large the worn-out hole will be.
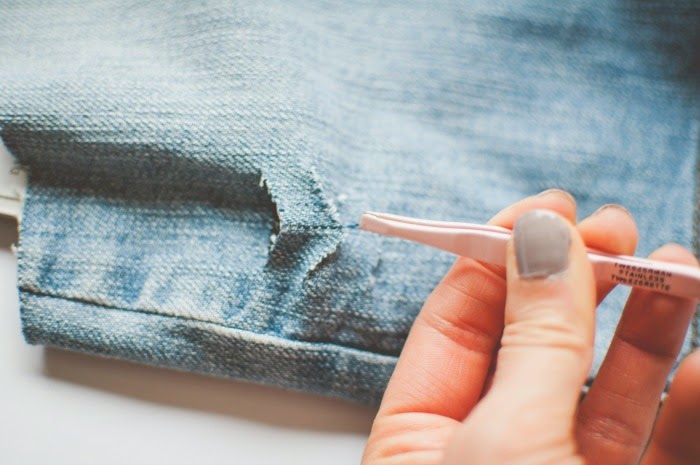
You will notice that within the weave of the denim itself, there are vertical blue threads, and horizontal white threads. Between the slits that you have made, use your tweezers to grab a vertical blue thread and gently pull it out.
The end result will be to remove all of the vertical blue threads within the slits you have created, to reveal only the horizontal white threads – leaving a perfectly distressed hole in your shorts.
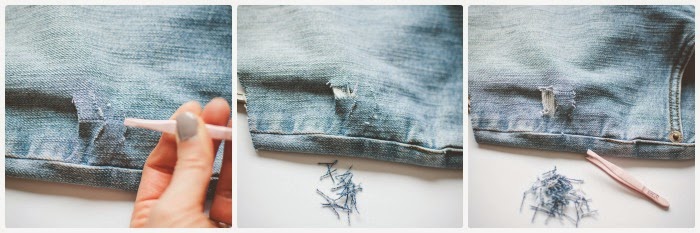
**Note – the first blue thread will be a little difficult to remove, however once you start to remove more they will start to glide out quickly and easily. Be patient with this process – it does seem a little tedious at first, but you eventually start to settle into a rhythm where the blue threads start to pile up!
Repeat the same process until you have created as many holes are you want. I chose to keep things pretty conservative for this particular pair of denim shorts, but you could achieve a more distressed look by either creating larger holes or increasing the number of them.
Step 3 – Distress the Pockets
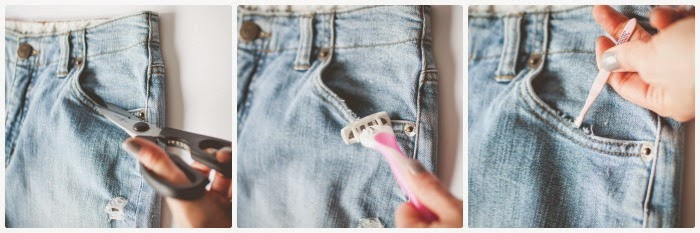
Distressing the pockets of your high waisted, denim shorts help to achieve that authentic worn-in look. The process is extremely simple – just cut up the very top of the pocket to expose the threads.
Drag your razor against the threads to create a subtle fray – use your tweezers to pull out extra threads if you wanted a more dramatic fray. This process should only take you a few minutes, but goes a long way to achieving the perfect distressed look to your shorts.
Step 4 – Don’t Forget the Backside
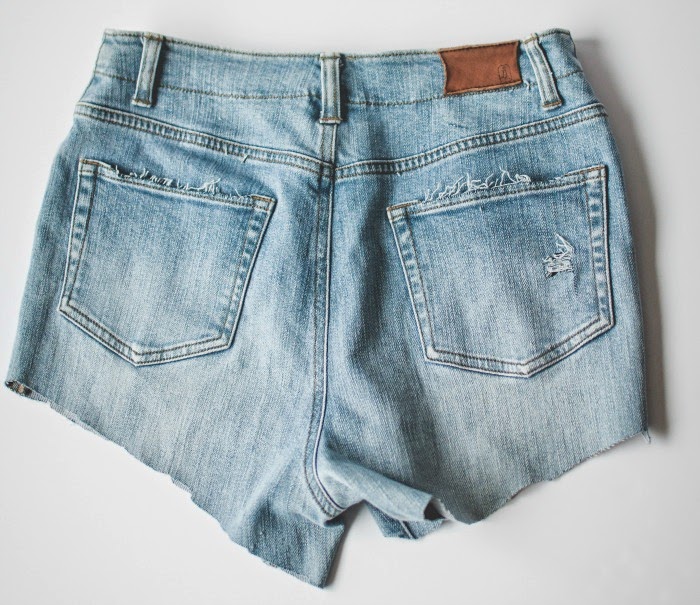
Don’t forget to add worn in holes, and distress the pockets of the backside as well.
Step 5 – Fray the Legs of the Shorts
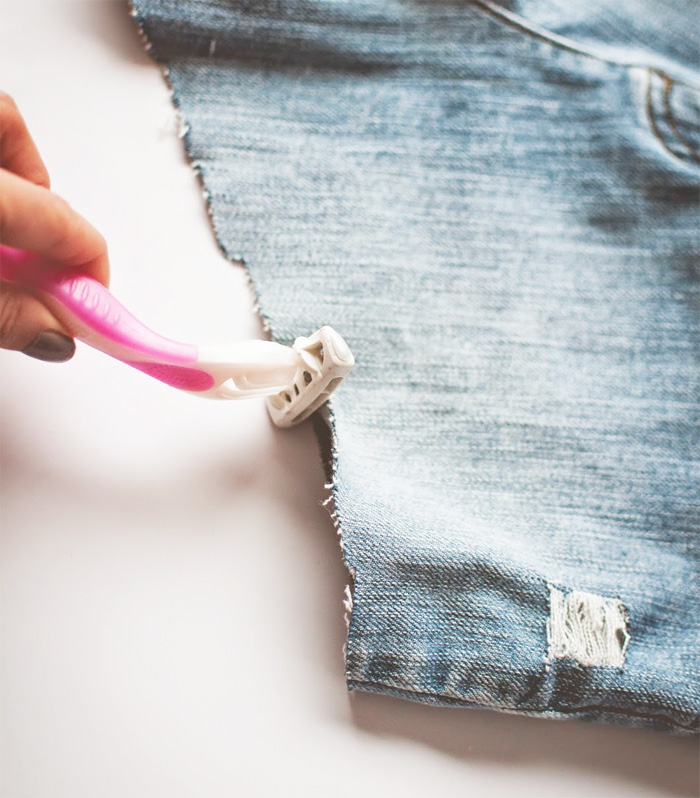
Drag your razor along the cut edges of your shorts, much like you did for distressing the pockets.
Step 6 – Throw you Shorts in the Washer and Dryer on Low
This last step is completely optional, especially if you are already happy with the results of your high waisted, distressed denim shorts.
If you’re after a more worn in look then throwing the shorts in the washing machine for a wash, then into the dryer on low, will give the shorts a much more destroyed look – the frays will become more pronounced and holes will grow larger.
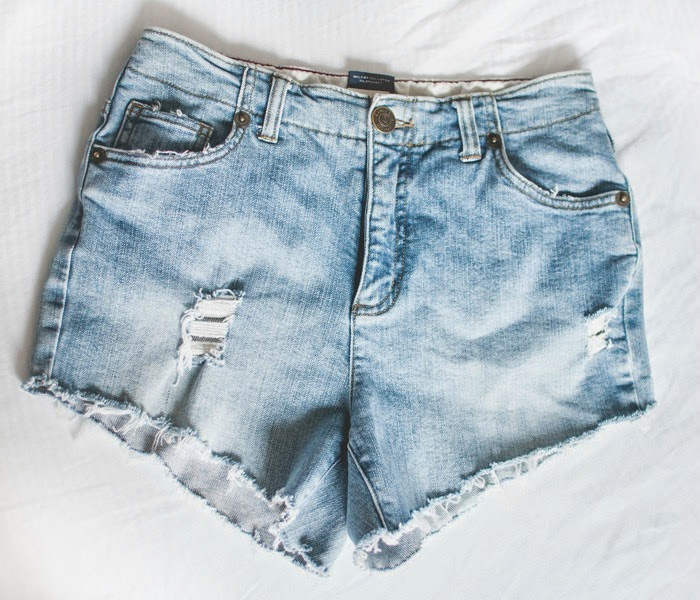
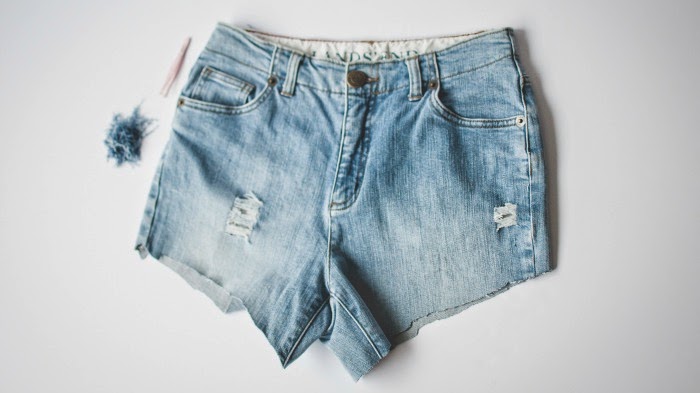
And that’s it! A simple way to re-invent and re-imagine and old piece of clothing to become a more current and trendy piece – without breaking the bank.
Last Updated on