
One of the things I had a lot of trouble with when I started filming videos for my YouTube channel and Watercolour Workshop was figuring out a way to secure my camera above my work table for the perfect birds-eye-view. Facing the camera downwards on a standard tripod always resulted in two issues:
1. The tripod legs would show in the shot
2. The camera did not extend out enough to show the center of my table
After experimenting with a DIY tripod for a while with a makeshift extension arm, I decided that there had to be a better way.
I came up with this awesome tabletop tripod that sits perfectly above my work area, so I can film my desktop views without worry and while sitting comfortably.
I filmed the process of putting it together, which is super easy by the way! You can press play below or click here to watch.
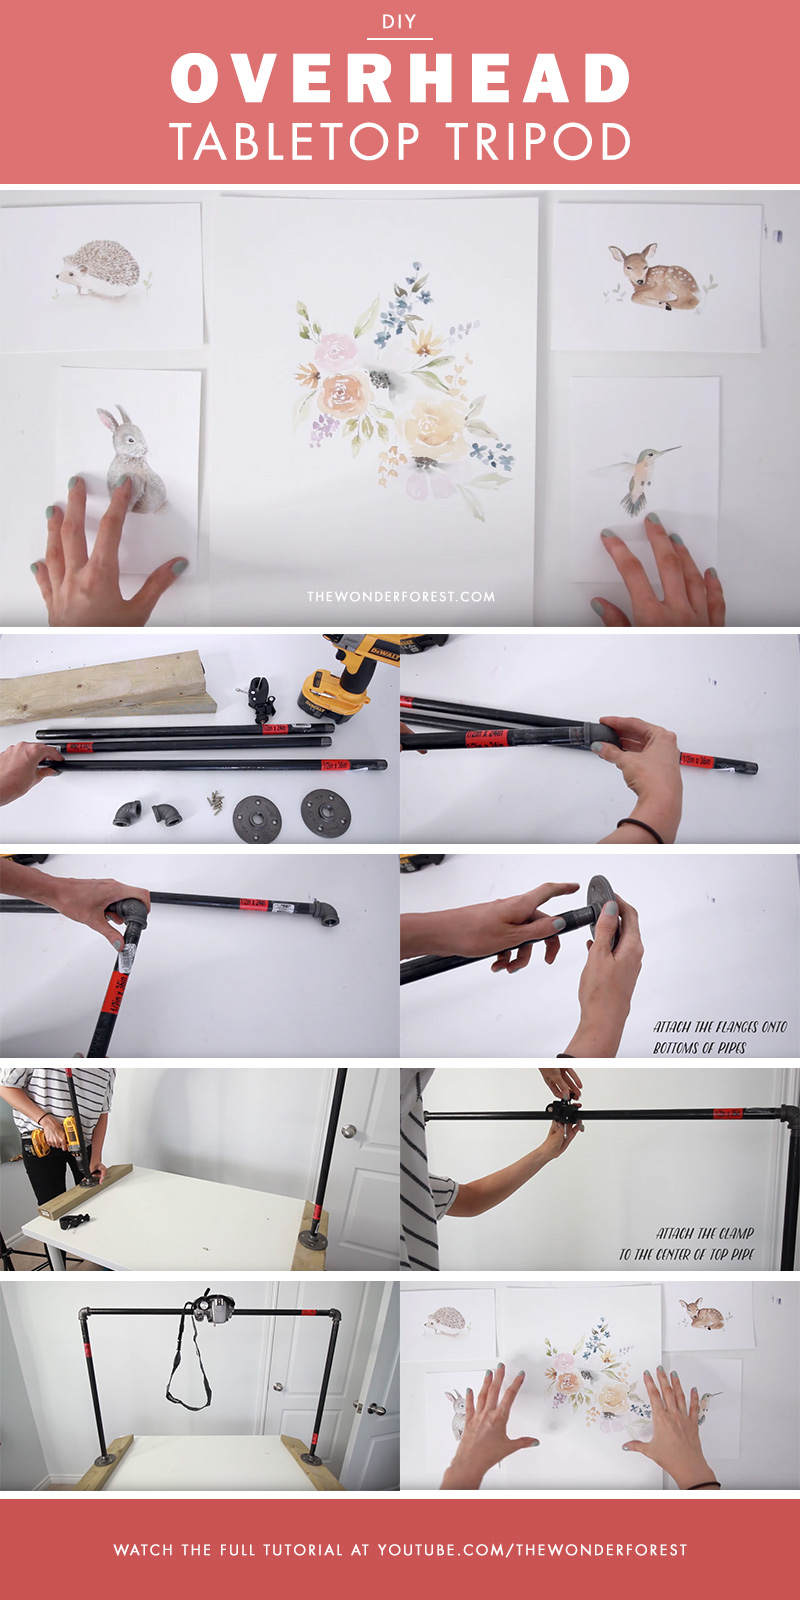
How to create your own overhead tripod
In case you missed it in the video, the supplies you will need are:
- 2 x 1/2″ by 24″ pipes
- 1 x 1/2″ by 36″ pipe (you can use a shorter one for smaller tables)
- 2 x 1/2″ floor flanges
- 8 x 1″ screws
- drill or screwdriver
- 2 pieces of scrap wood (2×4)
- This special clamp
If you make this, let me know how it worked for you!
Last Updated on
That looks so great! I love seeing DIY projects that help you move forward in business. Great Job!
Went out, right away to buy the pipes.. and without even looking (I was so excited), I was a bit surprised at the check out, what my total cost was. YIKES!… STILL, if I had purchased something like this instead, I’m guessing the cost would have much more. so I see it as a good, and helpful investment, for which I am very proud to have put together MYSELF… So, THANK YOU for showing me how!! ~tina
How much did yours end up being? Did you buy plastic PVC pipes or metal? I’d love to build this.
hi,
I really love this idea and this project. I was wondering how much did the pipes, floor flanges, and elbows actually cost?
Thank you for the post