Are you looking for a super easy sewing project that is also super usable and makes a great gift? Look no further than these easy-sew t-shirt headbands!
Sometimes all you need is a basic stretchy headband. I personally use one daily when washing my face or doing my makeup, so I know how handy they can be!
I had purchased a set of 2 of them recently for about $15, and after inspecting how it was made (as I tend to do!), I thought to myself, “I could have just made this!”. So, I grabbed an old jersey t-shirt and started testing out different methods of construction.

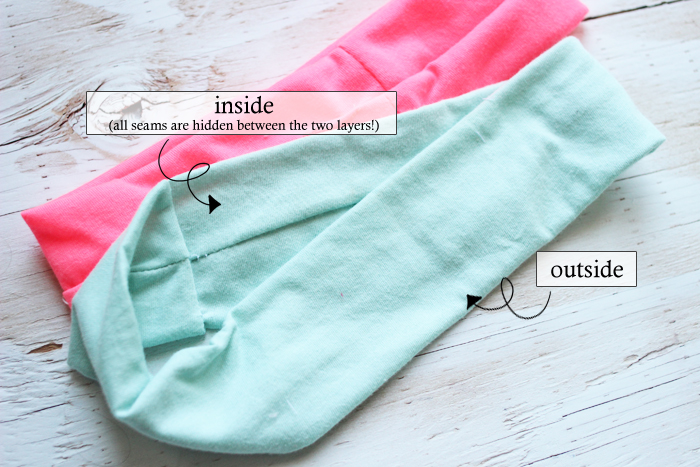
First of all, I wanted the seams to all be on the inside of the headband and hidden… meaning no raw edges which I thought would make it look cheap.
Not that it would really matter, but I had to satisfy my need to make it match the ones I purchased. My final result has zero raw seams and edges so it looks like it was store bought! Here is the final tutorial… I hope you try it out and let me know if you do!
How to make a t-shirt headband
1. First you’ll need to gather your supplies. You will need a stretchy/jersey t-shirt, scissors, a measuring tape, and sewing machine. You could also do it by hand if you like.
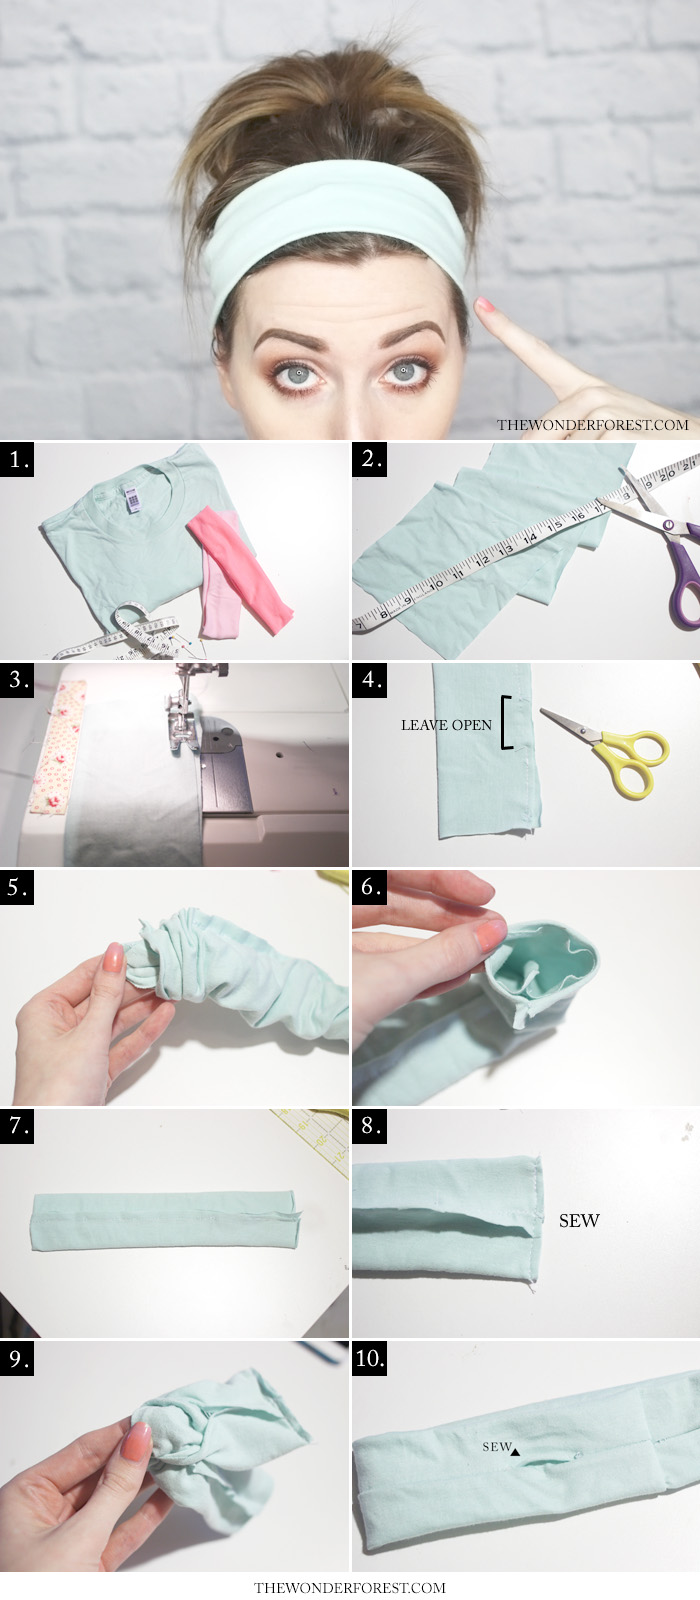
2. Cut your fabric to 20 inches long by 5 inches high (you can make it longer or shorter than 20 inches depending on how tight you want it). This should fit an average adult nicely. Make sure that the fabric has the knit grainlines going vertically up the 5 inch height (the same way the t-shirt is made!). Otherwise, it won’t stretch right.
3. Fold your piece of fabric in half on the long side, making the total height 2.5 inches by 20 inches long. Sew the edges together. (see photo #3)
4. Before you get to the end, leave a 1 inch gap, and then continue sewing to the end. This part is very important!
5. Now for the trickier part. Stick your fingers down your newly formed tube and grab the end. Pull the end up through the tube as if you were flipping it inside out but instead of pulling it all the way through, stop when the edges meet up with the start of the tube. (See photo #5)
6. Line up the seam on the inside with your outer seam and adjust it so it’s flat and lined up all the way around the hole (See photo #6).
7. What you’ve done is essentially folded your piece of fabric in half from the inside. Make sure it’s all nice and flat and that the seams are laying in the middle of your fabric as shown in photo #7.
8. Sew that open end shut. Trim any access fabric as close to the seam as you can.
9. Remember that 1 inch gap we left? You’re going to flip the whole thing inside out through that hole now. Push all the fabric through it until your left with your circle headband!
10. Finally, sew up that 1 inch gap. You can do this by hand to completely hide the seams!

That’s all! I hope you have fun creating this. I think patterned t-shirts would look awesome… You can really get creative with it and come up with your own unique looks! I’d love to see if you make one over on Instagram… tag me!

Last Updated on
