
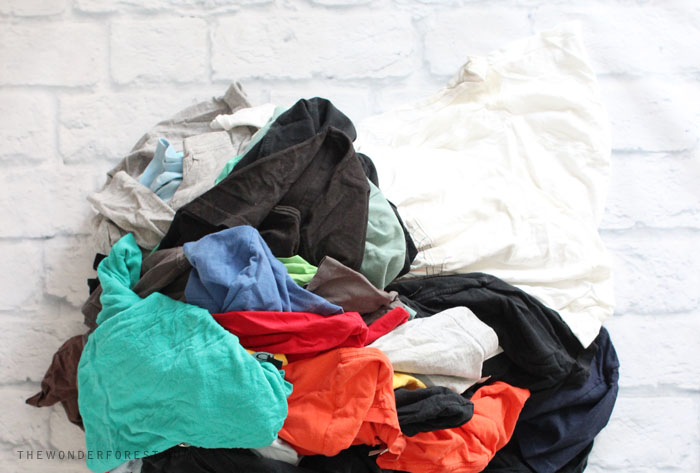
I’m sure you can relate — so many old clothes are either sitting in your closet or packed away in a box somewhere gathering dust. How about putting those old t-shirts to good use and upcycling them into a DIY braided rag rug?
What can you make a rag rug out of?
Perhaps you have some special memories from some of your old t-shirts and just can’t bring yourself to get rid of them, but you know you’re never going to wear them again.
Don’t stress… it happens to all of us! Thankfully we can reuse old materials like shirts, jeans, and even blankets to create some really cool DIYs.
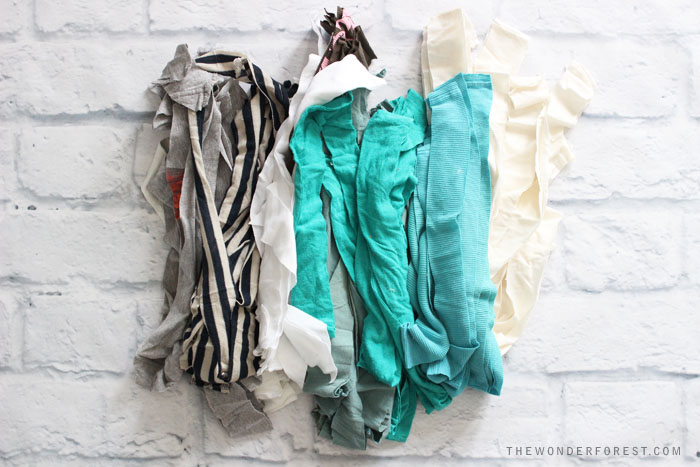
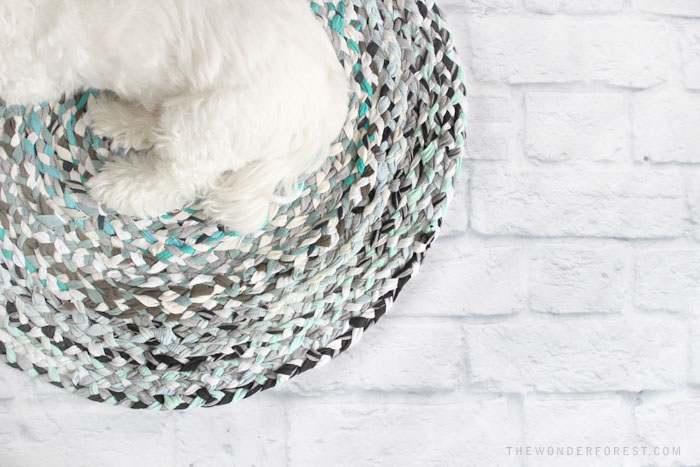
This rug in particular will utilize old t-shirts of coordinating colours, but you can use whatever colours of t-shirts you have laying around.
This would also make for an awesome outgrown baby clothing project!
Do you need a sewing machine to make a rag rug?
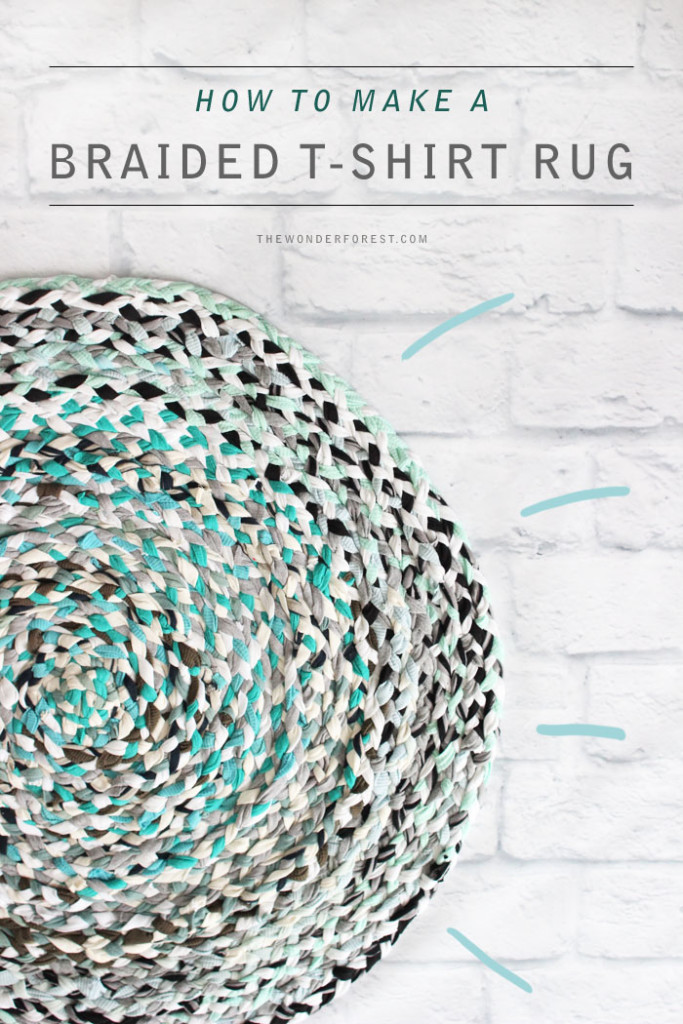
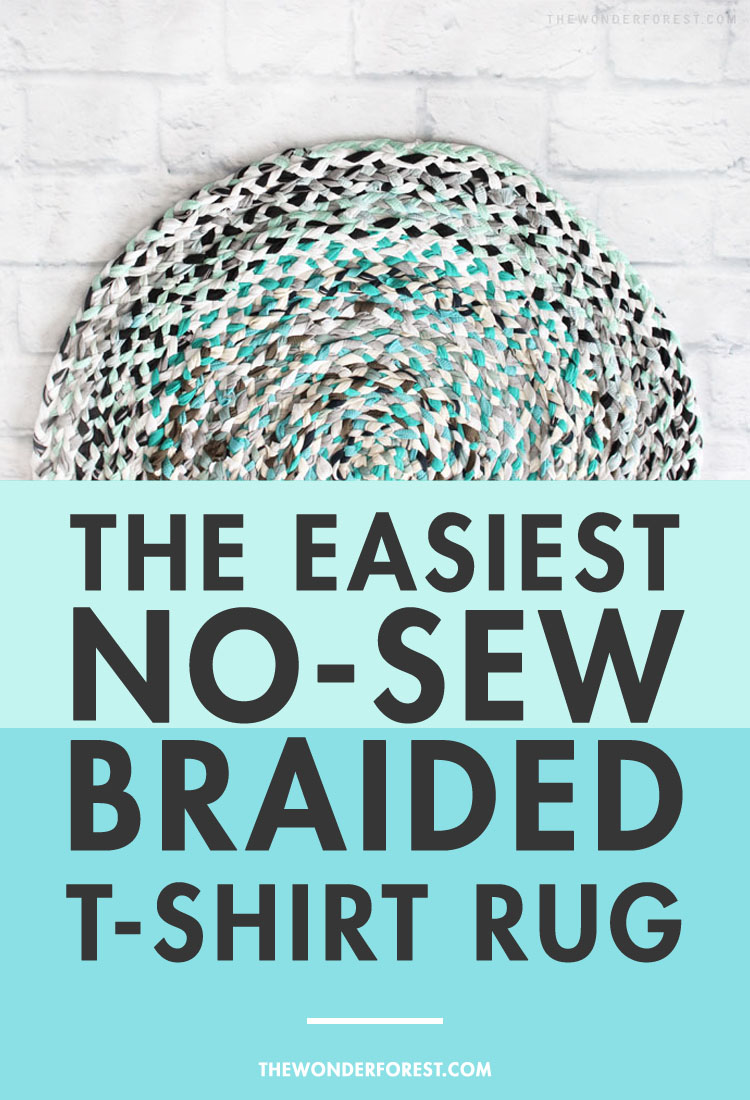
This t-shirt rag rug is the original method that we created that requires NO sewing! The pieces of fabric will be braided together and joined using a unique trick that is explained below in text and photos.
If you have a sewing machine, you can also try making this rag quilt with more of your scraps.
Let’s make a braided t-shirt rug!
I wanted to recycle my old t-shirts somehow because they weren’t all suitable for charity and I’m sometimes sentimental about clothing which makes it hard to just throw it out!
A braided rug seemed like an awesome idea and one that could actually give new life to the worn out old shirts. And hey, we can all use some fun new home decor DIYs.
I took on this project over a weekend; and while it does take a decent amount of time, I’m so happy with the result!
Choosing your rug colours
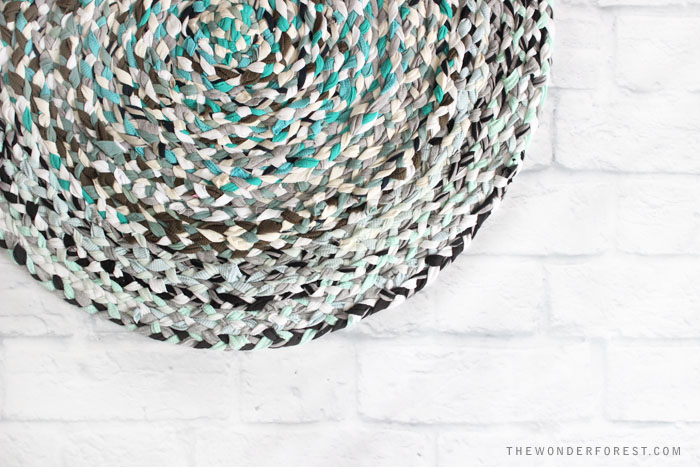
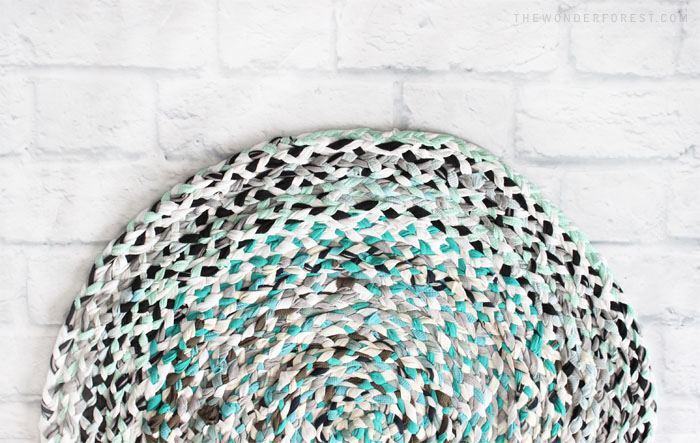
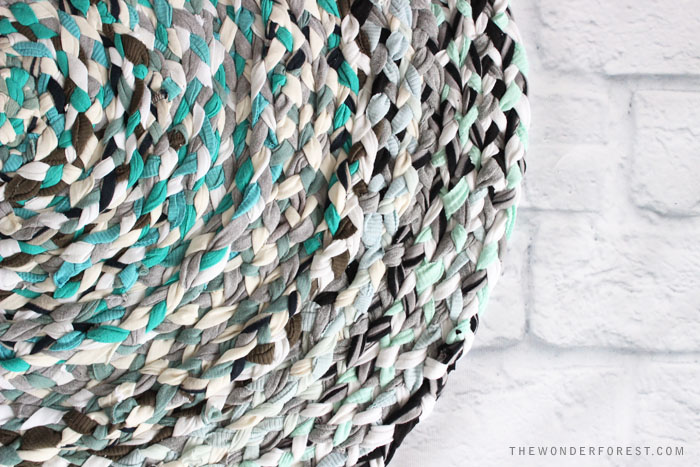
For my rug, I decided to grab a bunch of blue-toned shirts and some neutrals so my rug had some sort of a colour scheme.
You can totally just make an eclectic version with every colour of the rainbow too, so don’t worry about your shirts all matching if you can’t.
How many shirts will you need for a rag rug?
I used a total of fifteen different sized t-shirts for a rug approximately 30″ in size. The more shirts you use, the larger your rug will be.
If you want to make a braided rug from t-shirts too, here is how to do it:
Braided T-Shirt Rug Tutorial
You will need:
- A variety of old jersey t-shirts and/or tank tops
- Scissors
- Rotary cutter (optional)
- Fusible interfacing (optional)
Step 1 – Cut your t-shirts into 1.5″ strips along the width of the body. This process is much quicker if you have a rotary cutter. You’ll want to cut the end of each of piece so they’re strands and not loops of fabric.
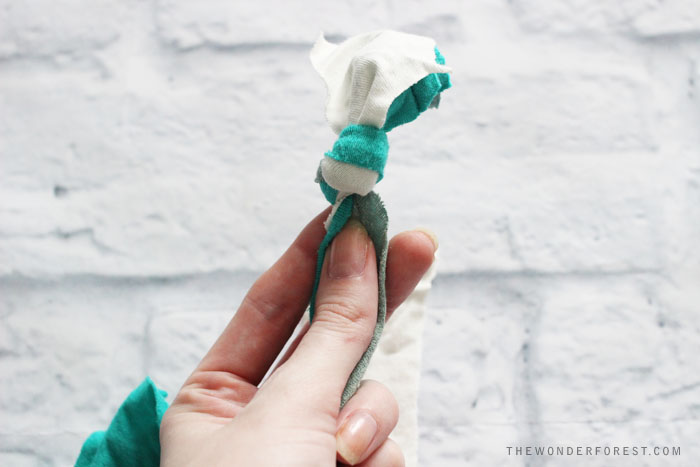
Step 2 – Gather three strips of fabric and stack them. Tie a knot tightly into the top to begin. I chose contrasting colours for my rug.
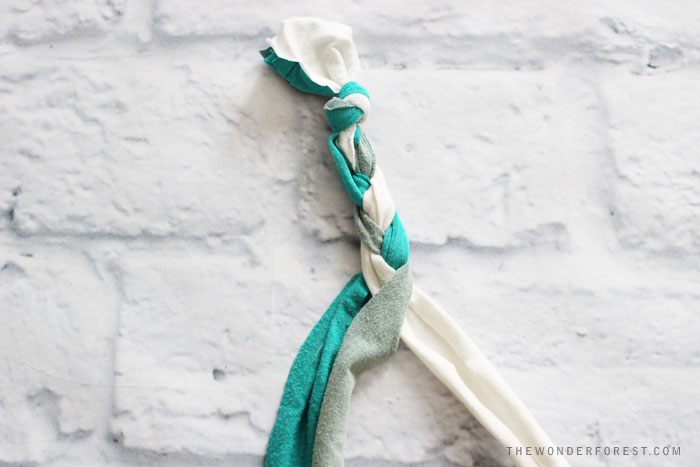
Step 3 – Start braiding the strips using the basic 3-strand braiding technique.
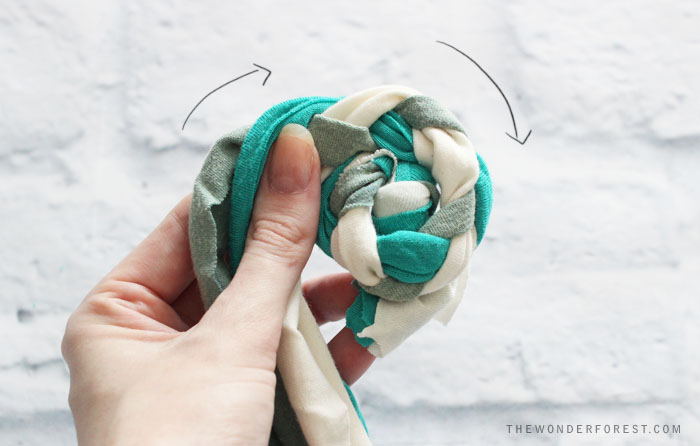
Step 4 – Once you’ve braided about 4″ of the strips, coil the braid into a circle as shown above, with the knot in the center.
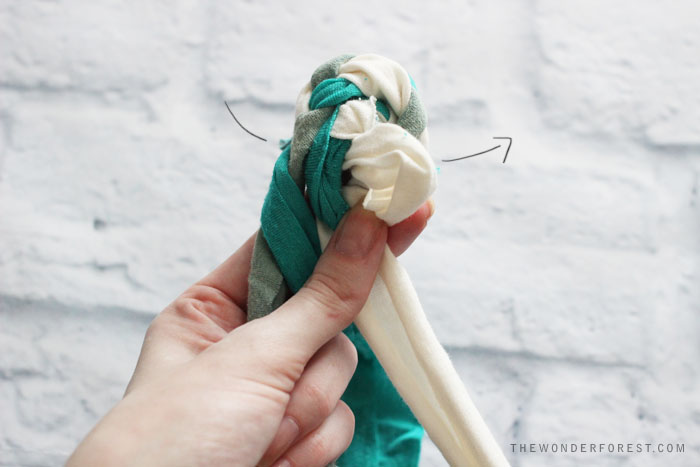
Step 5 – Take the strand closest to the center and pass it under and through one of the loops in the braid you coiled. This is how you will attach the braid to the coil.
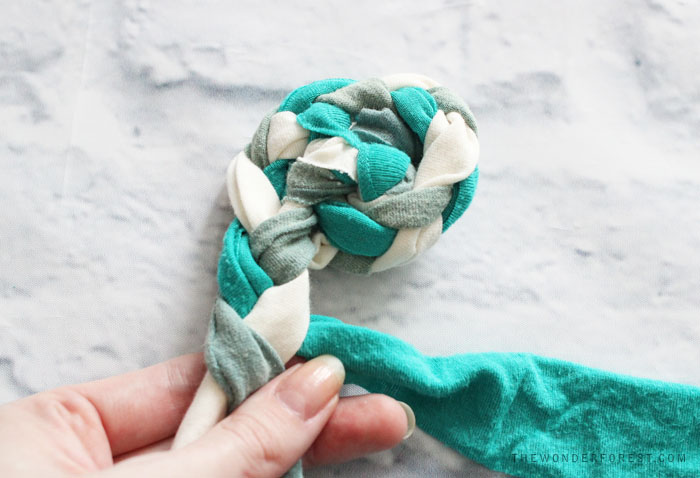
Step 6 – Continue your braid another few inches. It should be attached to the center coil where you passed the one strand through.

Step 7 – Every few inches, pass the strand closest to the center under and through the existing braid to attach it. You’ll do this continuously to create the entire rug! Braid and attach, braid and attach.
To add strips:
When you reach the end of the strip, you’ll want to attach another. Instead of making a bunch of knots, here is how you can quickly attach the next strand:
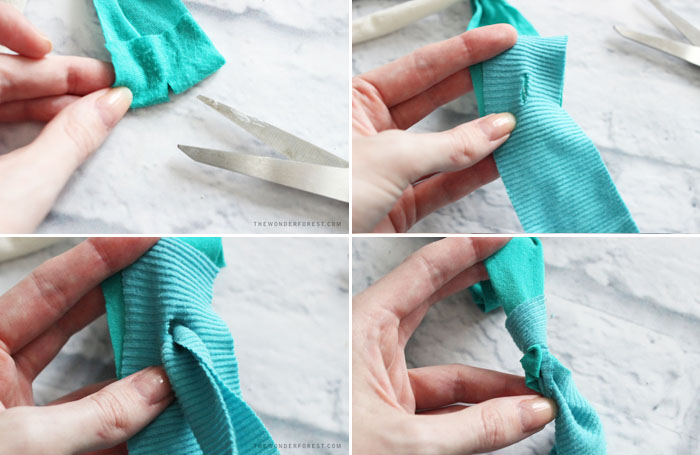
Step 1 – Fold over the very end of the attached strand and cut a small slit into the center. Do the same with your new strand.
Step 2 – Line up the two slits you cut on both strands as shown in photo 2.
Step 3 – Take the other end of the new strand and pull it through the back of the slits towards the front.
Step 4 – Pull both strands tightly and they will be linked together.
Things to note:
The rug will tend to bunch up as you go along. To flatten it, spritz it with a spray water bottle and use your hands to push it back into shape.
You can place some heavy objects on it to hold it down while you braid if you need to. To minimize the bunching, try to keep your joins loose.
I wanted to finish the backing of my braided t-shirt rug so it stayed in place, so I ironed on some fusible interfacing to the reverse side. You can also finish it with starch or Polycrylic spray as a protective measure.

How easy was that? Enjoy your new upcycled braided t-shirt rug!
Like this post? Pin it for later:
Last Updated on
You could buy a microfiber flat sheet from like Walmart or target, somewhere like that be less expensive then tee shirts have a similar feel and longer strips to work with. Just a thought.
or you can take a visit to your local thrift shop or goodwill and get lots of tshirts on the cheap.
Hi – thank you for the tutorial!
No idea if I’m doing it properly but I thought I’d share the start of my rug…
http://i57.photobucket.com/albums/g229/Kahli_h/IMG_20170315_232108.jpg
I’ll share the finished product soon!
Love this! I’ve been wanting to make a braided t-shirt rug but didn’t want to deal with the sewing, so I think I’ll give this a try. I want to make it more of an oblong shape, I think it will work if you start the center by folding the braid back on itself. What do you think?
I like the idea of this but I wish there were more pics of every single step. The pictures jump to the next part without actually showing the process to start there.
*process to get there
great idea(:
is it possible to get more pics of the steps? or maybe a video? it’s a bit hard to understand