
Raise your hand if you have a candle obsession. I’m talking the “how did I spend $40 on candles at Anthropologie?!” kind of obsession. Or the “I only shop the candles at Bath & Body Works when they’re 2 for $24” kind of obsession.
But did you know that you can actually make your own DIY candles at home?
Check out this super easy DIY scented candle tutorial that uses melted wax and fragrance oils of your choice. In this tutorial, we will be making beeswax candles, but you can make different types of candles with various types of wax.
These candles make for awesome homemade gift giving! If this is your first time making natural candles, this is a great project to dive into as it’s easy and doesn’t take too long!
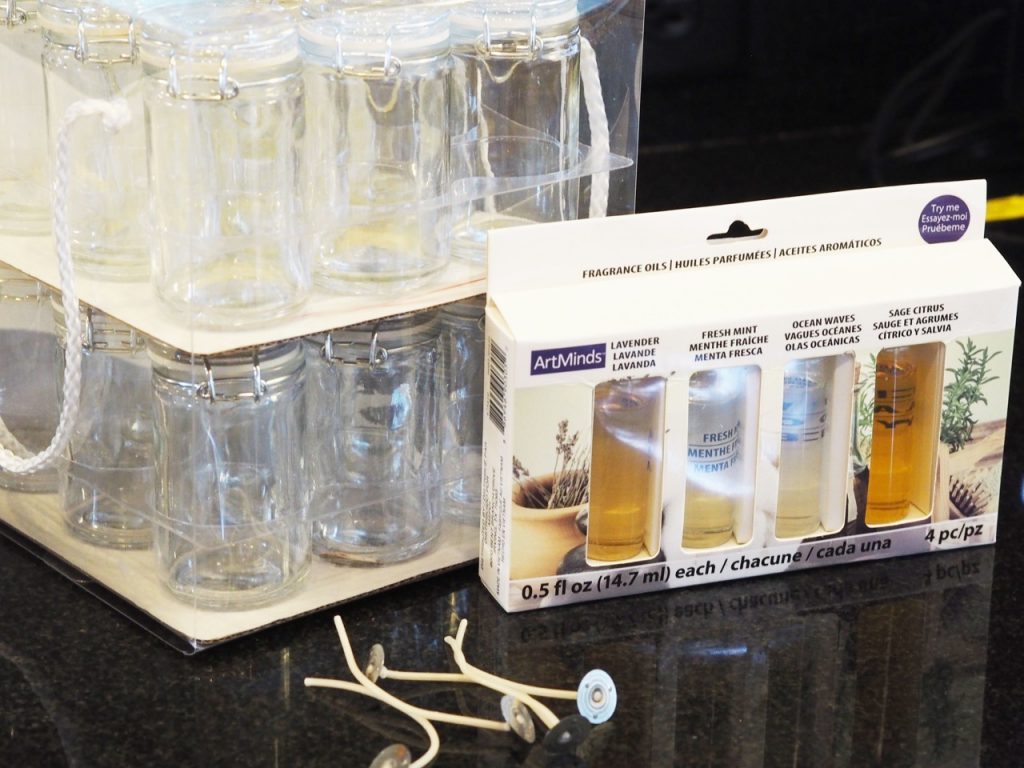
Supplies you’ll need:
You can find these things at most craft stores:
- Beeswax (easily found sold in cubes at any craft store!)
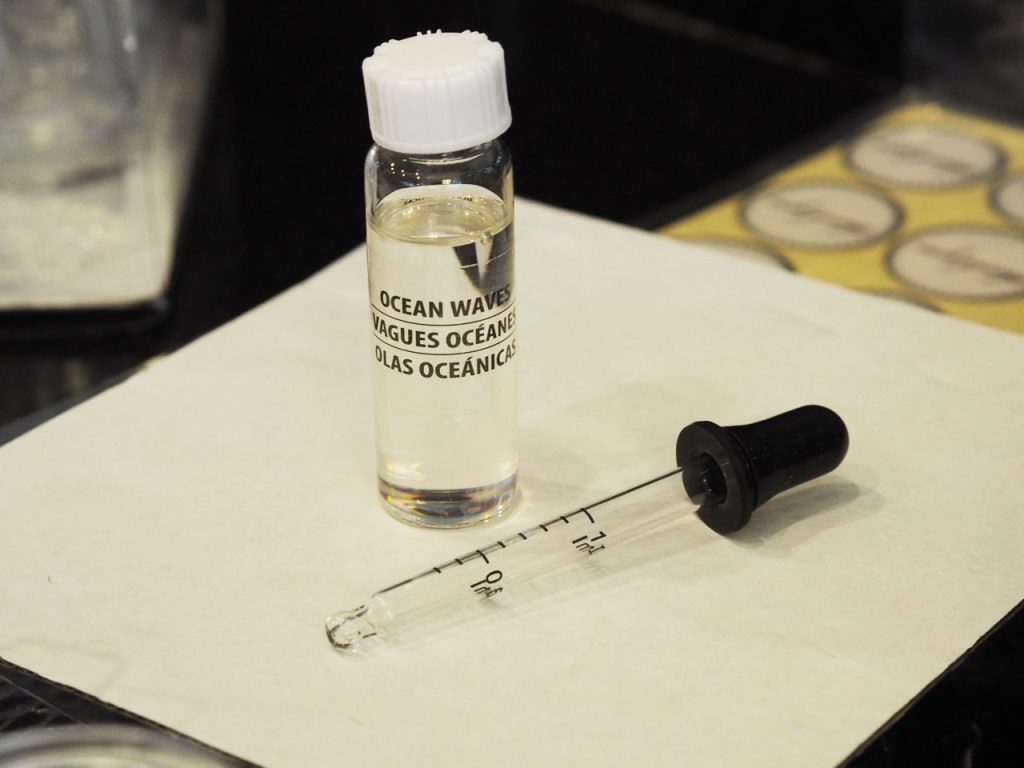
- Natural Essential oils of your choice
- Mason jars or glass containers (money saving tip: hit up your local dollar store!)
- Wicks
- Wooden skewers
- Double boiler (or saucepan or melting pot)
The candle-making process is pretty easy! Below, I’ll share the easiest way to melt the candle wax, add the candle wick, pour wax into the candle jars, and add your favorite scents.
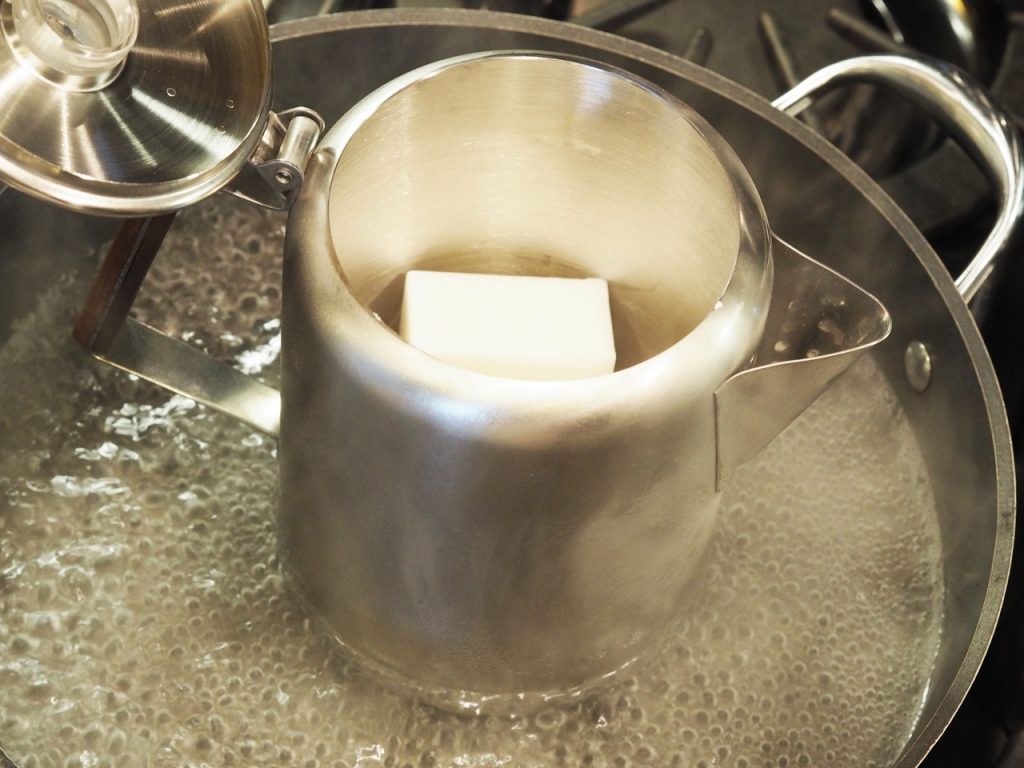
Start by boiling water
For your heat source, start by setting up your double boiler. If you don’t have one – don’t sweat it! Simply fill up a saucepan or melting pot with water 1/4 full and bring the water to a boil, then use a stainless steel bowl placed in the center of the saucepan as your makeshift double boiler.
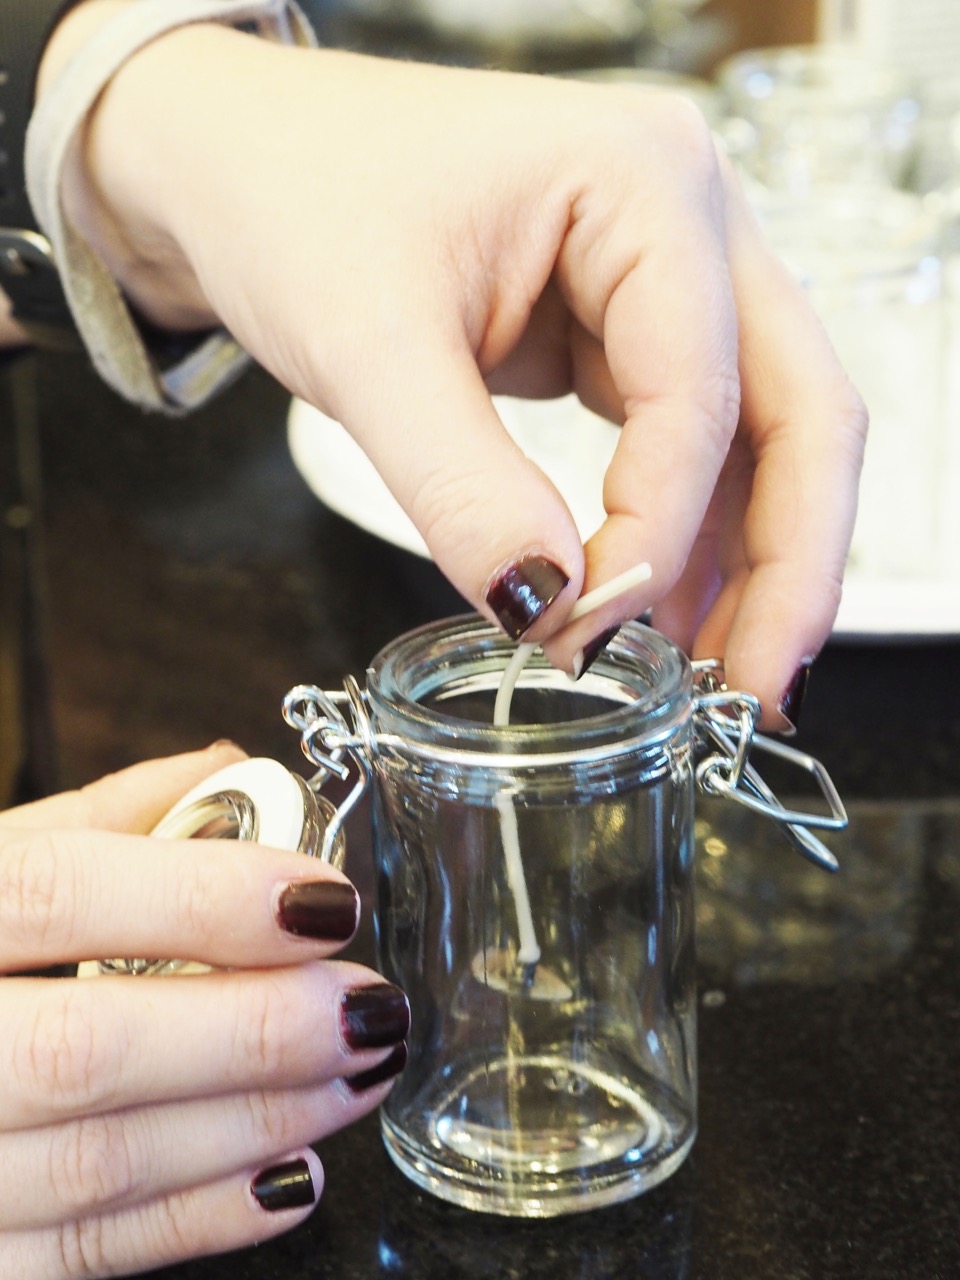
Set up your containers
Next you’ll need to set up your containers! Once the wax is melted and ready to go, you won’t have much time to pour, so it’s important to have everything set up before hand.
Place your wicks into the bottom of the jar or candle container, trying to straighten and center them as best you can. You can rest clothes pins on top of the jar to hold the wick in place if you need to.
Add your wax
Once the water has started boiling, cut your wax into cubes and place them into the double boiler (not into the hot water!). The amount of wax you use will depend on the size of your containers.
Stir the wax occasionally (I recommend using a wooden skewer) to help it to melt faster. Be careful not to over boil and be ready to add your essential oils as soon as the wax has melted because if the wax is left over heat for too long it may crack when it dries in final candle form (no worries if this happens – your candle will still work fine!).
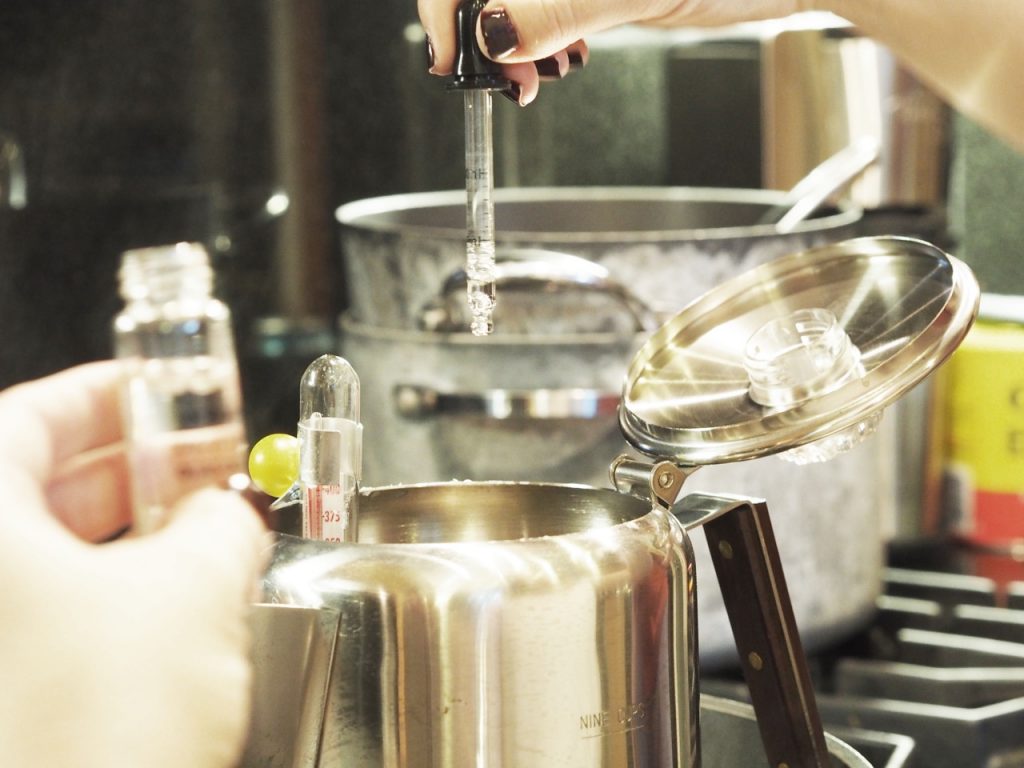
Add your scents
If you prefer unscented candles skip this step! Once the wax has fully melted, add in your essential oils. Again this quantity will depend on the size of your containers and also your preference! If you prefer lightly scented candles stick to 3-4 drops of essential oil, however if you’re like me and want your candles to take over a room – go crazy! Give the wax mixture another quick but gentle stir with the skewer.
Experiment with different oils like coconut oil, eucalyptus oil, or your own blend of essential oils. You can also experiment with different types of wax like soy wax, coconut wax, paraffin wax, or even leftover wax from an old candle!
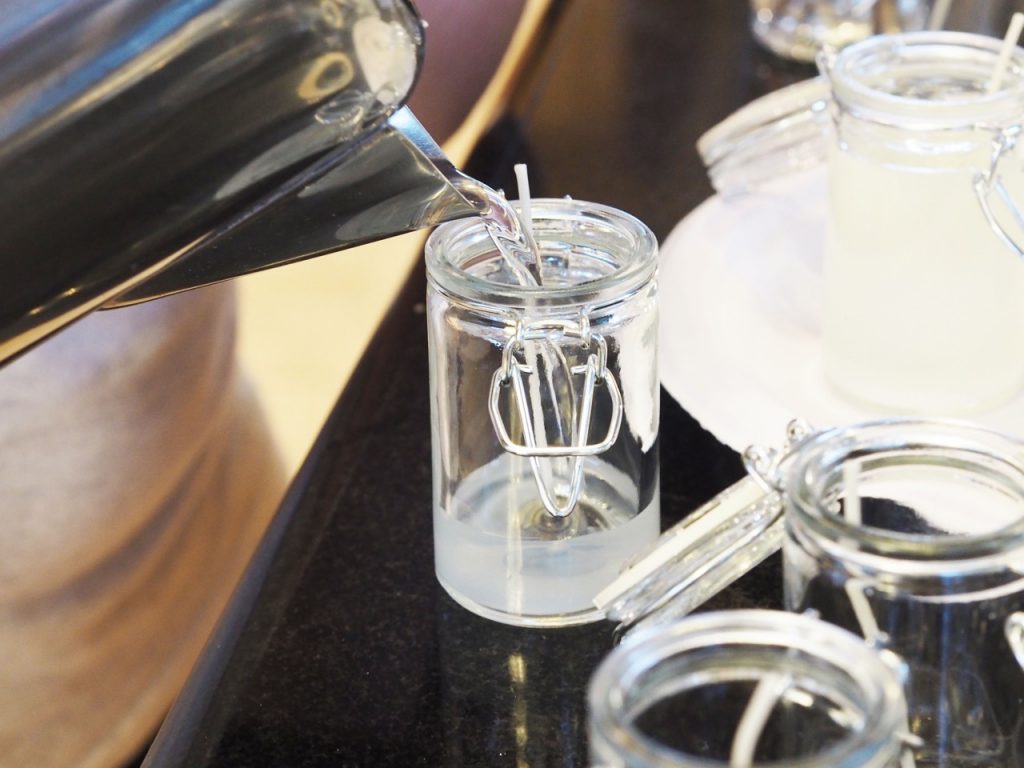
Time to pour!
Moving quickly (but safely!) begin to pour the hot wax into your containers that you prepped earlier. Don’t worry if the wicks don’t stay perfectly in place, you can adjust them as the wax starts to dry. You can also balance your wick in between two skewers or popsicle sticks to help it stay in place!
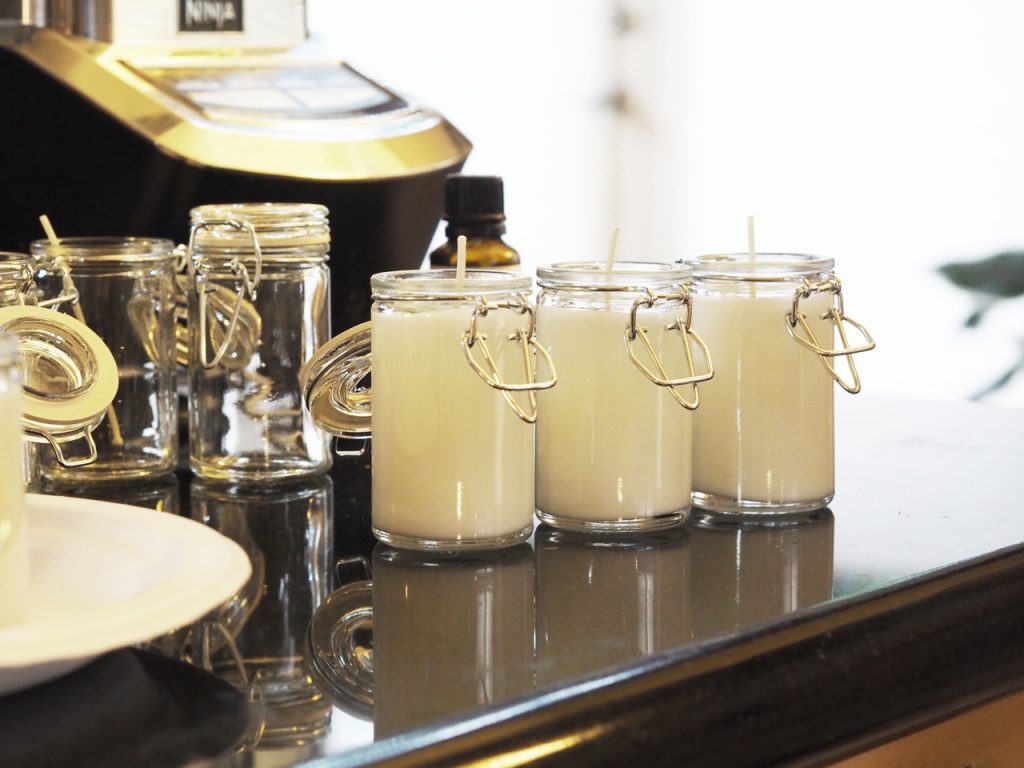
All that’s left to do is to let your new beautiful candles dry! As the wax cools they will harden. Smaller containers will dry in as quick as a half hour while larger containers may require 1-2 hours.
If you enjoyed this project, you can try making wax melts, taper candles, or a candle mold for fun candle shapes! Have fun!
This is so awesome! Thanks for sharing. I am huge scented candles burner so this tutorial comes VERY handy 🙂
I go through so many candles! Glad to know I’m not alone 😉
Kelsey
I love making my own candles! This was a great reminder I should pick up the hobby again.
That’s awesome you make candles! What scents are your favorite? In the tutorial above I was making “ocean breeze” but felt they weren’t strong enough…
Kelsey
Wow I am going to try this.
Kelsey, it’s amazing! I was looking for this DIY, so thank you very much! 🙂
Olya, x
https://girl-from-vogue.blogspot.com
You’re welcome, Olya!!! It was way easier than I thought it would be! I’m not usually the DIY type 😉 I hope you’ve been making some awesome scented candles!
Kelsey
I’ve been thinking about doing this for quite a while, thank you for sharing!
Gen | Raspberry Notes!
It’s so fun! Especially if you grab a friend (or two) and turn it into a party!
Kelsey