
Hey guys! I’m back with another watercolour painting tutorial!
One of the most common painting questions I receive is: “how do I paint watercolour clouds?!”
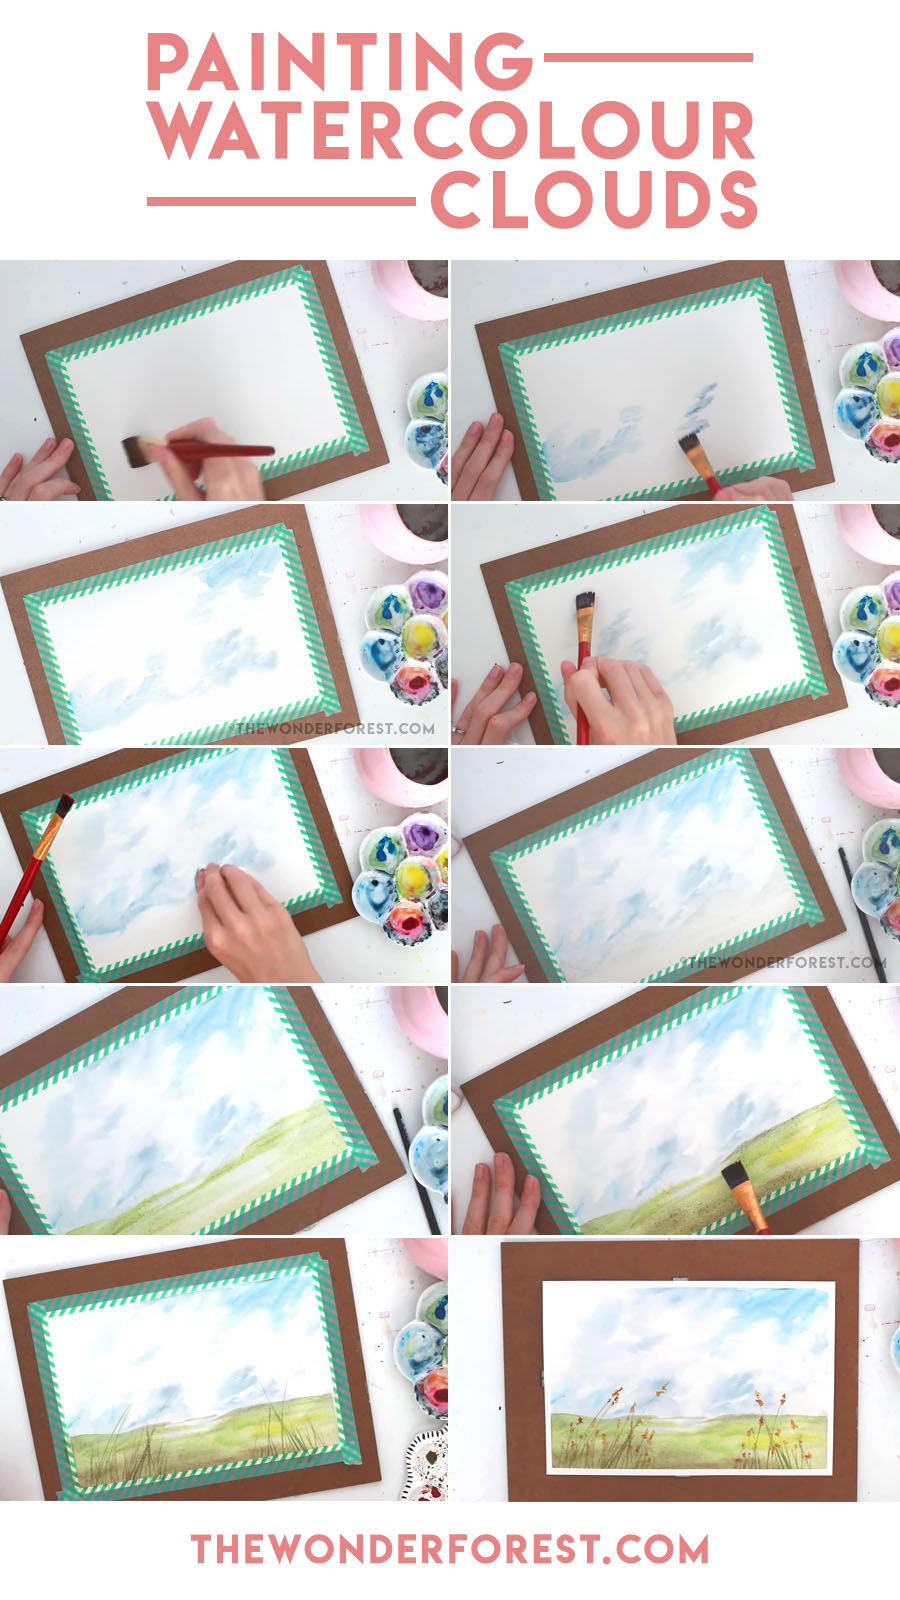
Today I wanted to share one of my go-to methods for creating awesome looking skies using a single brush and wet paper. There are a few different ways to do this, but in this tutorial I wanted to focus on a more realistic, wispy looking cloud as opposed to perfect little fluffy, illustrated clouds.
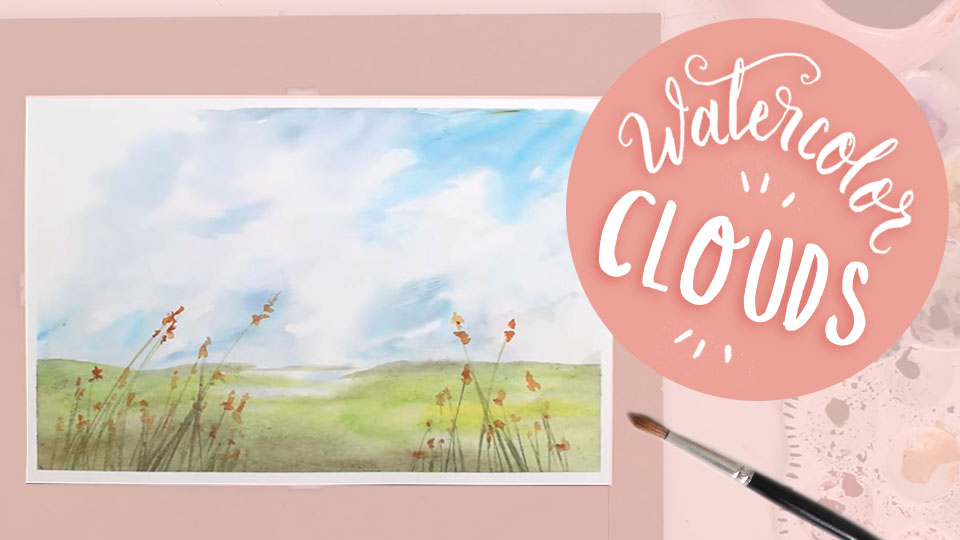
I’ll show you how to create the sky and then finish off the piece with a simple field and foreground detail.
I think this effect works great for landscapes and you can always add a touch of colour to the blue areas to represent a sunset or sunrise. The best part is that every time you do this, the result will be different just like a real sky.
I’ve filmed the whole process for you to follow along with. You can watch it here or click the play button below.
For this project I used:
- Watercolour paper
- Winsor & Newton Paint (Indigo, Cerulean Blue, Sap Green, Raw Umber, Medium Yellow, Indian red)
- Generic flat synthetic brush
- Silver Black Velvet #6 brush
You really don’t need any fancy supplies to do this. A heavy watercolour paper (300 gsm is recommended), a few paint colours, and some basic brushes should do the trick!
I hope you enjoyed this tutorial and I would love to see your watercolour clouds! Just tag me on Instagram (@wonderforest) to take a look.
You can also now order my book Watercolor With Me: In The Forest from online book stores and retail outlets. A full list of retailers can be found here!
Last Updated on
Love watching these vids even if I have 0 talent for it!