
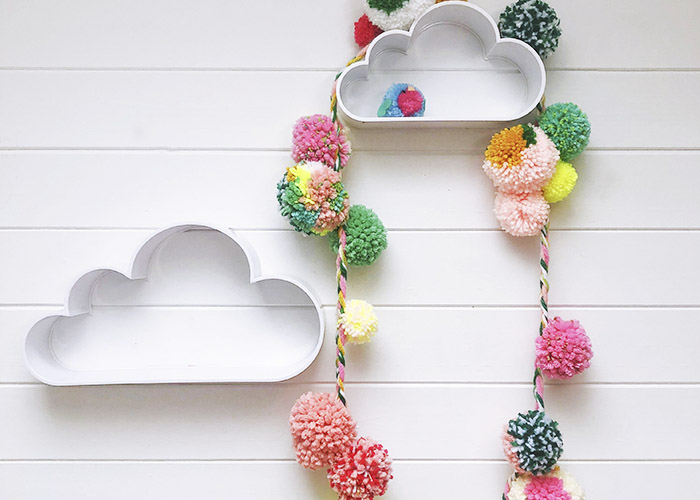
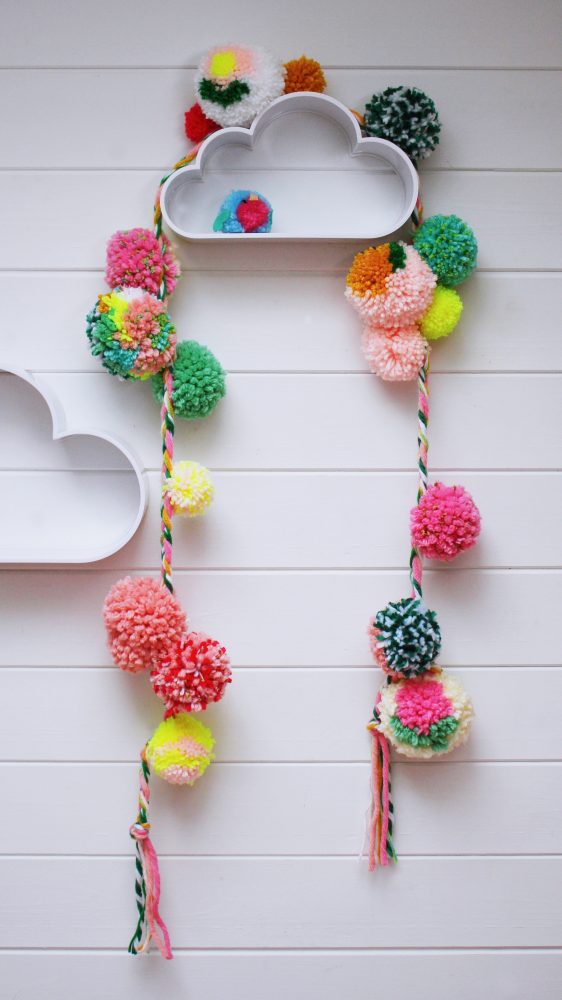
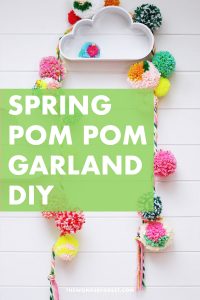
Bring some color back into your homes and lives after the chilly winter with these fantastic pom-pom garlands, bursting with fun bright colors.
This garland uses lots of different size and pattern pom-poms. There’s even a few that will look like fabulous flowers!! Once you have the hang of creating the pattern, they are really fun and super satisfying to make.
The chunky braided rope and random positioning of pom-poms gives the garland a chic boho vibe and will look lovely strung over a bed or door frame.
You Will Need
• Small, medium and large pom-pom makers
• Scissors
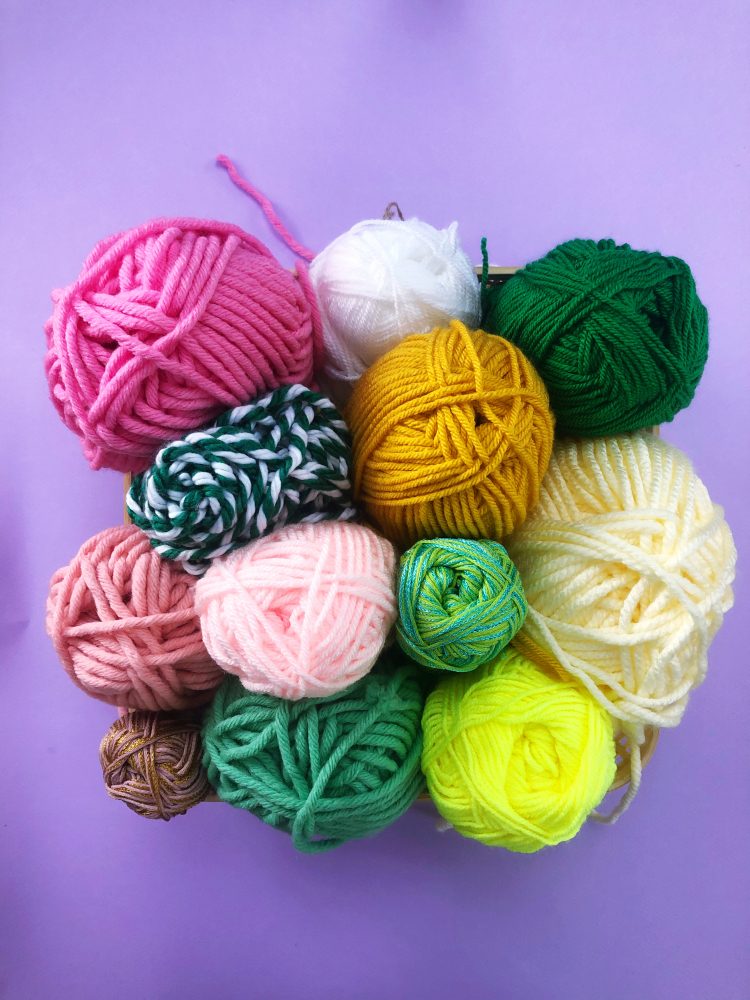
A selection of colorful yarns. We used:
• Paintbox Yarns Simply DK Neon Yellow & White
• Paintbox Yarns Simply Chunky Grass Green, Mustard Yellow, Lipstick Pink & Ballet Pink
• Paintbox Yarns Wool Mix Super Chunky Spearmint, Blush Pink & Bubblegum Pink
• Paintbox Yarns Metallic DK Blue Hawaii & Pina Colada
• Lion Brand Hometown USA Multi Spartans & Houston Cream
To Make a Flower Daisy
1. Using a 7cm (3inch) diameter pom-pom maker, begin by wrapping the neon yellow yarn round one half of the maker approximately 20 times. This creates the middle of the flower. Try and wrap in the center of the maker. Wrap the yarn on top of itself (rather than adjacent).
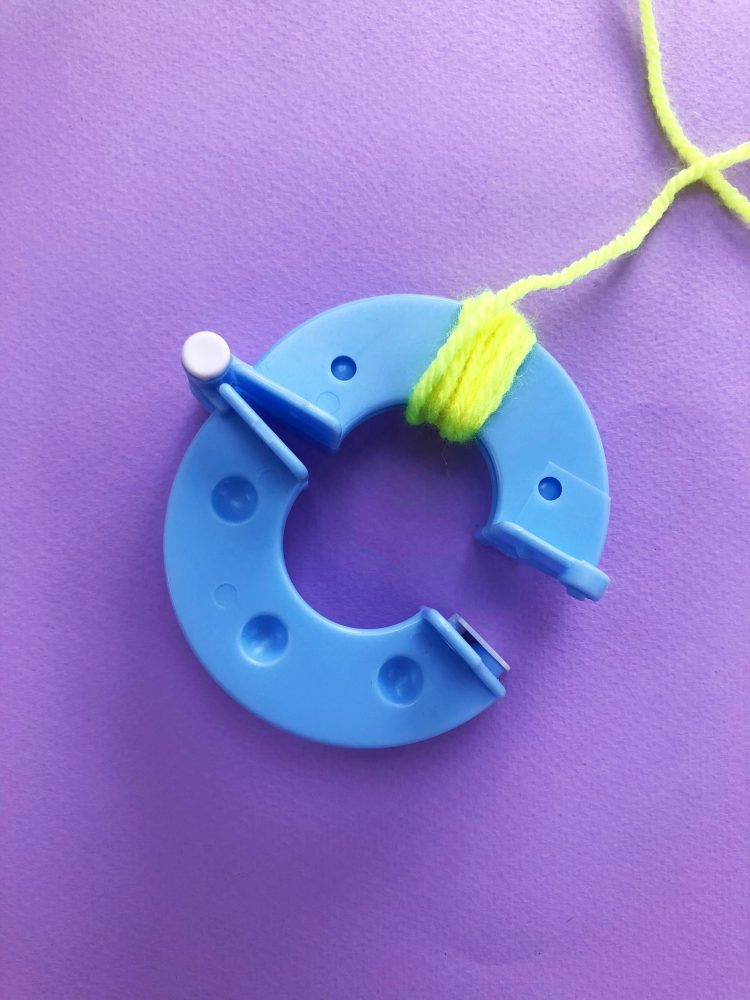
2. Cover the yellow yarn with 40 wraps of Ballet Pink yarn. Try and wrap 10 times either side of the yellow and the 20 over the top covering it all. This is creating the petals of the flower.
3. Wrap green yarn 20 times over the bottom half of the pink yarn. Make 5 wraps at the base of the p’ink (on the bare maker) and then 15 over the pink. This is to create some leaves for the flower.
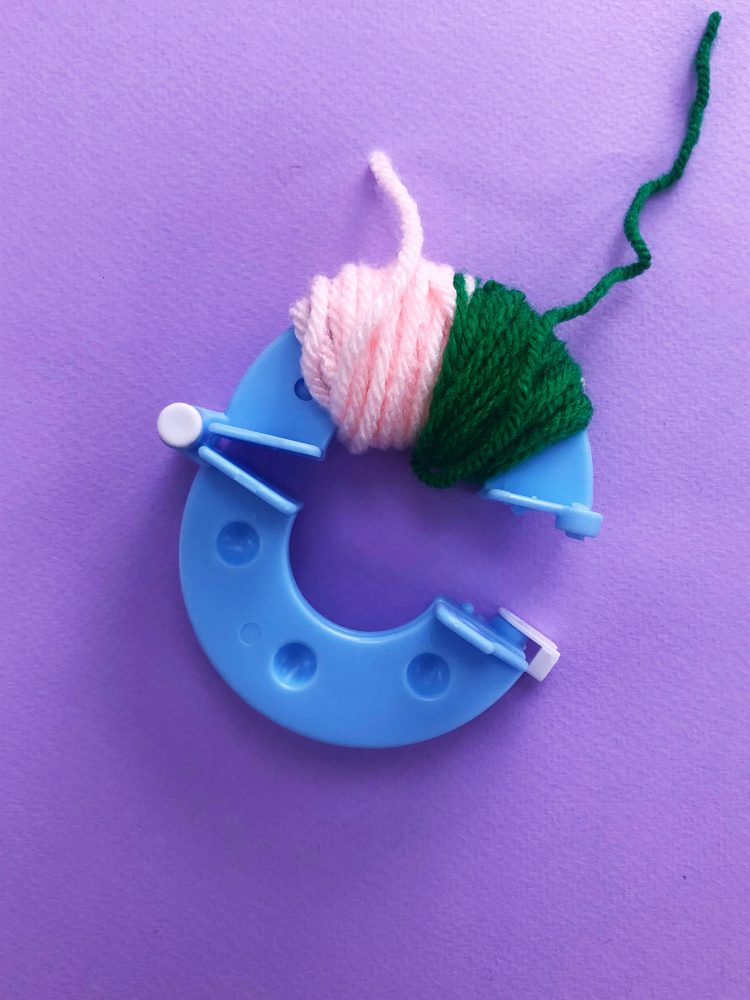
4. Fill the rest of the maker with white yarn and secure shut.
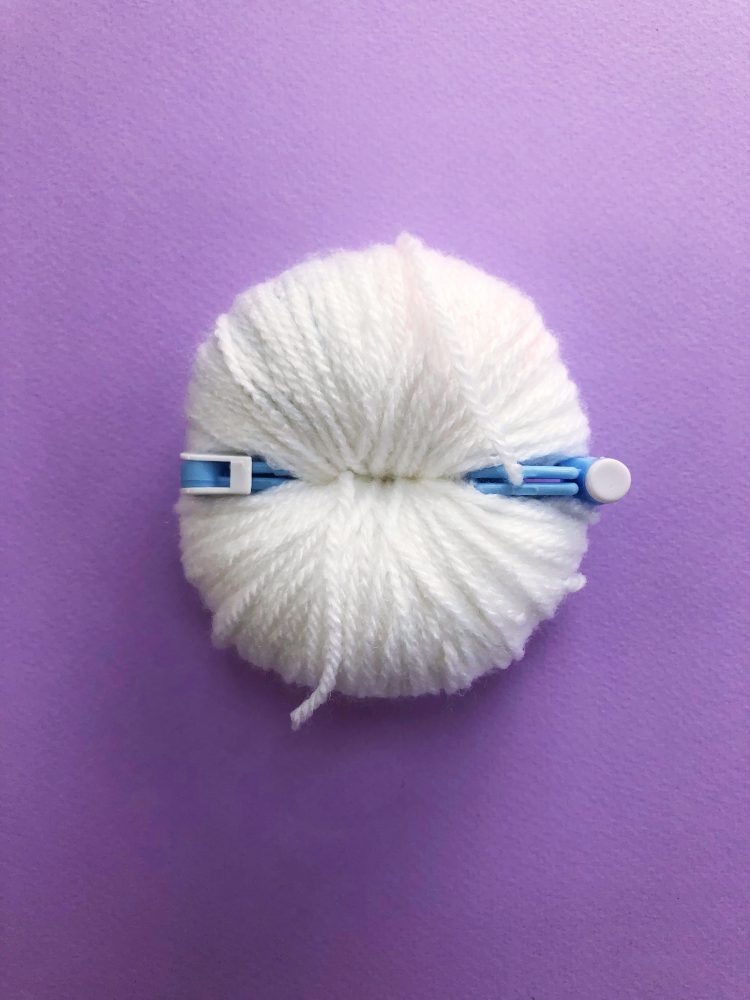
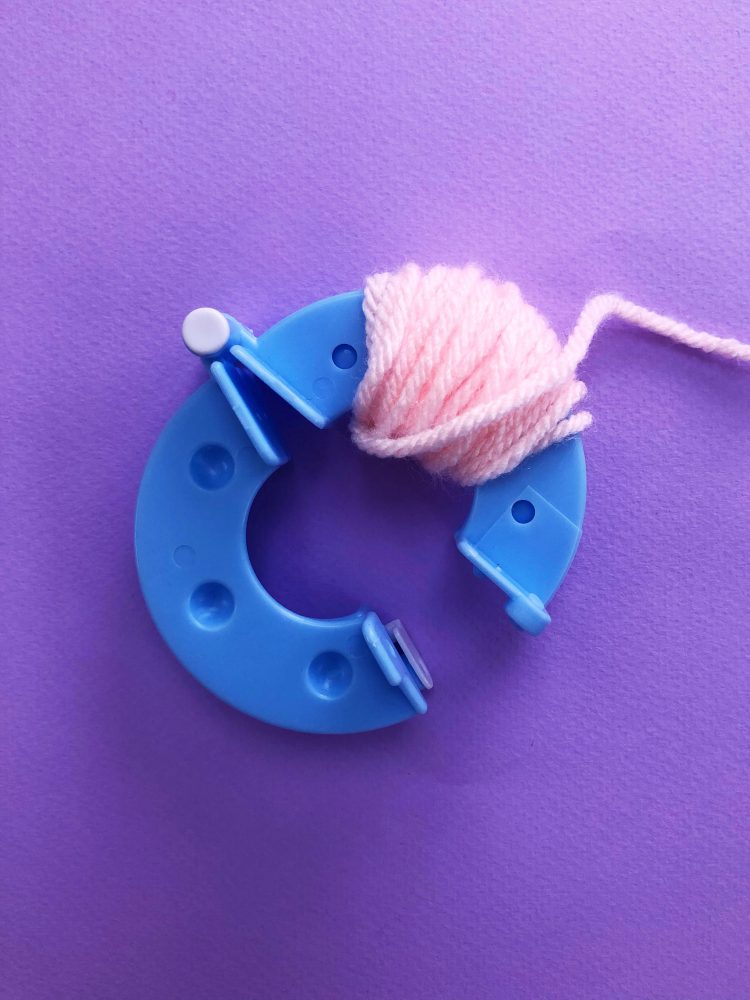
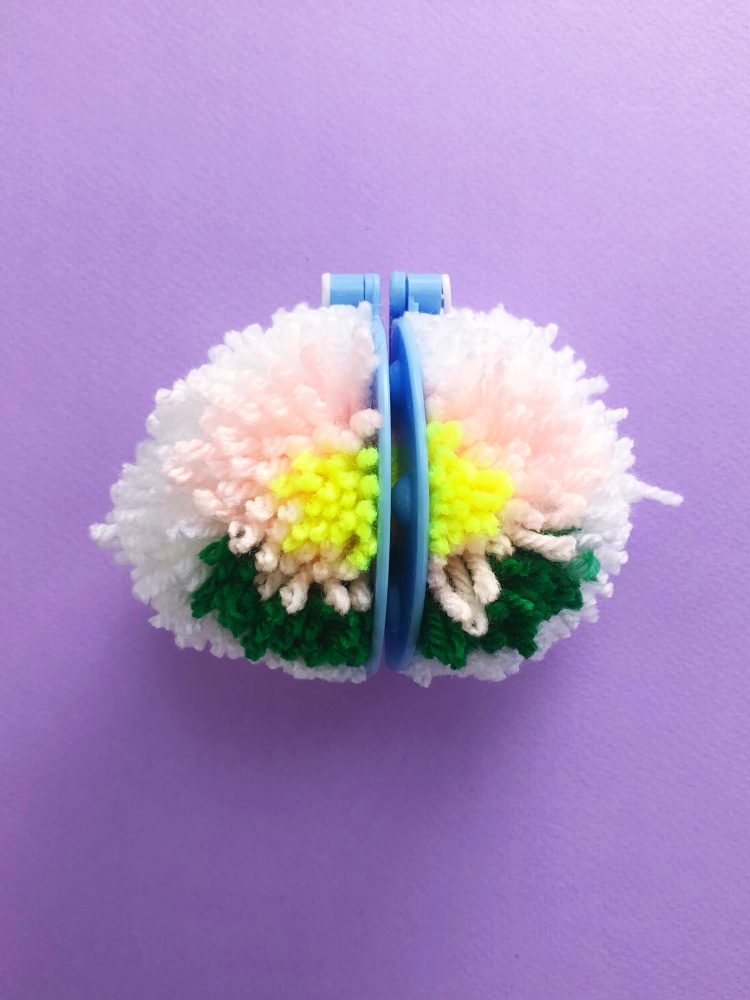
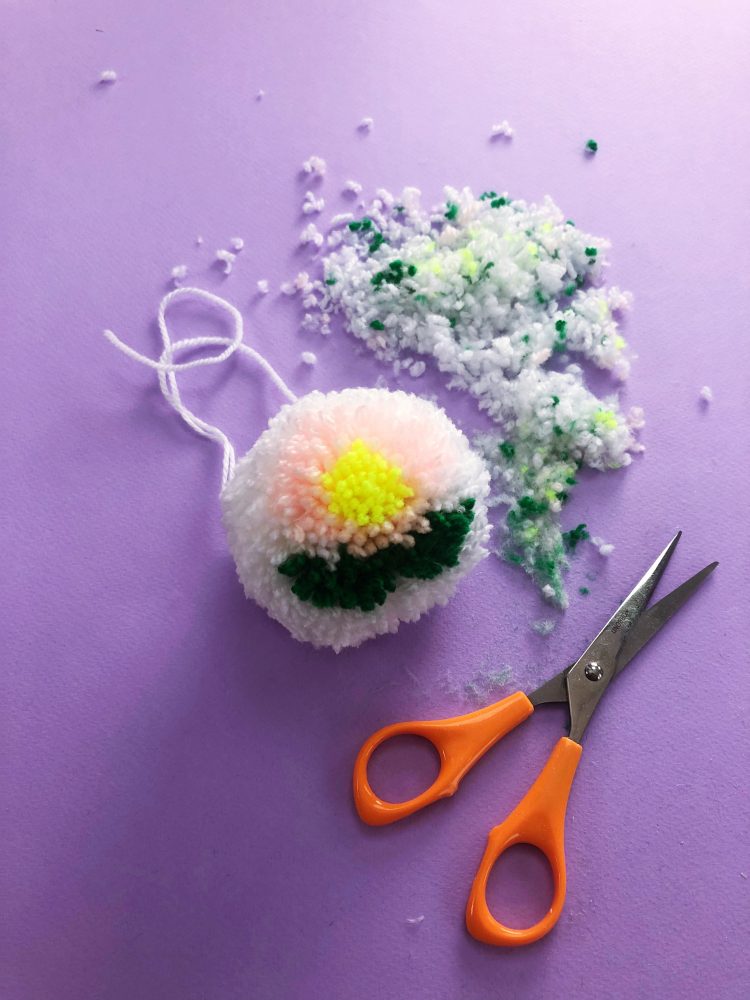
5. Cut open the pom-pom to expose the maker.
6. Tie a 30cm length of yarn around the middle of the pom-pom BEFORE removing the maker! Wrap the length of yarn around the pom, pull tight and tie a single knot. Wrap the yarn back around the middle and tie a tight double knot. Remember not to trim this yarn short as you will use it to tie onto the garland later.
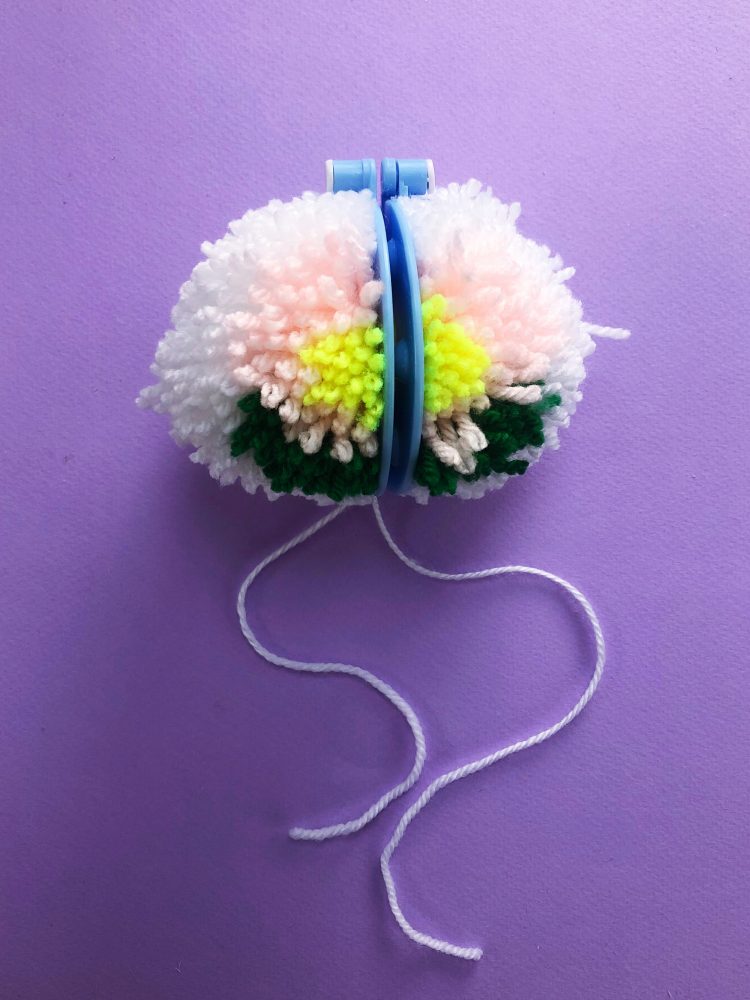
7. Remove the pom-pom from the maker and trim. The more you trim the more obvious the flower shape will become. You can move individual strands of wool with the scissor tips to move any strays! You can also make the flowers without a center color simply leave out step 1.
To Make Different Patterned Pom Poms
There are other ways of making patterned pom-poms. Use some suggestions below to create a colorful mix.
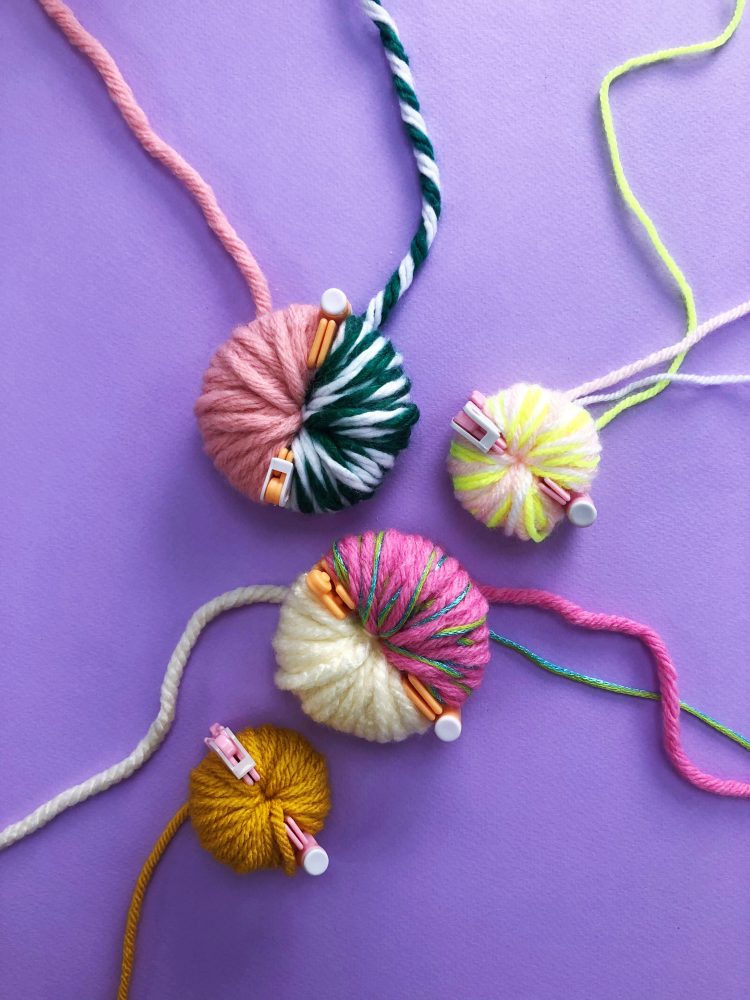
1. For a two-tone pom-pom: Wrap each half of the maker with a different colored wool.
2. For a multi-colored pom-pom: Take two or more different colored yarns and holding them all together wrap around the maker till full.
3. For a two-tone and textured pom-pom: Wrap a mixture of different thicknesses and different colors of yarn.
4. And of course simple one color pom-poms look great too!
To Make The Garland
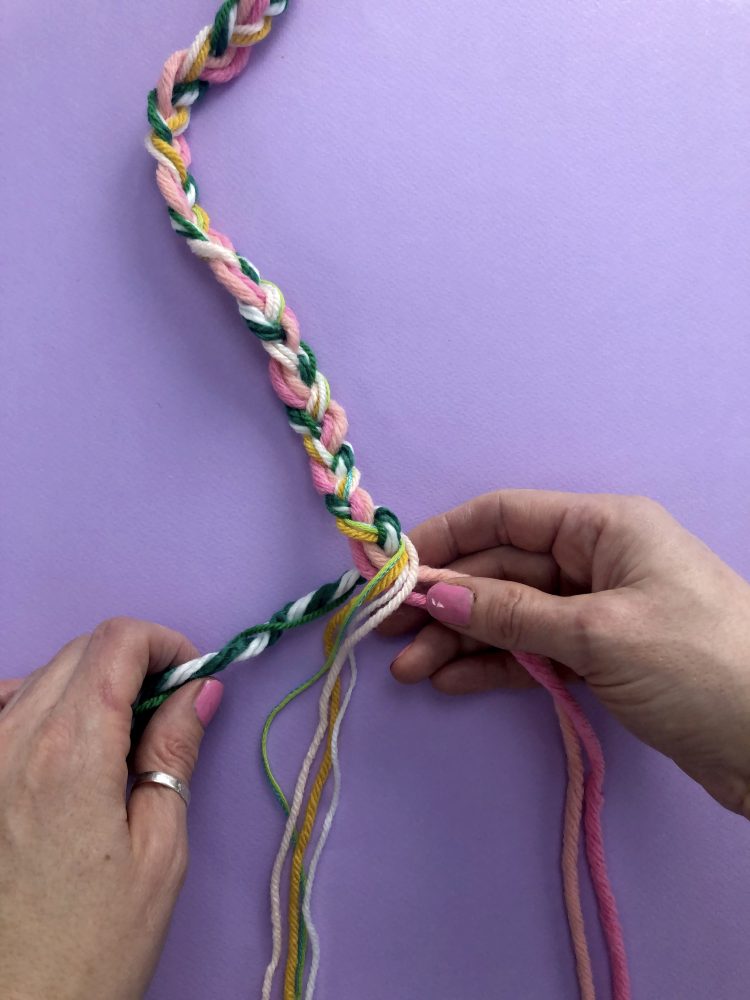
Make the garland rope by plaiting a selection of different thicknesses and colors together. Use about 2meters of each yarn. Leave about 10 cm of yarn at each end unbraided to create a tassel.
Lay the braided rope out and distribute the pom-poms along it. Try to vary the colors and sizes as you go.
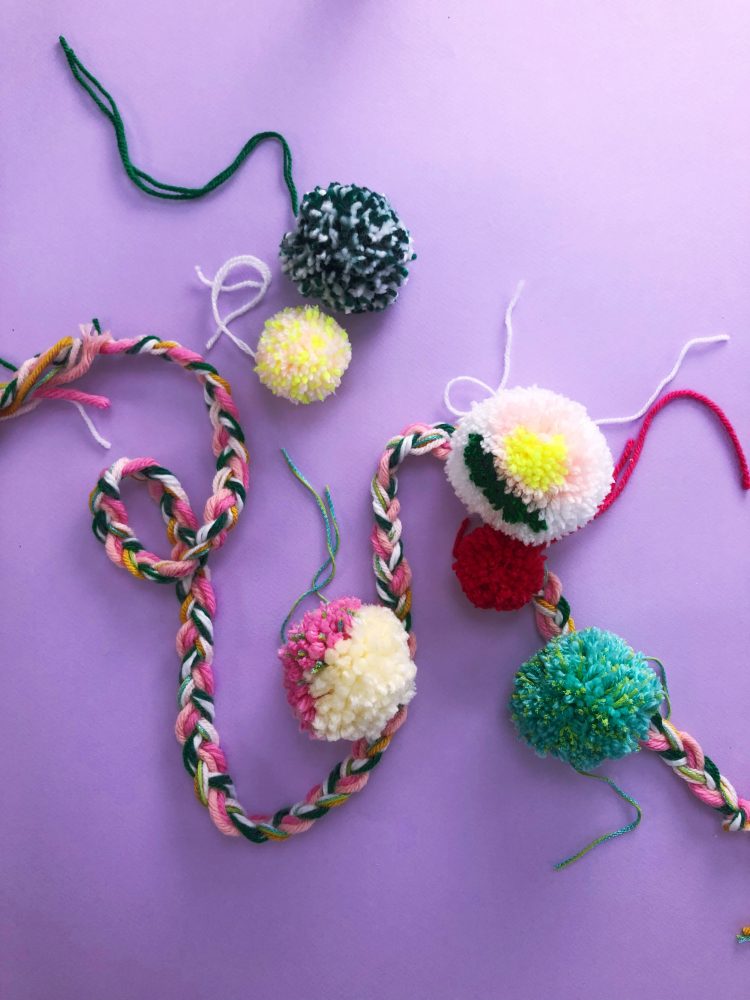
To finish, tie each pom-pom to the rope and then trim away the excess yarns.
PIN IT!
Last Updated on