
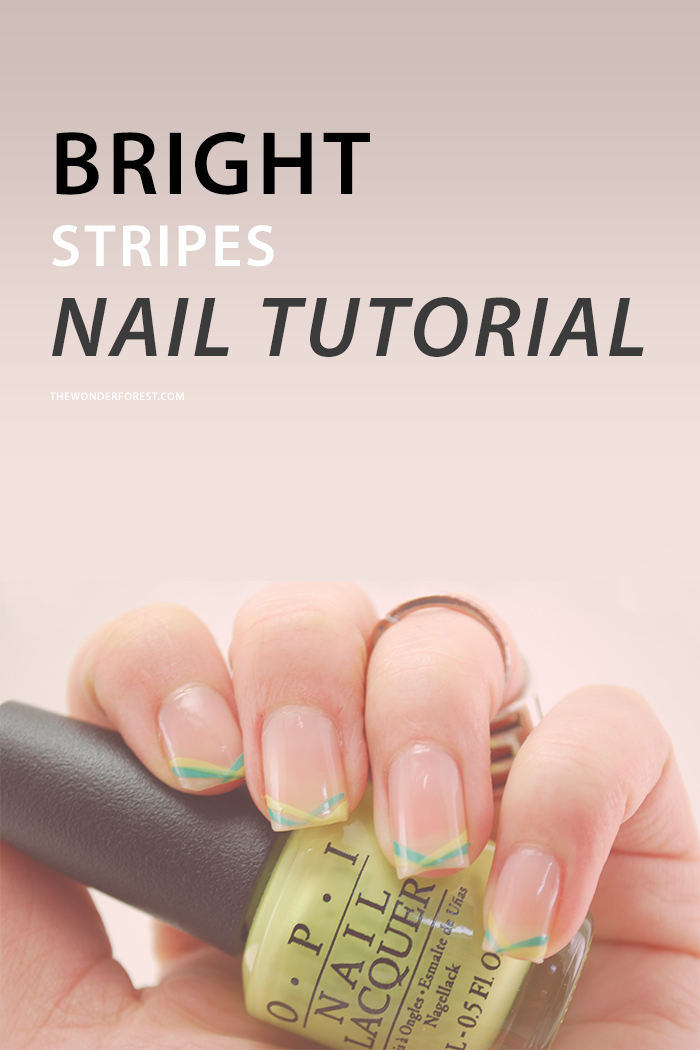
I don’t know about you, but I really dislike winter. And I’m ready for warm weather again. So I decided to pretend it’s summer and did a tutorial for this bright manicure!
Instructions
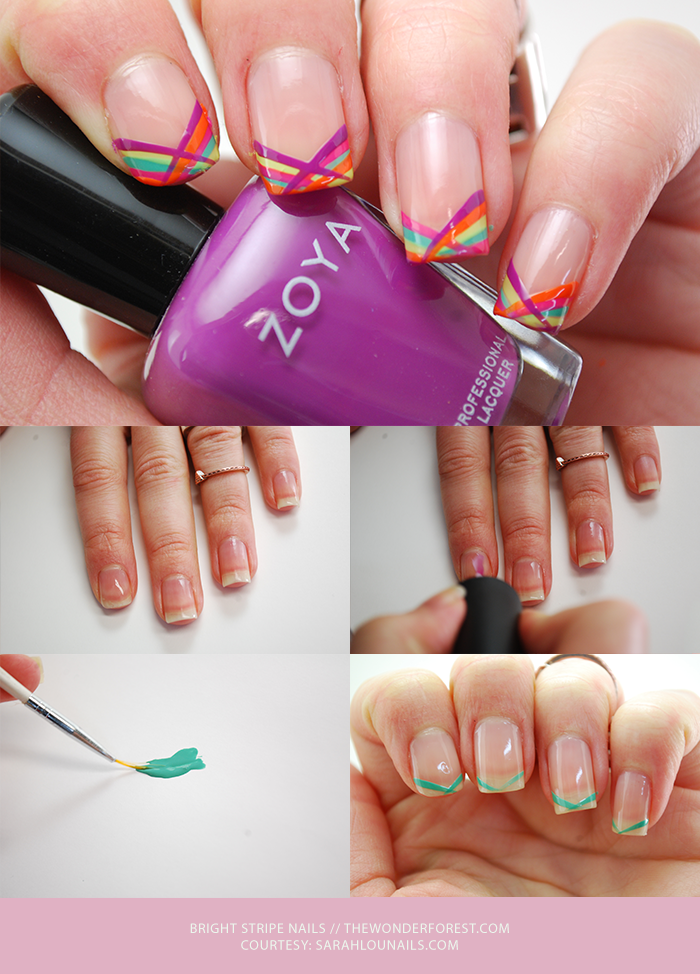
Step 1: Apply Basecoat
Step 2: Apply 2 coats of a sheer nude color to even out your nails.
Step 3: Using a striping brush, make one diagonal stripe across the corner of your nail.
Step 4: Make a second stripe going the opposite direction.
Step 5: Using a second color repeat step 3, but line the stripe against the first color, either above or below.
Step 6: Repeat step 5, but in the opposite direction.
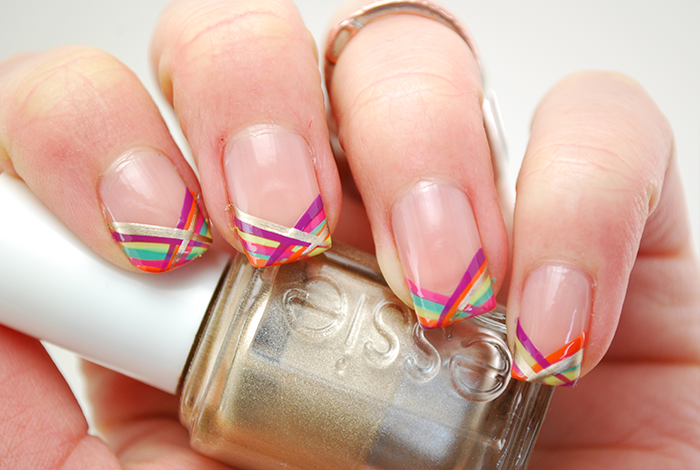
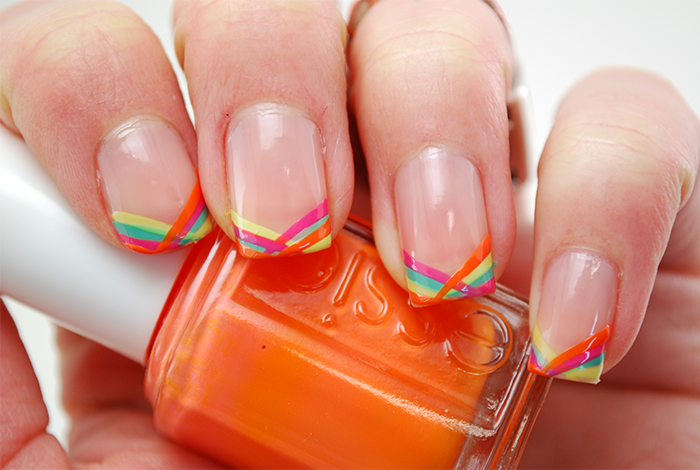
Step 7: Keep going with as many colors as you like until the tips of your nails are completely covered.
Step 8: Finish with top coat.
Tips
• To add a little variety, I striped the colors on my nails in different places. I didn’t want them to be completely symmetrical.
• If you wanted, you could continue this pattern all the way down your nail to cover it entirely.
Colors used
• OPI: Suzi Is Hungary Again!
• OPI: My Dogsled Is A Hybrid
• OPI: Life Gave Me Lemons
• Essie: Sugar Daddy
• Essie: Fear Or Desire
• Essie: Good As Gold
• Zoya: Kieko
• Seche Vite: Dry Fast Top Coat
Last Updated on