
Considering starting a blog but don’t know exactly how to go about it? It can seem a little overwhelming at first — Which blogging platform should you use? What should you post about? How do you set it all up?
Stop considering and just go for it — and don’t worry, I’ll help you every step of the way in this complete guide to starting your own lifestyle blog or niche blog.
Starting a blog can be a great new hobby or even used as a way to expand your business presence online or earn money. It’s not expensive and quite easy for anybody to set up — even those without much computer knowledge.
How to start a lifestyle blog
This beginner’s guide will walk you through the basic setup of a blog quickly and easily so you can jump right into creating posts. Let’s get started…
In this guide:
- Before You Begin
- Next Steps: Setting Up Your Blog
- Welcome to Blogging
Before you create your lifestyle blog
Decide on your overall niche
Starting a “lifestyle” blog doesn’t mean that you have to share every detail of your life. In most cases, lifestyle bloggers will choose a particular theme or topic to concentrate the majority of their posts on. See also: How to Dominate Your Blogging Niche.
Many call this “niching down” — which is to decide on a specific niche for your blog. This helps visitors distinguish the overall content of your blog and will help you stay focused as you create content.
Try to come up with some ideas that interest you the most or topics that you are somewhat of an expert on. Some broad examples could be beauty, fashion, art, tech, family life, or cooking. To “niche down” even further, think about what aspects of those topics you could focus on. For example if you chose the cooking niche, be more specific. Perhaps you enjoy vegan cooking, or cooking for other special diets.
Getting more specific with your niche will help you not only come up with tailored post topic ideas, but will also help distinguish your blog from other blogs and set you up as an expert in that area. Bonus: this is what Google likes to see and it should also help with your SEO. (what’s SEO?? more on that later…)
It’s not absolutely necessary to come up with a blog theme, but it will definitely help to attract like-minded people and benefit you in the long run!
Create your blog name
Once you’ve come up with your blog theme, it’s time to think of a name. This is the part that a lot of people struggle with the most.
I wrote an article a while back which shares my own formula for coming up with names for my projects, blogs, and businesses. This has been my ultimate trick and go-to method for creating a catchy name for all of my own projects.
Creating the perfect blog name is the post that you will want to read to see how to go about it. Your blog name should be easy for others to remember and spell, and have some sort of connection either to you or the topics you write about.
Choose a blogging platform
There are a variety of blogging platforms to choose from, and the decision is totally up to you. Blogger is free to use and allows you to set up a custom domain name while managing your content on the Google servers through the Blogger dashboard.
Blogger is where a lot of people like to start out because the setup is virtually quick and you can start creating posts right away. You can also transfer your blog from Blogger to WordPress in the future, however if you are planning on taking your new blogging hobby seriously, WordPress is the best way to go straight out of the gate.
WordPress is one of the world’s most recognized blogging platforms and offers a ton of features and plugins that Blogger doesn’t.
It comes in two versions: the free online .com version, or the self-hosted .org version. This can be confusing to newbies, but all you really need to know is that the WordPress.com version is pretty limited in its capabilities and does not allow advertising or custom themes.
If either of those things are important to you, now or down the line, then you should consider the self-hosted version.
With the free online .com version, you will access your blog through wordpress.com and all files are stored on their servers. This operates in much the same way as Blogger does, where WordPress hosts all of your content instead of having it all stored on your own self-hosted website.
If you’re going to go the WordPress route, I highly recommend doing it the right way with the full self-hosted version, since you’d probably want to upgrade to it anyways in the future. The entire blog will be kept on your own server and accessed through your own domain’s dashboard, not the WordPress site. I will show you how to easily and cheaply set this up below.
Why You Should Choose WordPress
- You’ll create a website that is entirely yours, meaning you own it!
- WordPress is FREE to install and use
- Lower monthly hosting fees and no high subscription costs
- Totally FREE email addresses branded to match your domain name
- Unlimited amount of customizing, widgets, and add-ons available
- No third party websites to login to
- No need to learn how to code or design
- You control everything! From files to storage, design and more.
- It’s easy to use! If you can use Microsoft Word, you can use WordPress
- WordPress is the most highly used and universal platform in the world
Setting Up Your Blog – Next steps
Register a domain name
If you’re serious about starting up a blog, registering your own domain name to match the name of your blog is the way to go. This means that instead of your website address being something like “myawesomeblog.blogspot.com”, it could simply be myawesomeblog.com.
If you read my post about choosing your blog name, you should have already checked to see if the domain name you want is available for the name you chose.
If you chose to go with Blogger, you can read my step-by-step tutorial for registering and setting up a custom domain name on your Blogger account right here.
If you chose to go with WordPress (which I highly recommend), you will set up your domain name when you set up the rest of your blog, as shown below.
Alternatively, you can register your domain name separately and link it to your blog later on. For cheap domain names, I recommend NameCheap, which costs less than a DOLLAR to register a new .com domain. If you’d like to register now and link it to your blog later, go ahead and click here to register your domain name.
Set up hosting and install WordPress * (WordPress only)
The self-hosted version of WordPress means what you will need your own web hosting account. What is a hosting account? A hosting account is your own reserved space on the web that houses your website and all of its files. Think of it like your computer’s hard drive where you store all of your files and photos, except it’s an online space entirely dedicated to your website.
Since you’ll be “renting” space on the internet from a hosting company, there are fees involved with this.
Lucky for you though, I have a special hosting rate from Bluehost that I am able to offer to you. Their basic plan only costs $2.95/month, includes a FREE domain name, unlimited bandwidth, custom email accounts, a super easy 1 click WordPress install, and so much more.
Disclaimer: because of the long term partnership I’ve created with Bluehost over the years, all links to their site are referral links. This is so I can offer you this amazing price and I will earn a small commission should you choose to sign up.
Let’s get to it…
To get started with WordPress, sign up for your hosting account and get the special rate by clicking here. The basic plan should suit most small websites and blogs but if you think you will need more features, you can choose a different plan. The rate is charged up front annually so you can save huge! (These are special Wonder Forest reader exclusive rates).
If you’ve decided to sign up with Bluehost and haven’t yet purchased your domain name, you’ll be able to choose a domain name right after selecting the plan you want.

Tips:
- I recommend going with a .com, .org, .net, or your country extension (.ca, .co.uk, etc.)
- Your domain should be easy to say and spell. Try to avoid hyphens.
- If your chosen domain isn’t available, try different variations of it
Complete the rest of the signup forms to create your account.
Watch me sign up for a hosting account with free domain name
In this video below, I’ll show you the exact settings I choose when signing up for a new hosting account so you can get the most affordable package.
Setting Up WordPress
Once you have your login details, sign in to your BlueHost control panel and choose the “Install WordPress” option. If you used the instructions above to sign up for an account, you’ll automatically be directed to login to your account to access your Control Panel. You should see this page:
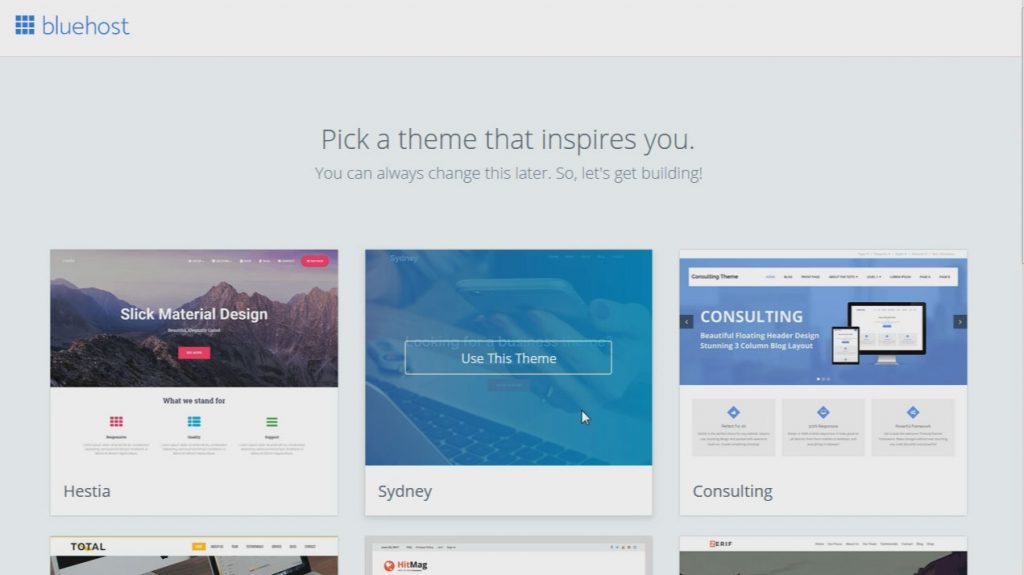
This will be your theme for WordPress. Bluehost is automatically going to install WordPress for you! Pretty cool, right!? You can always change this later, so just pick any theme to begin.
2. On the next page, click the Start Building button to be directed straight to your WordPress dashboard. If you chose a new domain name, Bluehost will set up WordPress on a temporary URL that will automatically switch over to your new domain name once it propagates.
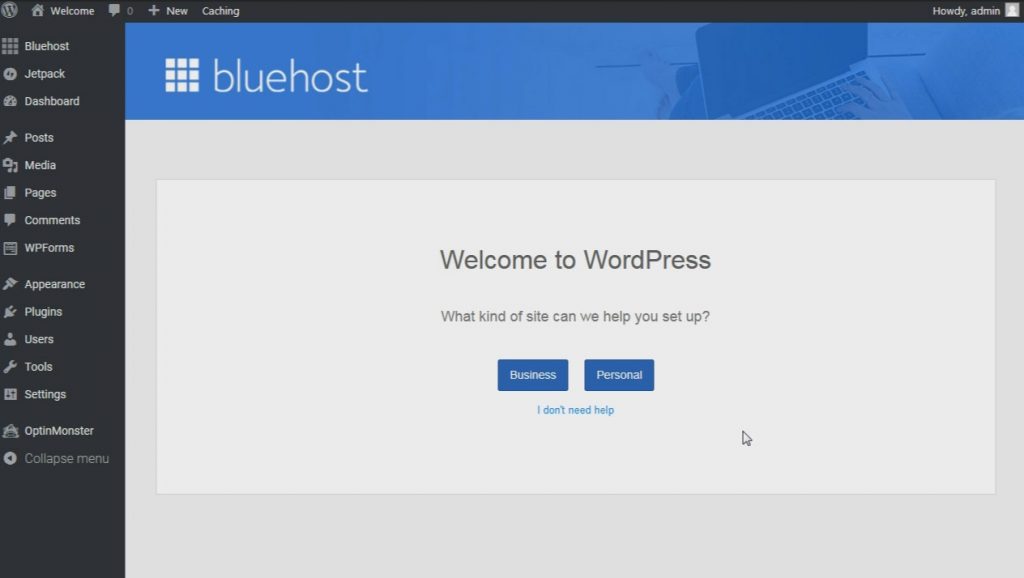
You can click either Business or Personal to be guided through an easy walk-through, or click the I Don’t Need Help link to set things up on your own.
Accessing WordPress
Your login page would normally be www.yourdomainname.com/wp-admin, using the username and password provided to you via email or with which you signed up with. If you added a new directory for your WordPress install, such as “blog”, your login page would be located at www.yourdomainname.com/blog/wp-admin.
Make it your own
Design your blog
Now that your blog is set up, it’s ready to be made over! The default themes that come with your blog can either be tailored to your own taste, or you can install a totally fresh and unique design.
Some places to find paid WordPress themes include Creative Market and Envato Market. You can also search the WordPress Themes library by accessing the Appearance > Themes page on your dashboard and then choosing Add New.
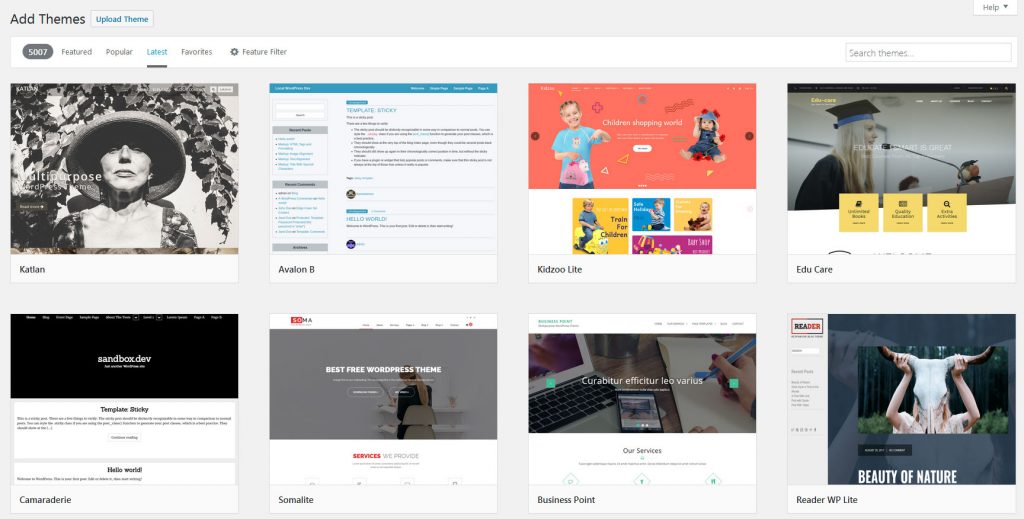
Tip: Look for themes that are mobile responsive. This will ensure that your website looks fantastic on mobile devices as well!
Once you’ve chosen a theme, simply click the Install button on the preview to install the theme to your site. You will also need to click the Activate button to publish it live.
You can view all of your themes on the Themes page in the dashboard. To customize your theme, head on over to the Customize tab in the Themes section of the sidebar. This will open up your theme in a live editor window and you can change things such as the site name, the header, navigation, typography and more. The options here will vary depending on the theme you’ve chosen.
Create your first post
The hard part is over. You can now relax and let your fingers do the talking. Creating your first post is exciting! There are really are no rules for this, so jump right in.
The editing pages in Blogger and WordPress are pretty easy to grasp and if you like, you can play around with the buttons and settings to familiarize yourself with everything. You can schedule your posts, safe as a draft, or publish posts pretty much the same way on both platforms.
To create a new post, navigate over to Posts > Add New in your dashboard.
Try adding photos to your posts and playing around with the formatting options. The best way to learn these editors is to simply mess around with them and figure out what everything does. They are set up similar to programs like Microsoft Word, so it shouldn’t be hard to get the hang of quickly.
Tip: Posts differ from Pages in that Pages are static pieces of content and Posts are like journal entries (or blog posts) listed in reverse chronological order. That means if you are sharing news, the most recent news will appear at the top of the page. Posts can be found in the Archives, Categories, Recent Posts, and other widgets. Basically, create a Page for static content that is not dated, and Posts for dated “journal-like” entries.
I wouldn’t worry about creating Posts if you are simply using a WordPress site for a website with content that does not change frequently. Pages with static information should be all you need.
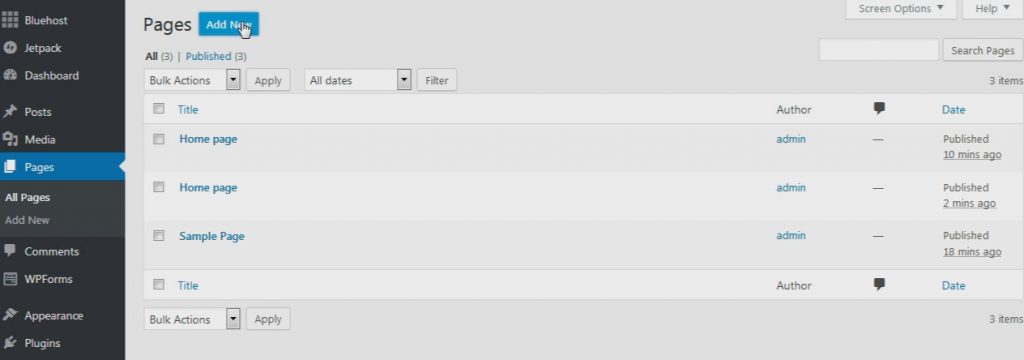
Create some Pages
You’ll want to create some basic pages for your site. This will help you when customizing a theme and changing front page settings.
You’ll grasp the Dashboard as you go, but for now let’s get some Pages set up. Perhaps you want a Welcome page, Contact page and an About page. Let’s make those!
- In the sidebar of your Dashboard, choose Pages > Add New
- Enter a page title in the Title box and your content in the text box (you can just type in some temporary content for now and edit it later)
- Hit Publish when you are done, or click Save Draft if you want to save the page for later.
You can add as many pages as you want!
Add your Pages to the menu
If you want to add that page to your main menu on your website, all you have to do is go to the Appearance section and then select Menus.
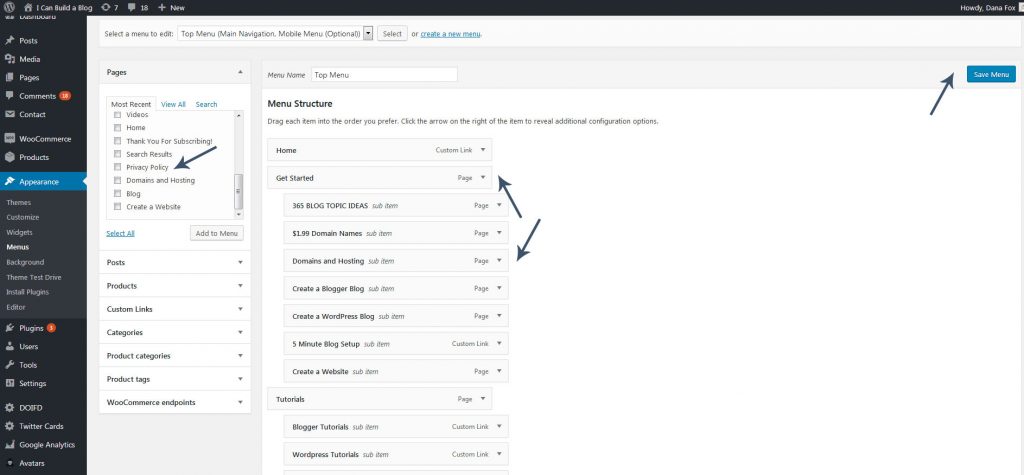
You can find your page in the Most Recent box or you can change tabs to View All. Clicking the checkbox and Add to Menu will add the page to the menu hierarchy on the right. From there, you can drag and drop the menu item wherever you want it. To add a page as a sub-menu item, simply drag it slightly to the right and underneath the primary menu item. Save your menu when you are done.
Change your Settings
After a WordPress install, you should check your main settings and tweak them to your liking. To do this, go to the Settings link in the Dashboard sidebar and visit the General page. You can change the name of your site and your site’s tagline here. You can also set your timezone and more.
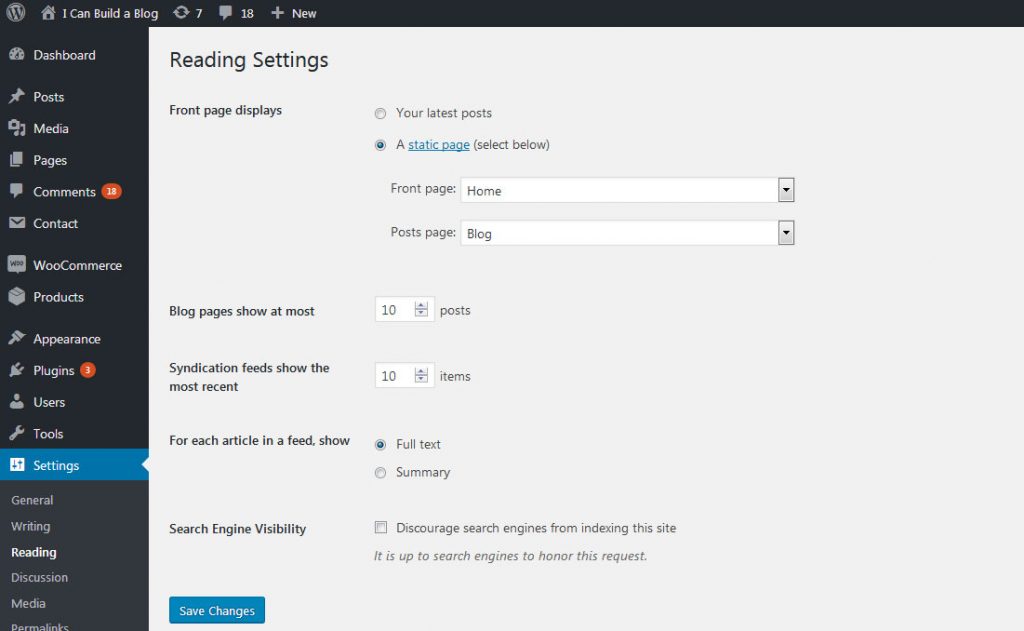
On the Reading page under Settings, you can choose how you want the front page of your website to look. By default, this is set to display your latest Posts. If you won’t be using the blog features or want a Welcome page as your front page, you can change this to the Static Page option. Then, select a Page you’ve created as your Front Page (such as a Welcome page!).
If you still want to use the blogging features, create a new page named Blog or something similar, and set the Posts Page to that Blog page so the entries show up there instead of on your main page.
Under Discussion, you can choose whether or not you want people to leave comments among other things.
Editing your sidebar
The sidebar of your website is made up of “widgets”. You can access and edit/rearrange these widgets in the Appearance > Widgets section. This is a drag and drop interface which allows you to position certain elements by dropping them into place. They will automatically save! You can delete widgets by opening the boxes using the down arrow and clicking the Delete link.
Plugins, what are they?
Plugins are like add-ons for WordPress that enhance the functionality of it and allow you to incorporate some cool elements. For example, there are photo gallery plugins, contact form plugins, security plugins, and so much more.
To add new plugins, just go to the Plugins link in your Dashboard then Add New. Here, you can search the WordPress repository for free plugins to add to your site. After you install a plugin, just Activate it and it will appear in your Dashboard sidebar! (hint: usually under the Settings section!).
BONUS: Setting up your email addresses
Since you now have your own hosting account, you can set up your own custom email addresses. This is something that those other third party sites don’t let you do (because you don’t have access to your own hosting account… you’re using theirs!), but it’s so easy with your own hosting account!
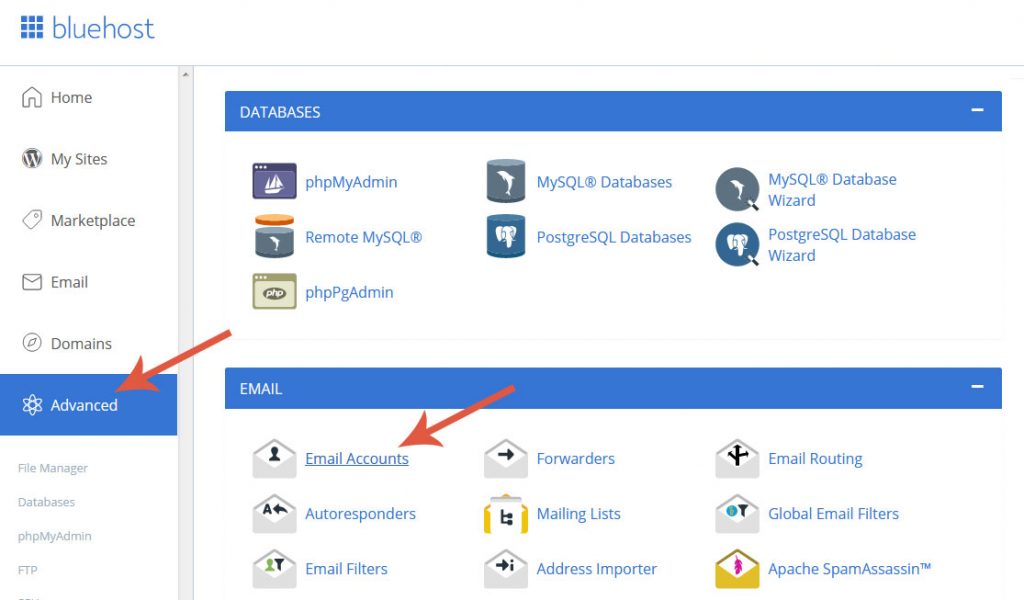
First, login to your web hosting control panel. If you signed up through my link above, you can do this through the BlueHost website, or alternatively visit YourSite.com/cpanel (replace YourSite.com with your own domain!) and login with your site username and password.
Head on over to the Advanced tab and then find the Email Accounts icon to set up a new account:
Tip: Bluehost has a great walk through tutorial here that will show you how to set up your email account.
After you set it up, you can access your mail through the Webmail link (YourSite.com/webmail) or set up your email program like Outlook or the Mail app on your iPhone to enable sending and receiving of messages.
Now you can have unlimited email addresses such as [email protected]!
Welcome to the blogging club!
Scheduling and making time
Now that you’re a blogger, you need to make sure you have the time to post and update your site.
The easiest way to do this is to get yourself a planner and schedule certain topics on certain days. It’s totally up to you to decide how much you post. It could be a few times a week, every day, or a few times a month. Find what fits within your schedule and work with it!
Coming up with topic ideas
Notebooks are essential for me! I jot down ideas whenever they strike me. Try to come up with a list of 10-20 blog topic ideas on your own that relate to the theme of your new blog.
If you are blogging to earn an income, you’ll want to familiarize yourself with SEO — Search Engine Optimization. How your posts appear on Google and other search engines is all dependent on how well you’ve done with SEO. The topics you choose also contribute to this greatly! Think: “what will people be searching for?”, or “how can I help someone with information about this topic” whenever you are jotting down blog post ideas.
Front page results earn the most traffic, so try researching SEO best practices and learn how to properly format your blog posts for optimal traffic.
Taking photographs or using stock photos
Blog posts just aren’t the same without a graphic element. Taking photos is something you’ll probably want to get into the habit of doing.
Don’t have a fancy camera? Make the most of what you do have. Phone cameras are more than enough these days, just be sure to take lighting and composition into account when shooting your own photographs.
Use bright natural light when possible and play around with different styles of compositions.
If taking photos isn’t your thing, try using stock photography websites. There are paid options such as Shutterstock or iStockPhoto and options that allow you to use royalty-free images, such as Pexels or Unsplash.
Join the community
The blogging community is huge and varies so much. Different genres, different genders, and different goals.
Sign up on social media if you haven’t already and get yourself out there! Chat with other bloggers, join groups or twitter chats, and just have fun promoting yourself (without being spammy). This whole blogging thing is more of a lifestyle in itself than a task, so enjoy it and decide how you want your journey to go.
I truly hope that this lengthy guide was a great help to you and gave you the kick start you needed to start your blog.
Who knew starting a lifestyle blog could be so easy?! Happy blogging!
Pin this for later:
Last Updated on
I love this post. It’s made me realize that I probably don’t have a very specific theme on my blog which is probably why I don’t get many views. Thanks! 🙂
http://www.wallflowerkronicles.com
Great information! I actually love coming up with blog names. I keep giving my daughters and friends names of blogs I think they should write. For whatever reason, it’s something easy for me. I have a blog for women’s fashion for women with a large bust called When the Girls Rule (www.whenthegirlsrule.com). If anyone is stuck on coming up with a name pop over to my blog and contact me!
This is all great information! I really need to nail a more stern theme on my blog.
Thanks so much for this! 🙂
C | http://thisgirlc.blogspot.ca/
Hey, I’m so grateful that I stumbled upon this website, which offers great lifestyle advice as well as very valuable information about starting a blog. Thank you so much for the tips ! Love from Europe <3
I am now starting off and currently fishing for ideas. Im lacking content. Hopefully I can apply the steps mentioned in this post. 🙂 https://travelbeautypad.wordpress.com
This was very helpful, thank you!
hi! Thanks for the advice. I’m currently starting my blog i hope i could get better result in the next days. Still I’m lacking of content but these ideas helped me to find out more of my interest. Here’s my http://www.happyhippievibe.com
Have been debating about switching from Blogger to WordPress – so glad I found your site. Thanks for all the helpful insight!
http://www.notsetinsilverstone.com
This helps me a lot. Thank you very much. Here’s my blog: blogofvm.wordpress.com
Hi guys I recently started writing my own blog so make sure you check it out and tell me your opinion. https://imperatorlife.wordpress.com
Hello, Thanks for the wonderful post. I am just starting to blog and I am still confused if I will get the domain name or not. I saw your templates and it looks really nice, now I am thinking of changing my template. Here’s my site, http://discovercanadanow.blogspot.ca/
I’m starting my new lifestyle blog soon… Those are really great tips 😉
Mary // microsoft dynamics partner
Great post. I think the hardest thing is to keep continuity and keep the posts coming. Getting time to write and feed new posts to your blog is the hardest challenge (for me anyway). I would love to do 3 a week, at best I do 3 a month.
Great tips! http://www.joinmein.miami
I just found your website/Youtube channel and am so excited to read all your tips on Lifestyle Blogging. Growing my Lifestyle blog is a big 2018 goal and your articles and videos are helping me zone in on where and how to make changes. Thanks so much! http://www.inspireddelight.com
What an informative blog! I love the step by step, I’m stuck on trying to make posts accurate and think I need to follow a more “journal” like style. You’ve captured how to really make something interesting in your writing and I think a notebook is a great idea, especially since I’m not always at the computer. The other important part you included was to set aside time. I know many people who have started and then they drop the ball and don’t continue. Wish me luck, I’m a rookie, but hope to get into the groove of this soon. Thanks again for your great insights! – Heidi Would
There are many ways to start a lifestyle blogs.But yes, WordPress is the best way to start a lifestyle blog.
http://www.YourToenailFungus.com/