

How To Make a Macrame Plant Hanger
Those who love bohemian home decor know that macrame is key. Here is a simple tutorial for a quick macrame project you can use to hang up a small plant! Using simple knots, this planter macrame project is great for beginners and doesn’t require experience.
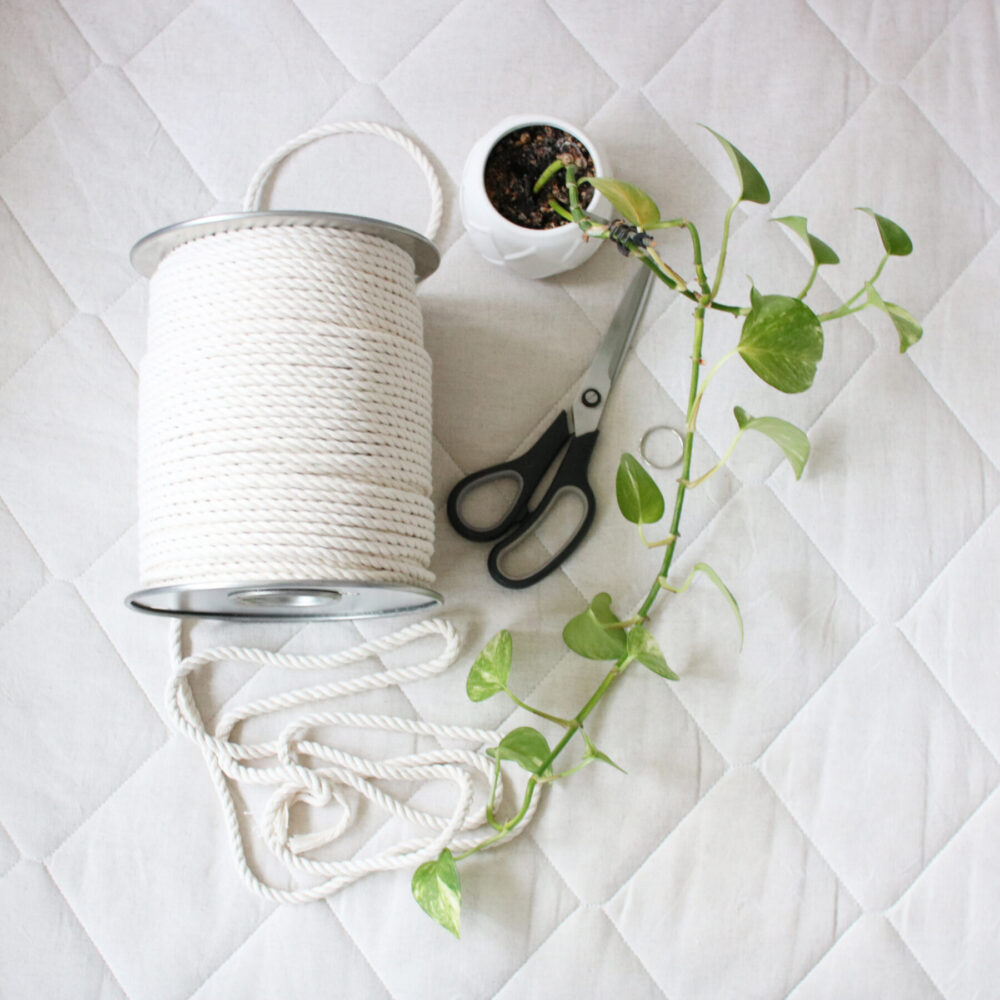
To start you will need:
- Cotton string
- A small key ring or something similar
- Scissors
- Your plant of choice!
Creating Your Easy Macrame Plant Hanger
Begin with cutting out three two meter strands of string and slip the ring into them. Fold the string half way and you will have six strands total. Cut a 20cm strand of string and split it. My string is three-ply so I had three thinner strands.
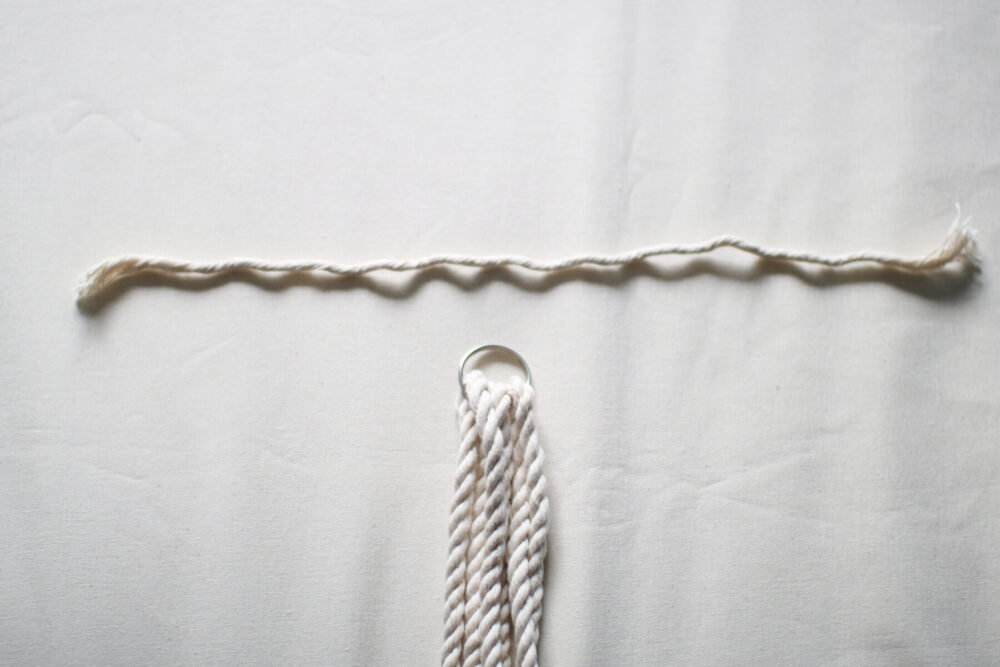
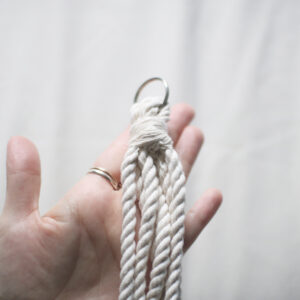
Hold the shorter string against the bundle of six and leave a tail of about 5cm. Starting at the top, start winding the string around the bundle and work your way down until there is another 5cm left.
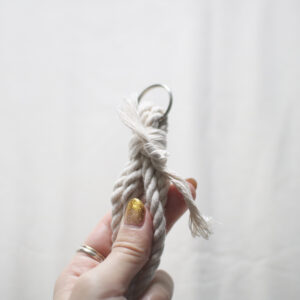
I ended up with three sections from this. Tie a knot with the two strands and cut the string leaving a 1cm tail so it will not unravel. Using scissors, push the tail end underneath the wounds to conceal the ends.


Now lay the string down and separate into three two strand groups. Begin by knotting each pair about 10cm from the top. The knot is made of two basic knots together, like the one you use to tie your shoe.
After you knot them all, it should look like the photo below. There are three knots in total for this row.


Repeat again 10cm from the first knot for each group, again three knots in total. For the third row of knots, I decided to use an overhand knot for a different effect. For this one, loop the two strands together and pull the strands through. There will be three knots in this row too.


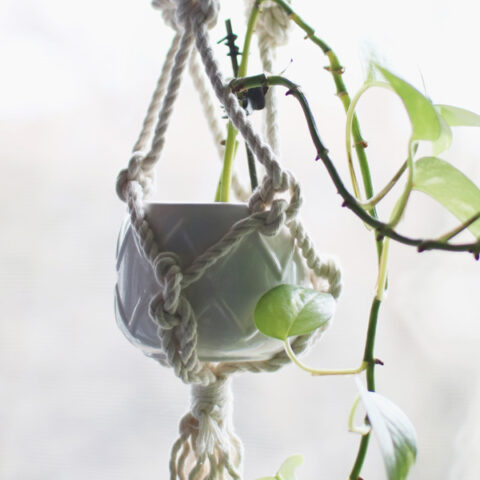
Now we will begin to make the part where the pot will sit. Begin by splitting the two strands and taking one from each group. See the image below — the strands will become attached and form a circle. Go across, knotting the shoelace knot three times.

Split the knots again and repeat another three shoelace knots 5cm below the previous ones like the image below. See how it creates a webbing that will hold in the pot.


Now we will gather all the strands and line them up in order to tie the end. Depending on how big your pot is, the distance you tie the final knot will be different. For my small pot, the diameter is about 10cm, so I did the final knot 10cm from the previous knots.
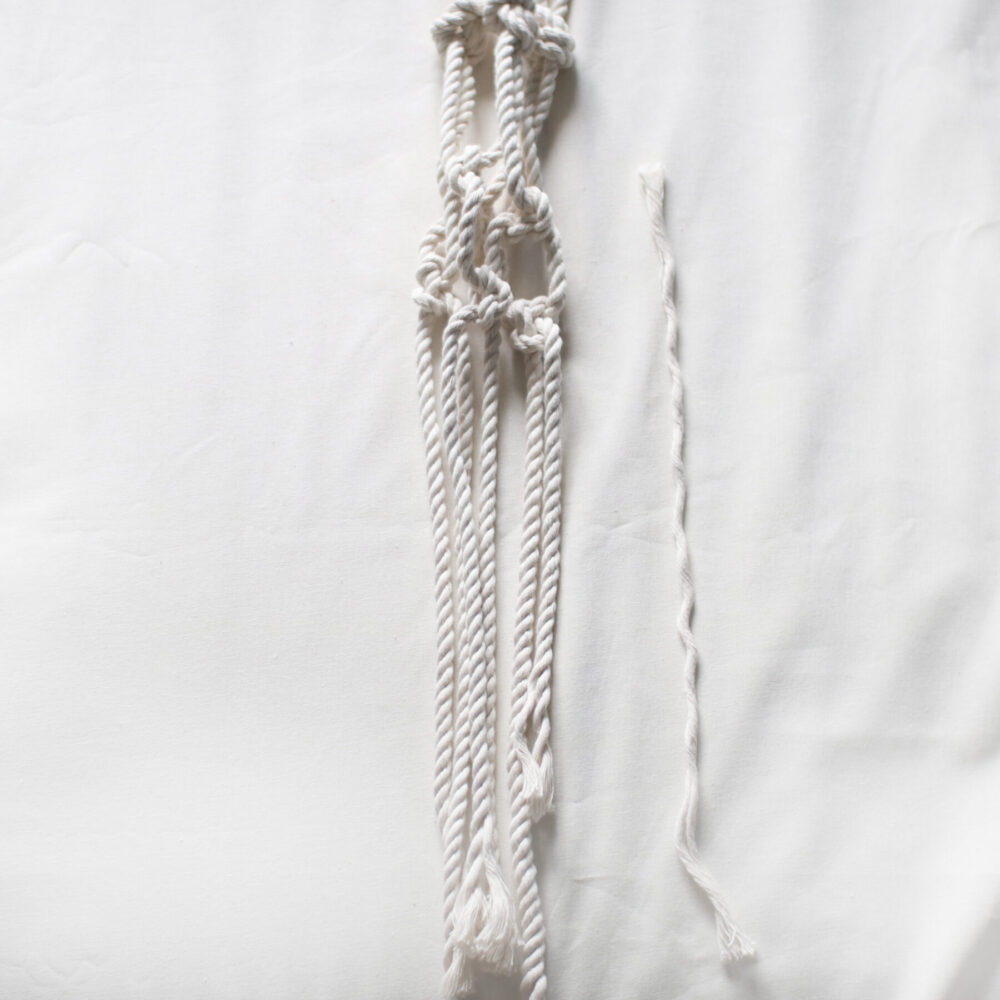
After you have decided where to have you knot, gather the strands together and tie them like the knot we did at the beginning. Using another 20cm of the thin stand of string that we had leftover from before, wrap it around the strands, tie a knot and tuck in the ends using scissors.
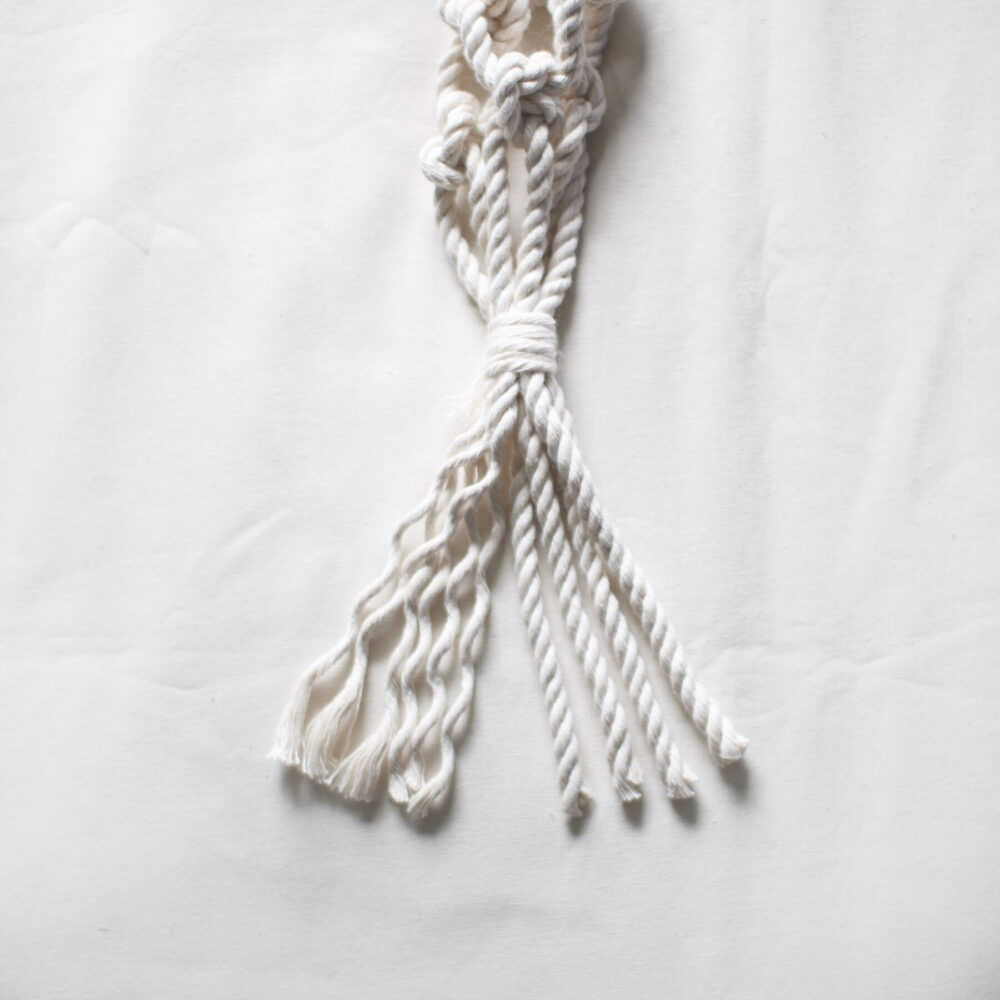
Now, the final step is to cut the ends at an even length. If you want, you can split all the strands like I did in the image above for a different effect! Now, put in your little pot and you’re ready to hang it!
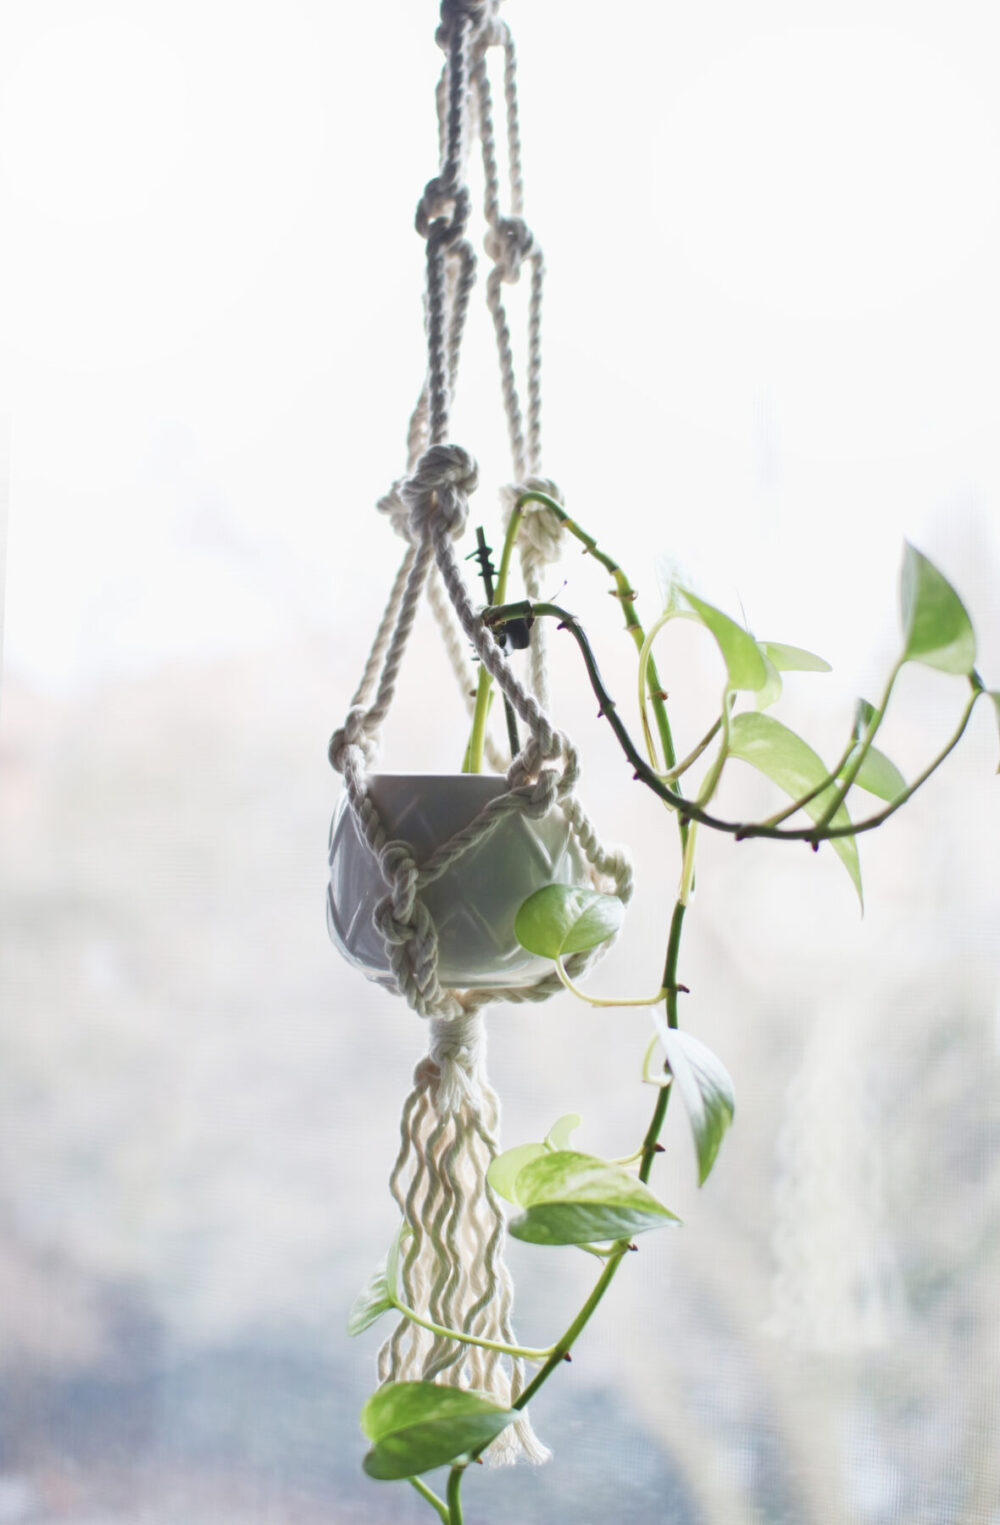
How easy was that? Now how about trying these other beginner friendly macrame projects that can be used for decor, gifts, and more.
DIY Macrame Plant Hanger for Beginners
A step-by-step tutorial for creating a simple macrame plant hanger
Materials
- Cotton string
- A small key ring or something similar
- Scissors
- Your plant of choice!
Instructions
- Cut out three 2 meter strands of string and slip the ring into them. Fold the string half way and you will have six strands total. Cut a 20cm strand of string and split it.
- Hold the shorter string against the bundle of six and leave a tail of about 5cm. Starting at the top, start winding the string around the bundle and work your way down until there is another 5cm left.
- Tie a knot with the two strands and cut the string leaving a 1cm tail so it will not unravel. Using scissors, push the tail end underneath the wounds to conceal the ends.
- Lay the string down and separate into three two-strand groups. Begin by knotting each pair about 10cm from the top. The knot is made of two basic knots together, like the one you use to tie your shoe.
- Repeat again 10cm from the first knot for each group, again three knots in total. Loop the two strands together and pull the strands through. There will be three knots in this row too.
- Split the two strands and take one from each group. The strands will become attached and form a circle. Go across, knotting the shoelace knot three times.
- Split the knots again and repeat another three shoelace knots 5cm below the previous ones. It will create a webbing that will hold in the pot.
- Gather all the strands and line them up in order to tie the end. Depending on how big your pot is, the distance you tie the final knot will be different. For my small pot, the diameter is about 10cm, so I did the final knot 10cm from the previous knots.
- After you have decided where to have you knot, gather the strands together and tie them like the knot we did at the beginning. Using another 20cm of the thin stand of string that we had leftover from before, wrap it around the strands, tie a knot and tuck in the ends using scissors.
- Cut the ends at an even length. If you want, you can split all the strands for a different effect! Now, put in your little pot and you’re ready to hang it!
Last Updated on