
Calling all creatives! Do you love to bake, and you’re looking for easy ways to jazz up the presentation of your work? Or maybe you’ve never been one to spend time in the kitchen, but it’s time to delve into a new hobby? Decorating cake is an art form and it can be a great creative avenue even for those who aren’t big on baking.
As a self-taught baker and cake decorator, I’m blessed to be able to do something I love for a living. Over the past 17 years since I first started teaching myself to decorate as a pre-teen, I’ve compiled many tried-and-true tricks to making beautiful cakes.
We’re going to go over some basic steps for crumb coating and base icing your cake, and then 5 easy beginner techniques (that don’t look beginner!) to make your cake look professional.
Cake Decorating: What You Need To Get Started
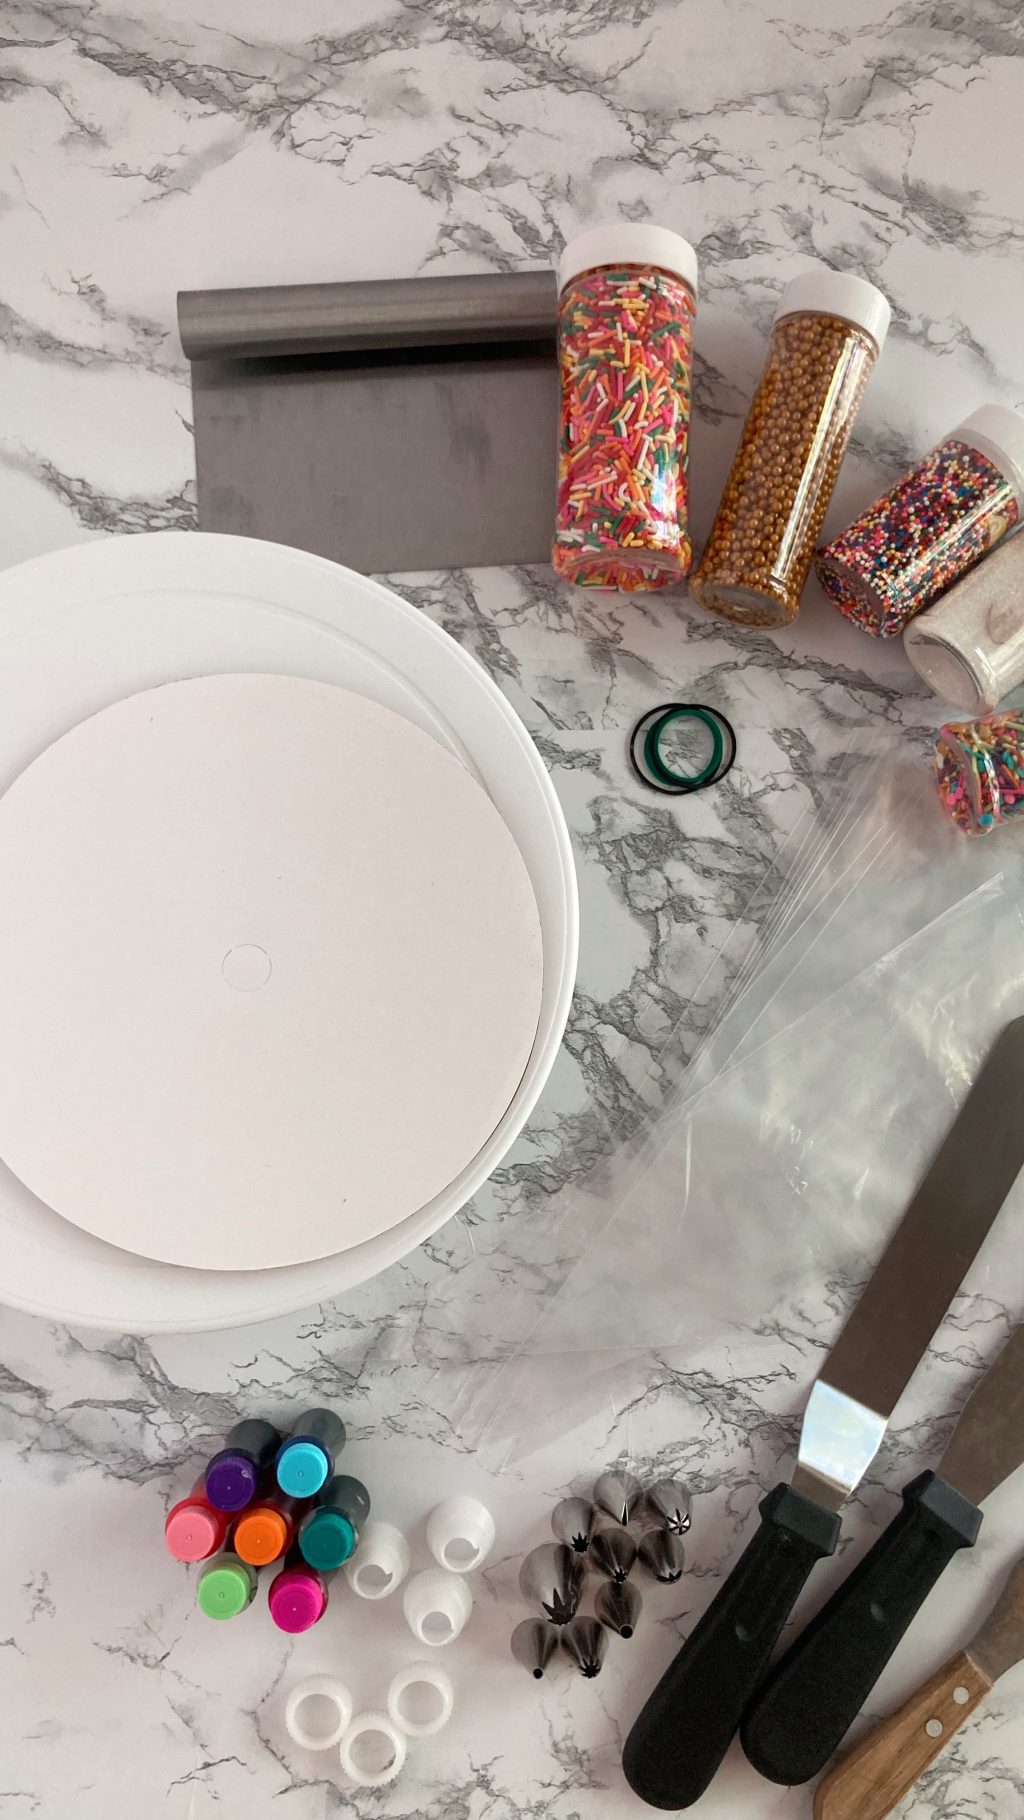
Here’s everything you need in your cake decorating toolkit!
Cake Decorating Supplies
- Cake boards
- Cake turntable (for a set, try this)
- Cake leveler (or a serrated knife)
- Piping bags
- Gel or paste food colouring
- Sprinkles
- Spatulas in a variety of sizes
- A bench scraper
- Your favourite buttercream recipe (my favourite is a vanilla buttercream from Sugar & Sparrow)
- Decorating tips & couplers (To get started, you’ll want a few sizes of round tips, star tips)
- You may also need scissors, a small spoon, parchment paper, paper towels, and some small rubber bands.
Starting Techniques
Before you actually start decorating a cake, you can practice on a cookie sheet lined with parchment or wax paper. This way, you can scrape off the buttercream, refill your bag, and start again–without the pressure of messing up a whole cake!
Here are a few useful techniques you’ll want to get comfortable with!
How to create Shell/Beaded Border with icing
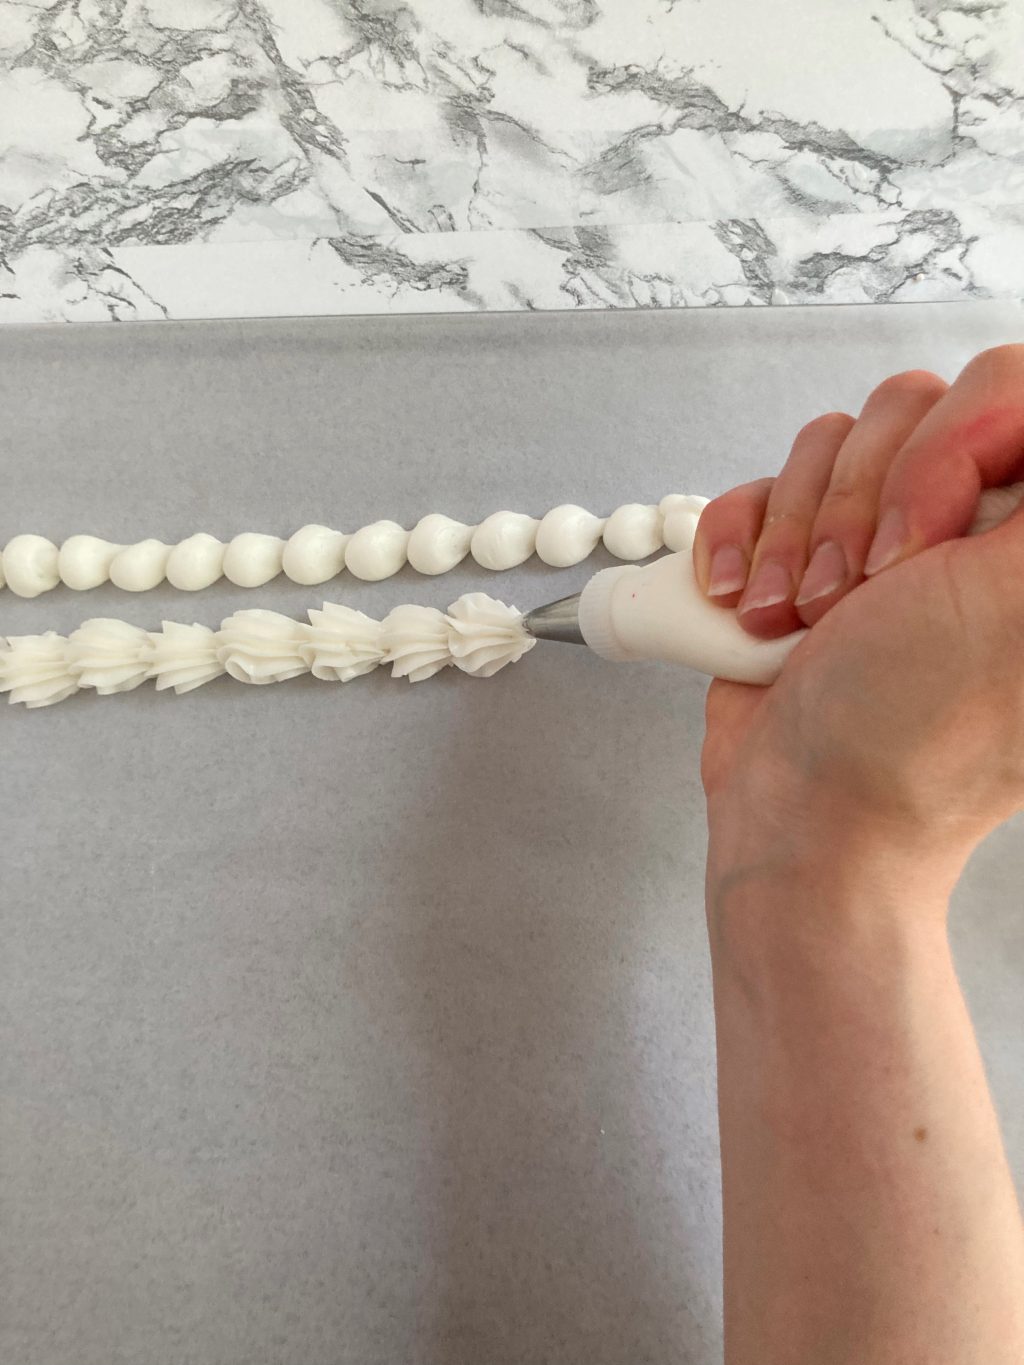
To get started, fit a piping bag with a small coupler and a star tip, and fill with any colour frosting. Holding the decorating bag at a 45º angle to the surface, squeeze the bag to create a rounded shell. Quickly loosen the pressure and lightly move the tip downwards to finish off each shell. Repeat to create a line of shells. The tip used here is a Wilton #20.
The same motion can be used with a round tip to create a beaded border. For a beaded border, use the decorating tip to swipe down on each dot as you move to the right. This beaded border was made using a Wilton #8.
Writing on Cakes with Icing
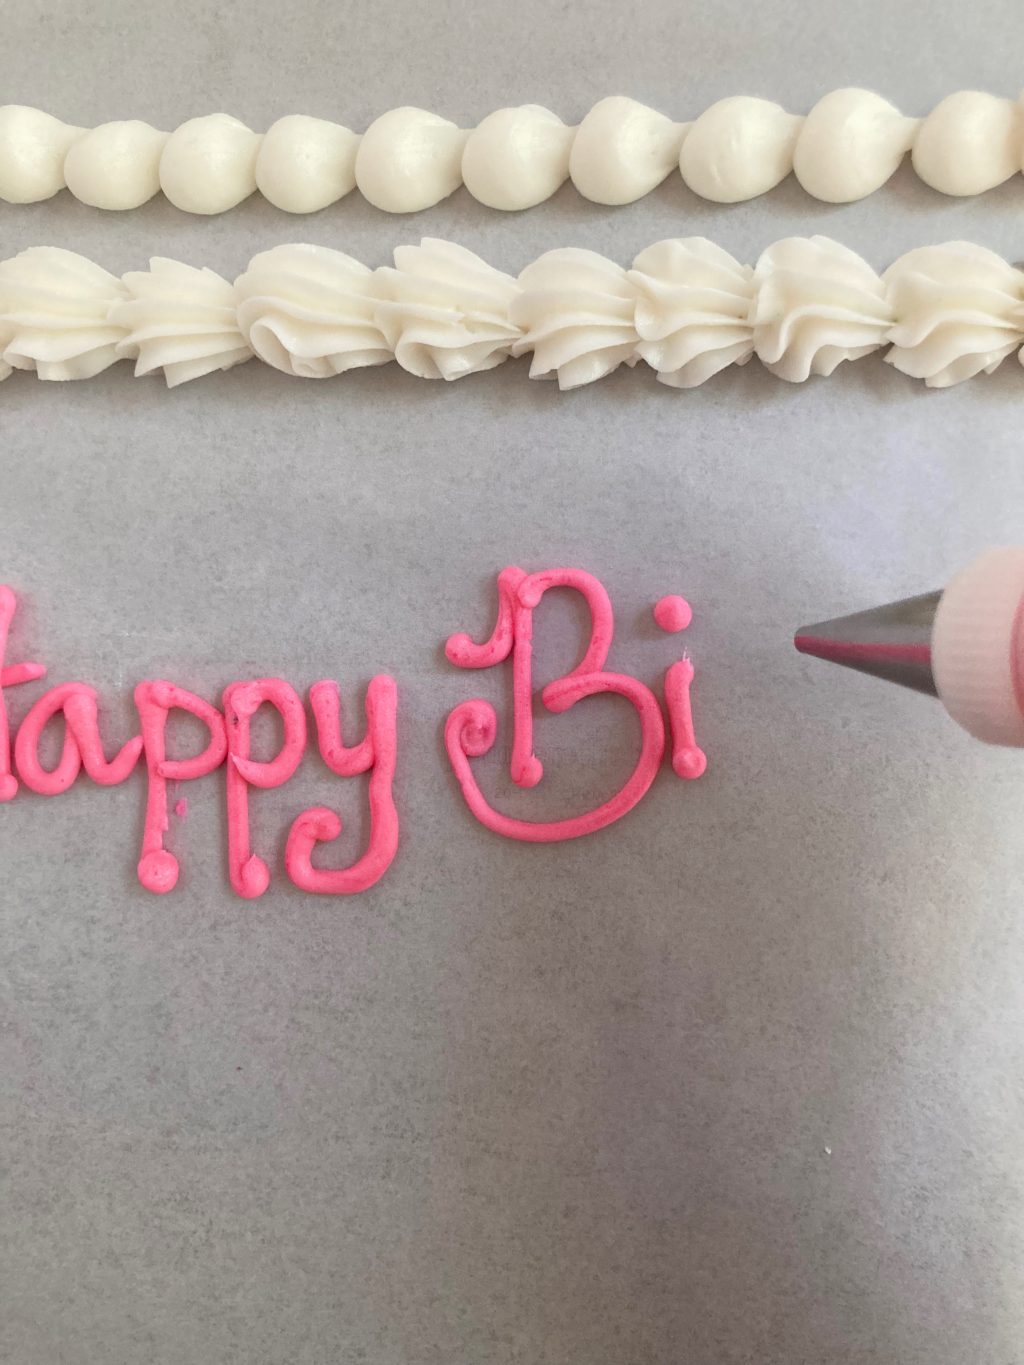
You can also practice writing on parchment paper! Practice freehand, or print out a phrase in a fun font, and place it under your parchment to trace it. This helps develop even letters. A trick of the trade is to pipe lines slightly above the surface on which you’re writing. As you let go of the pressure, gently attach the line to the surface. You will notice less shakiness is visible this way!
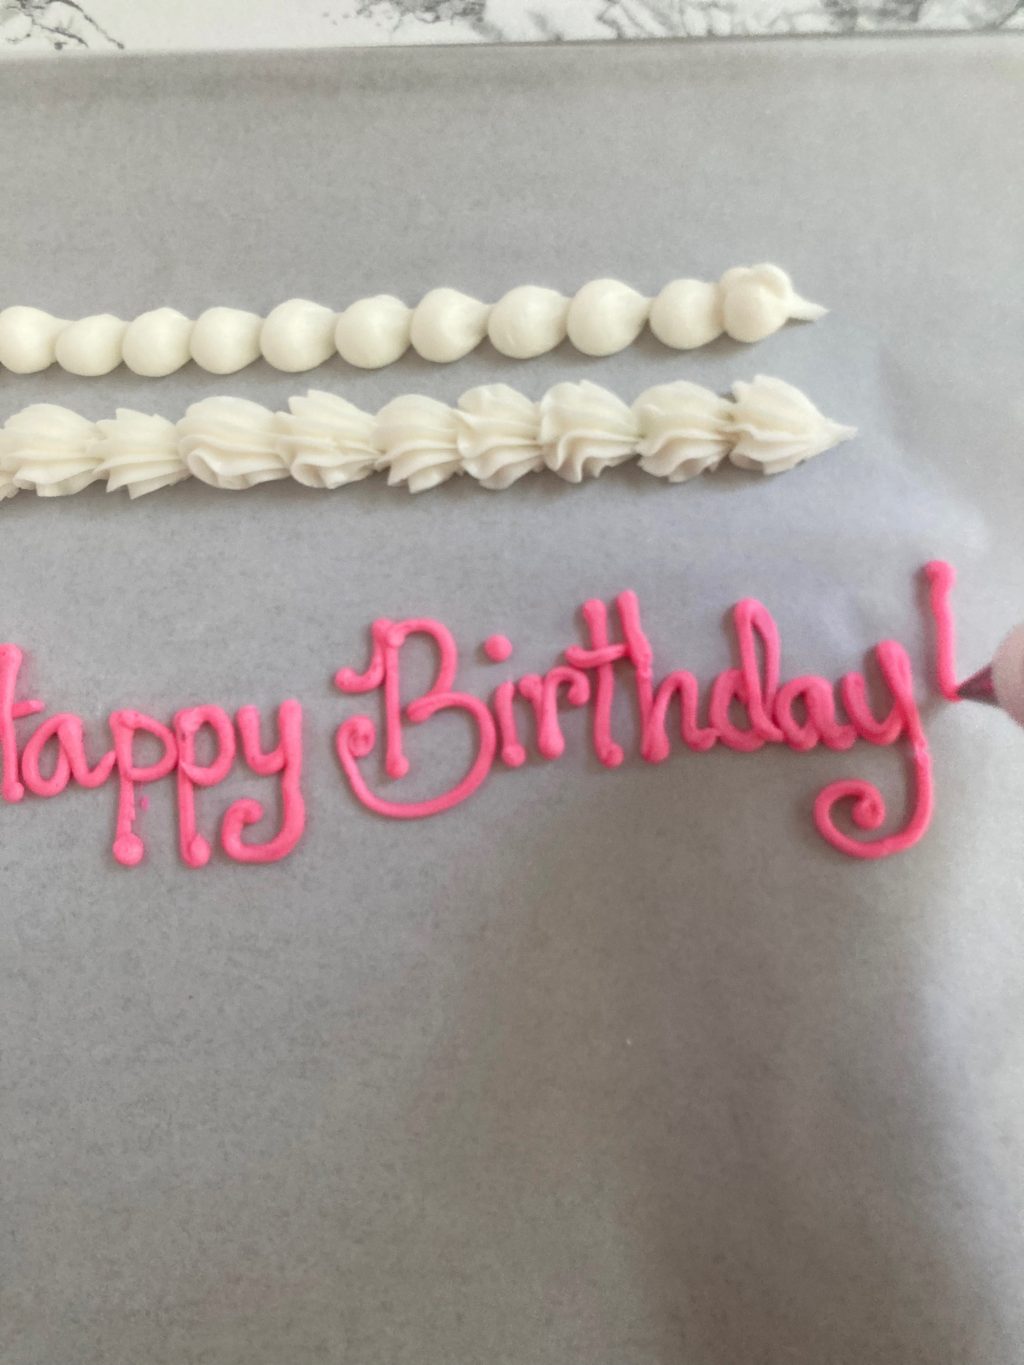
Experiment with thinner tips like #1 or #2, medium like #3, and thicker tips like #4 and #5. Pipe with confidence…adding flourishes and curlicues helps distract from imperfections!
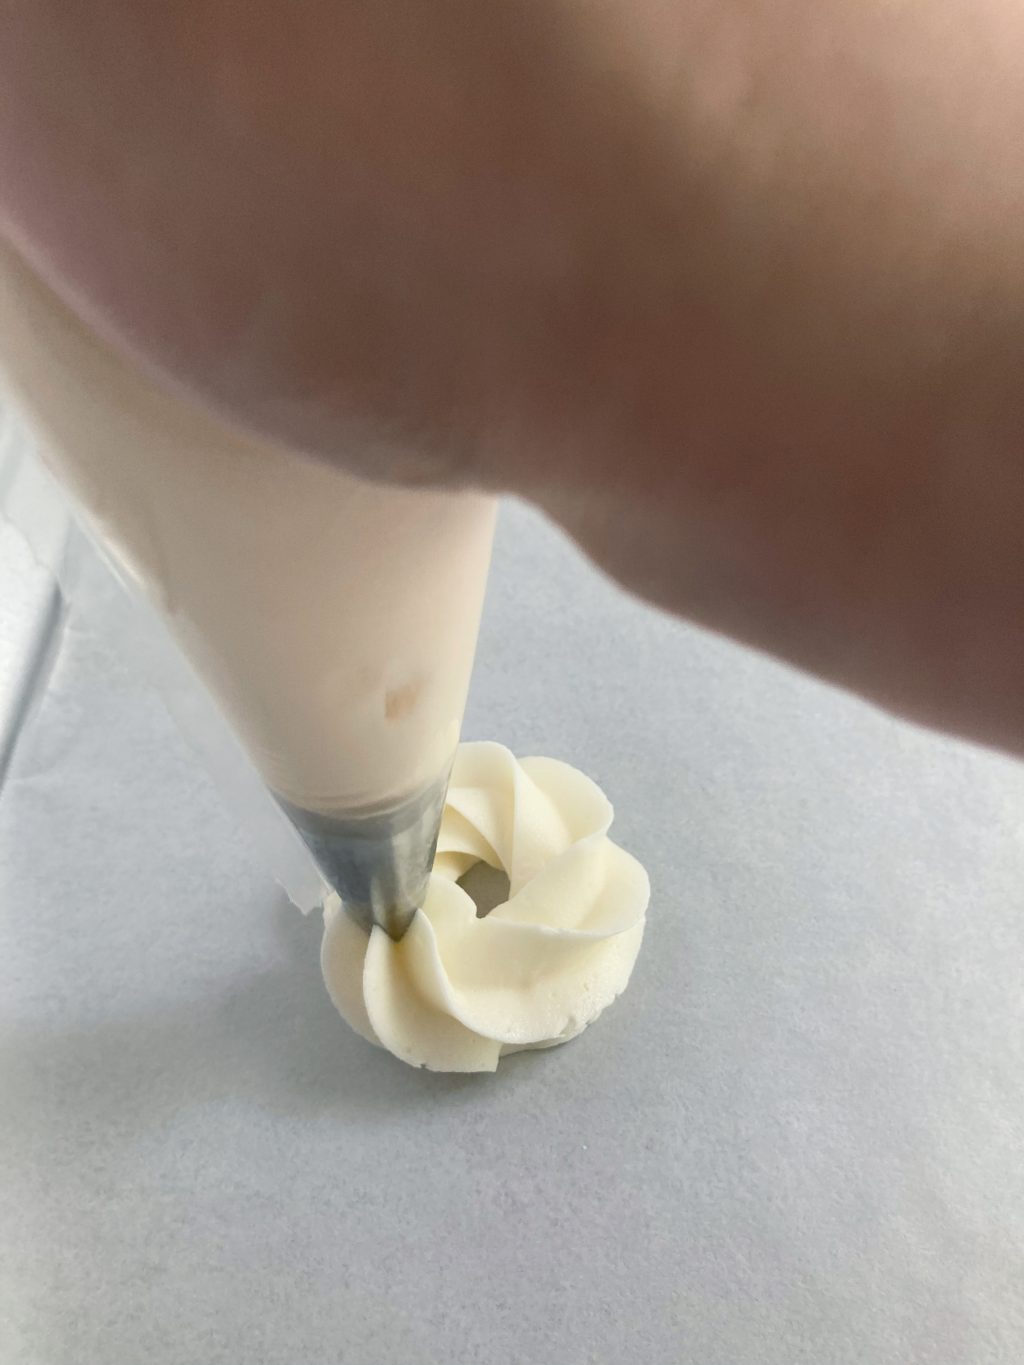
Making Rosettes with Icing
For the rosette, use a star tip like 1M (or any medium-to-large star tip–many cupcake piping tips look beautiful with this technique, and each one will give a slightly different look.

Experiment to find your favoyrite!) In a very slow circular motion, spiral outwards and finish off in a circle.
Making Swirls with Icing
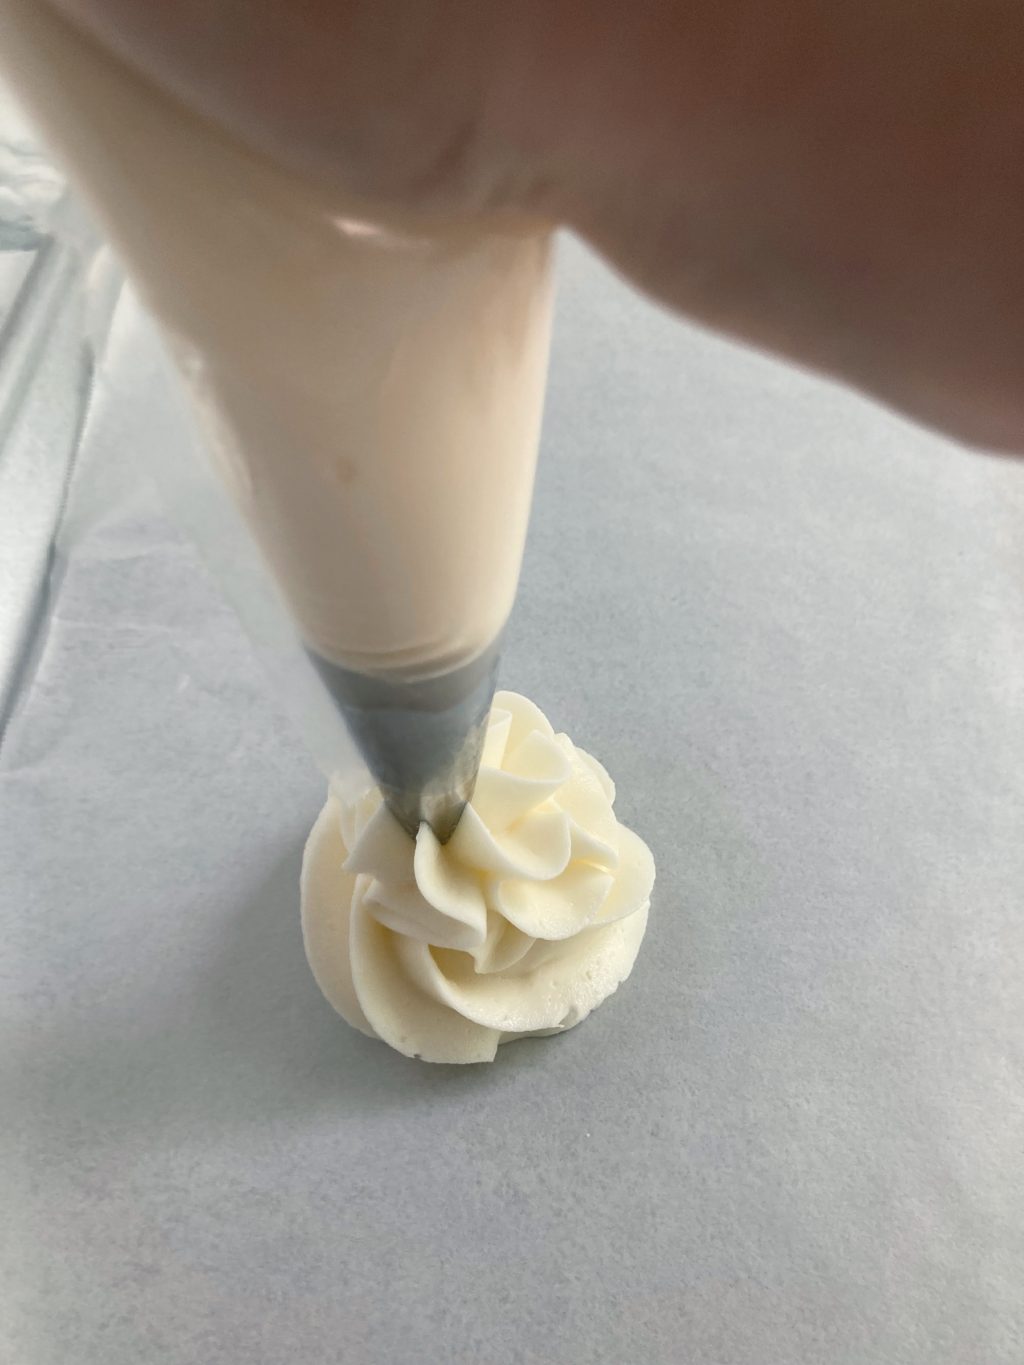
A swirl begins just like a rosette, however instead of finishing off, keep piping in an upward spiral, making the circle smaller as you go. Swirls look beautiful in any large star tip or even a French pastry tip.
How To: Frosting Your Cake for Beginners
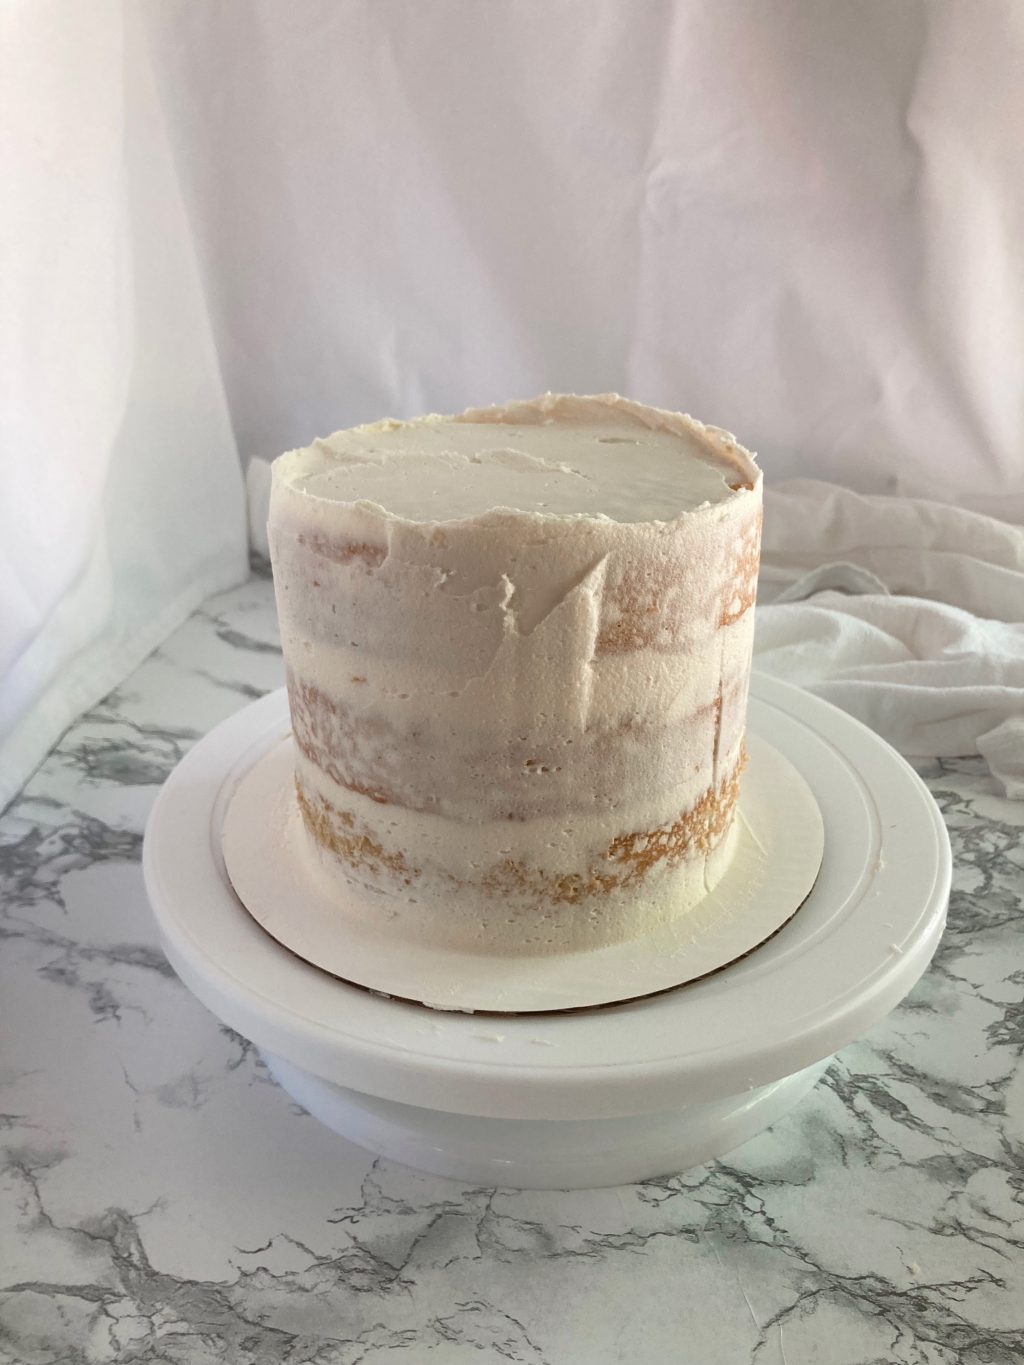
The first step to frosting your cake is to stack, fill, and crumb coat. The crumb coat is a technique of using a thin, messy layer of frosting to lock in all the ugly crumbs. The cake is chilled like this so that it hardens, making it easier to frost the pretty outside layer. If you’ve ever spread frosting over a cake and found it full of crumbs, you know how difficult it is to get the crumbs out once they’re there!
Start by leveling your cake layers. You can use a cake leveler, available at craft stores. A serrated knife works well too.
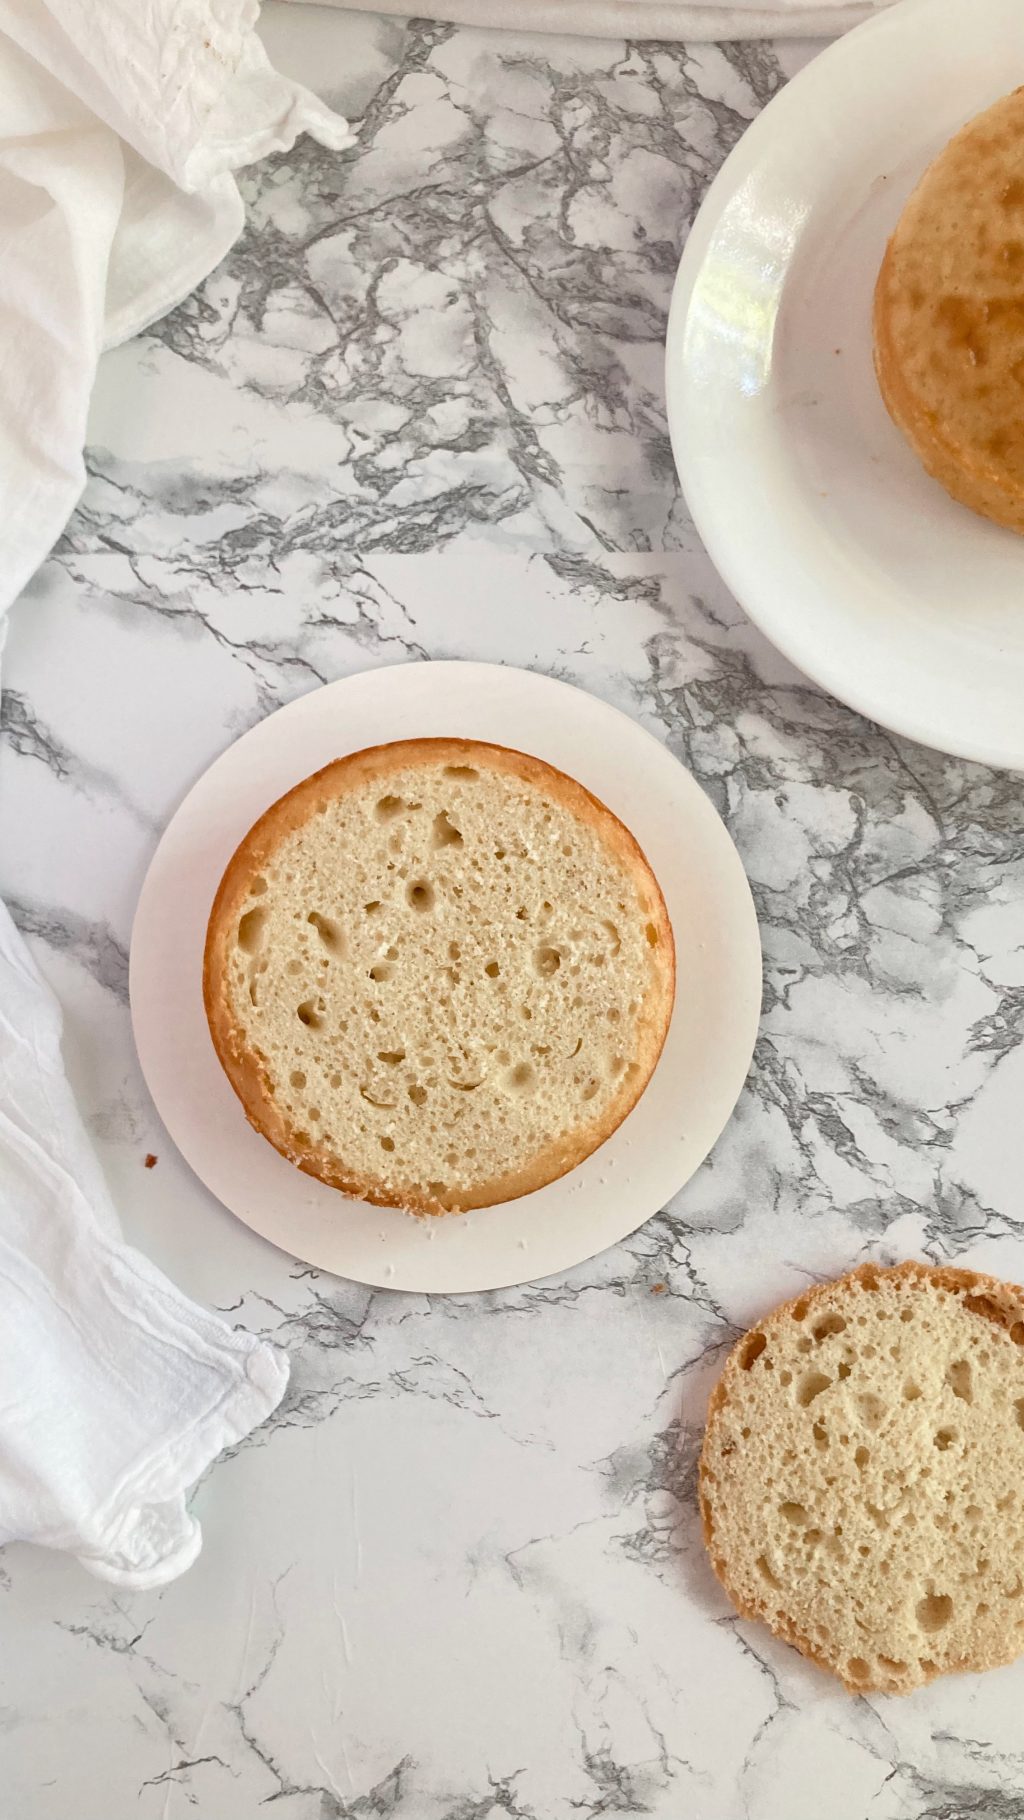
After leveling, I wrap my cake layers and freeze for anywhere from about twenty minutes to several days. I like to work with cake that’s already frozen. It helps keep those crumbs from coming off, and every little bit helps!
To start off, spread a little bit (a tablespoon or two) of icing on your cake board and spread it thinly to glue your first cake layer to your board.
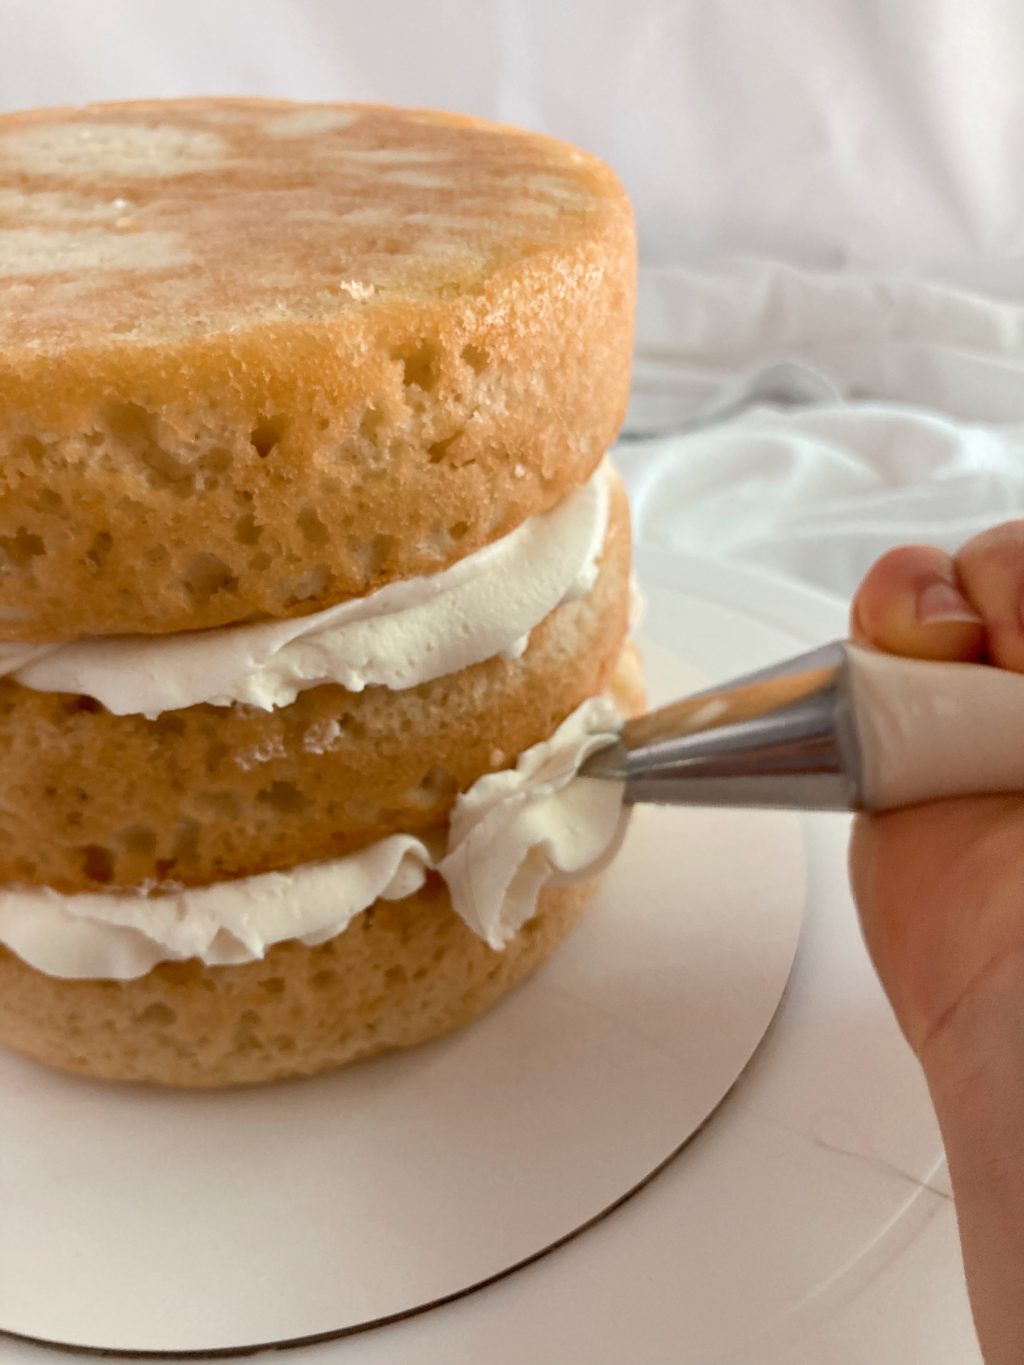
With your piping bag, outline a circle around the edge of your first cake layer.

We call this the dam. If you want to fill your cake, you can add jam, lemon curd, custard, or mousse to the middle. Otherwise, just fill it with frosting. Don’t overfill! Use your angled spatula to spread your filling evenly, and top with the second cake layer. Repeat the process until all your cake layers are stacked.
Next, prepare a large piping bag with any sort of large tip. I like to use my star tips as a one-size-fits-all tip, but you could also use an open coupler or a tip called a base icer – especially made for the base layer of frosting.
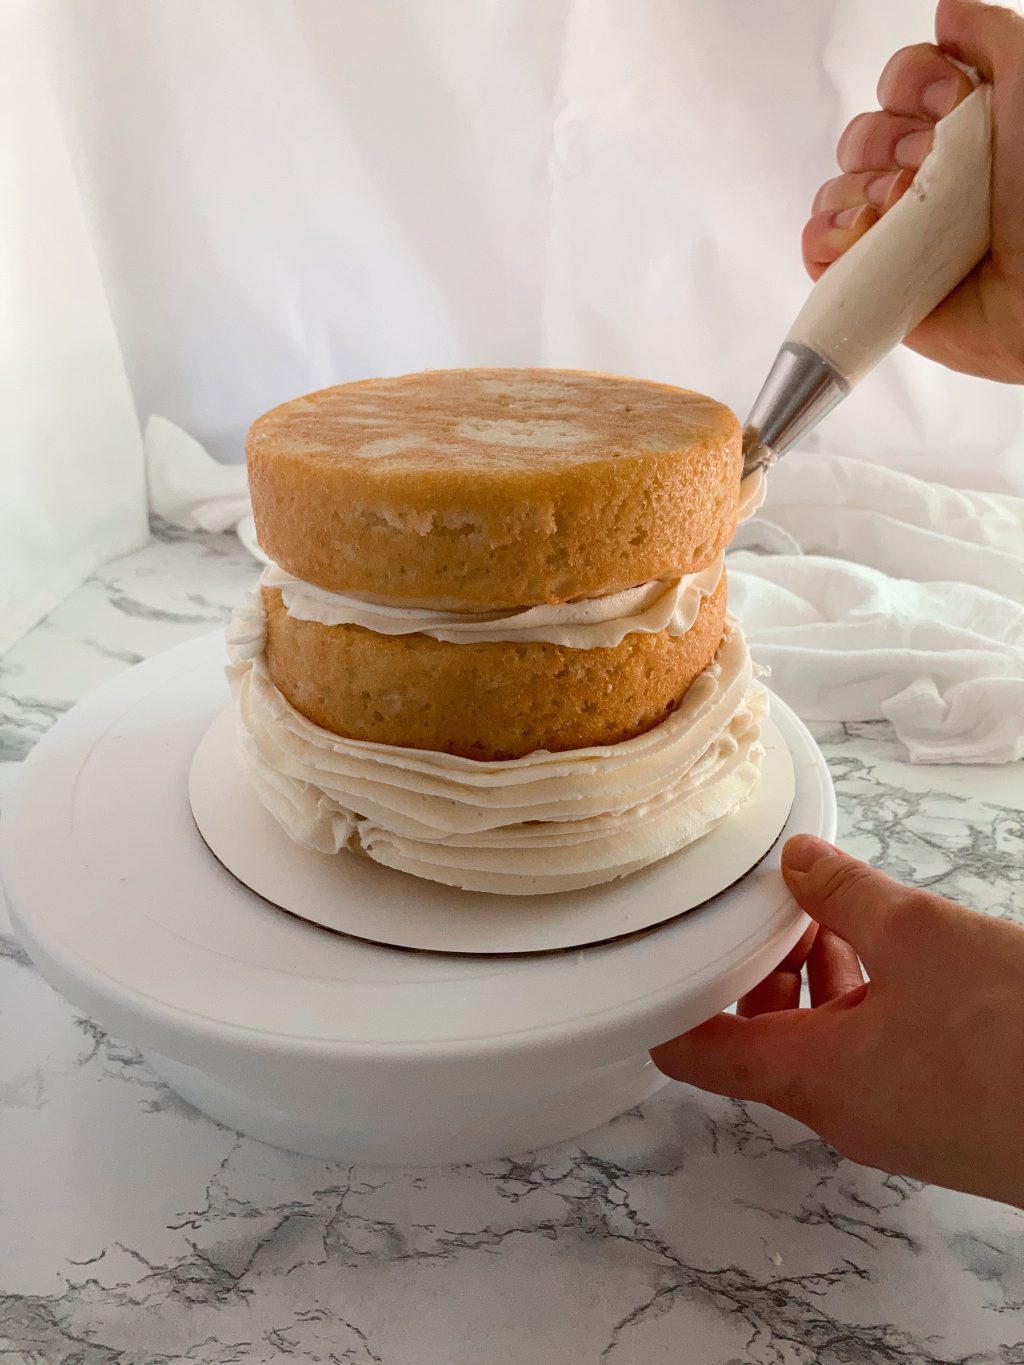
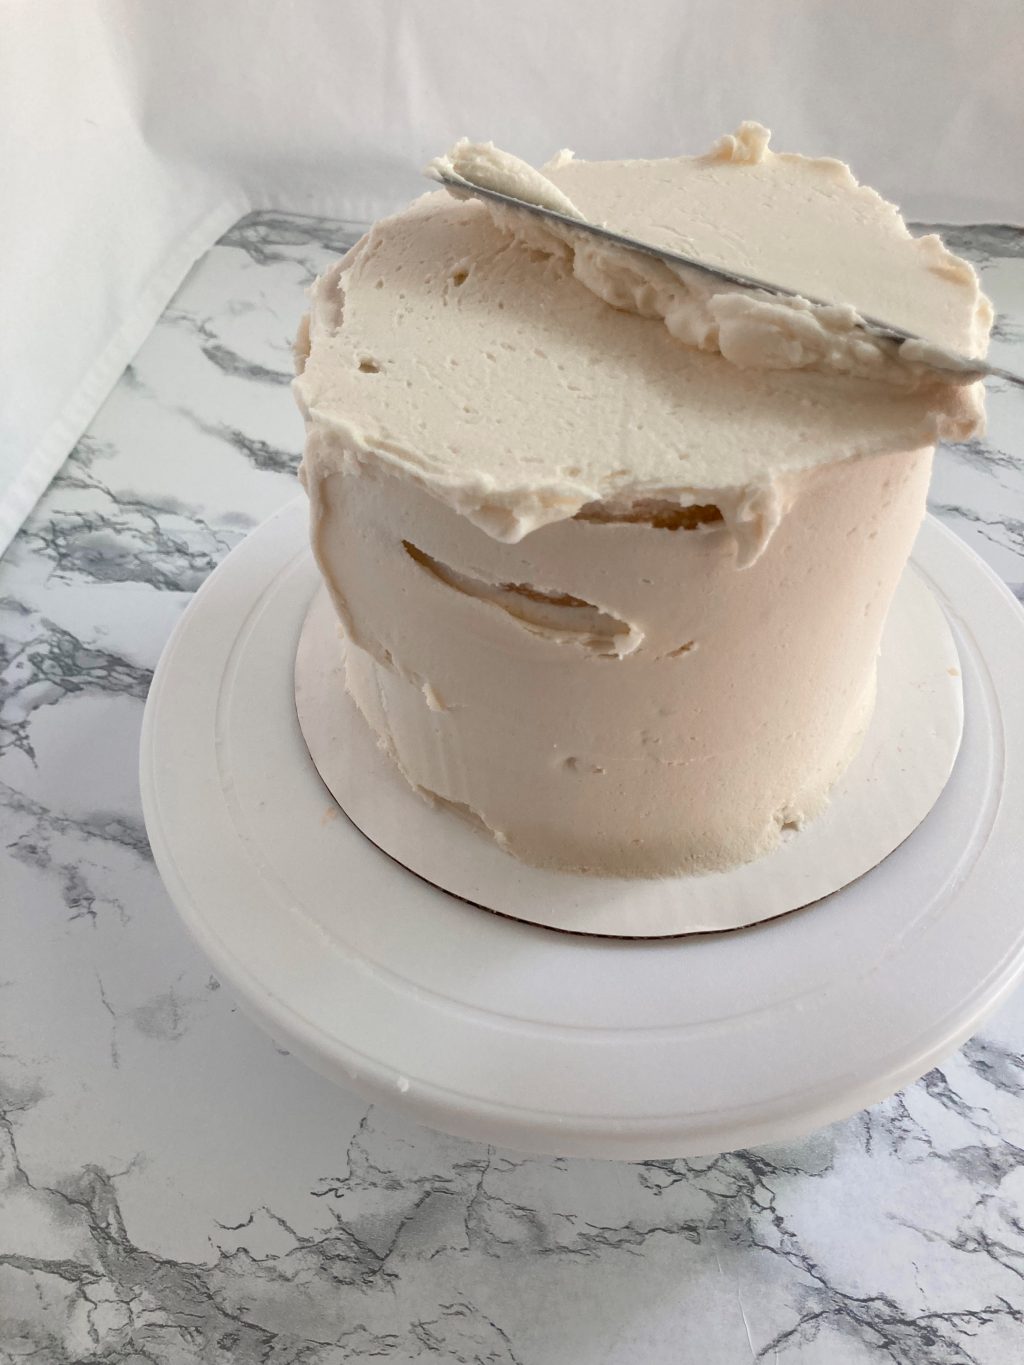
Pipe a layer of frosting all over the sides of your cake. For the top, you can simply plop a dollop of frosting.
Using your large spatula, employ a smoothing motion to spread this frosting along the sides and top. This can be imperfect, it’s simply to adhere the frosting to the sides of the cake.
Next, use your bench scraper to scrape the frosting thin against the sides while turning the turntable in a smooth motion.
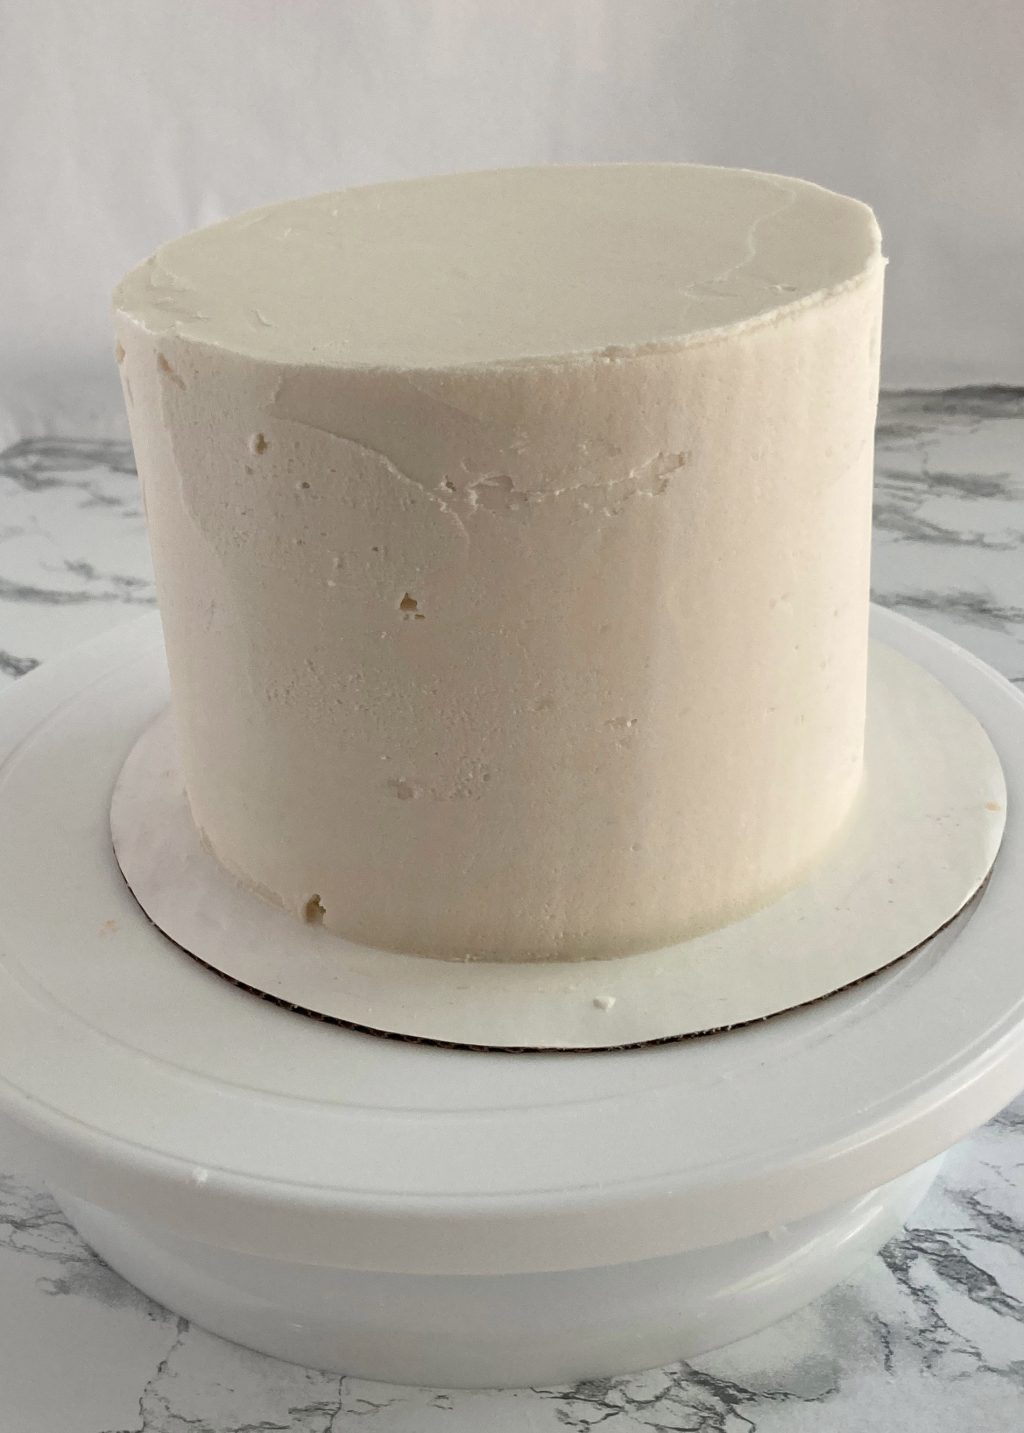
And that’s it for the crumb coat! Chill your cake in the freezer for about twenty minutes.
Now it’s time for the base ice.
Cake Decorating How To: Base Ice
Refill the piping bag you used for the crumb coat with whatever color you want your base layer of frosting! Repeat the same process of piping buttercream all over the whole cake.

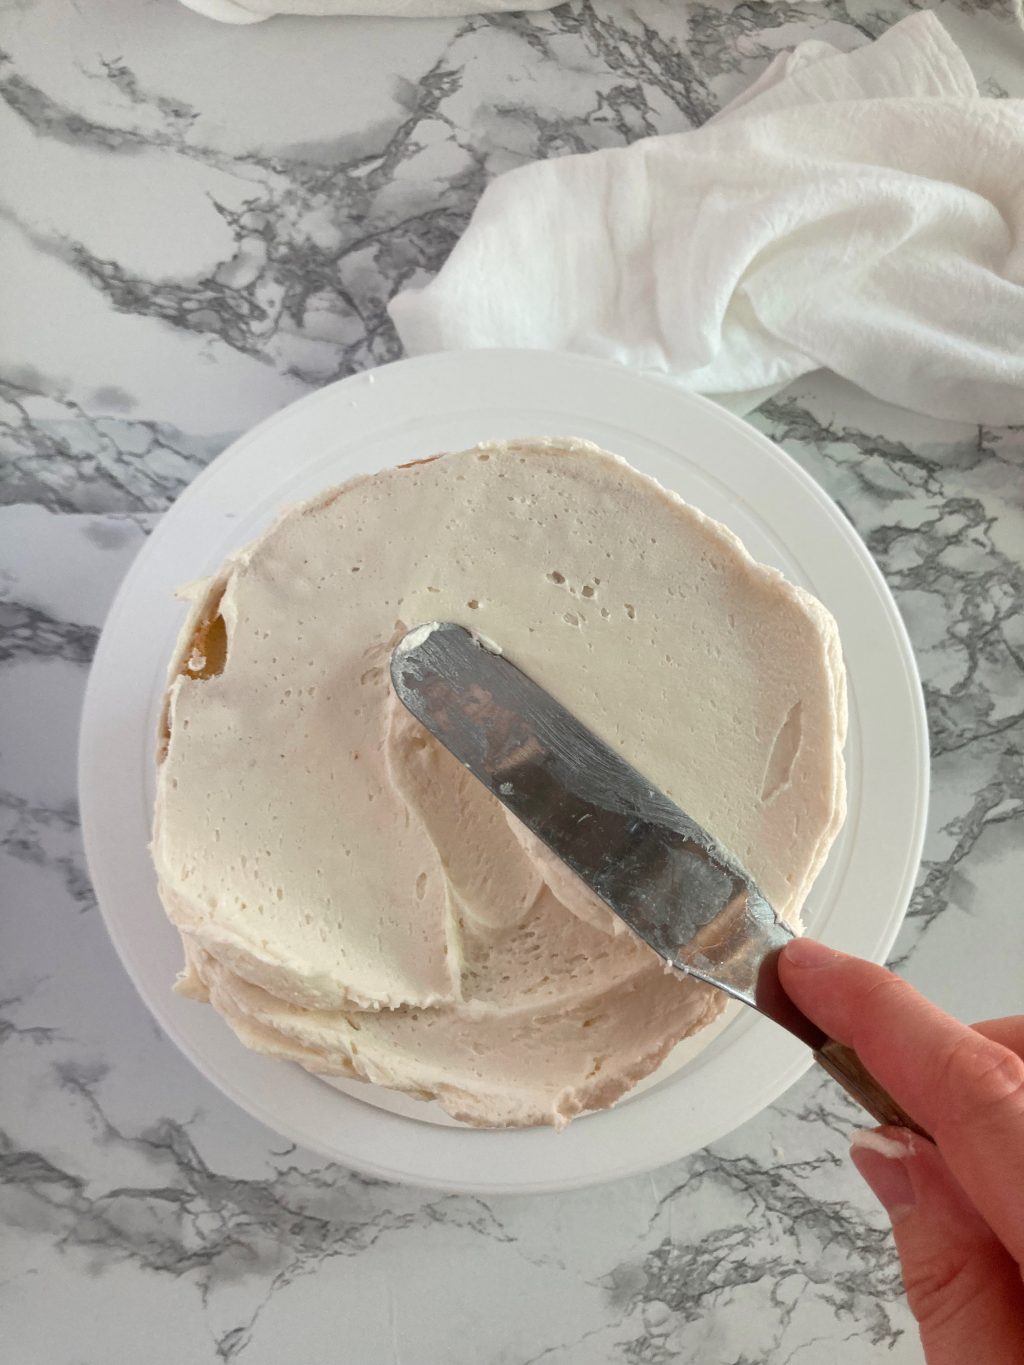
Smooth the frosting with your spatula. For the top, use a brushing motion to remove excess frosting on the edges, wiping your spatula after each swipe. Smooth the frosting evenly over the top, in as few motions as possible.
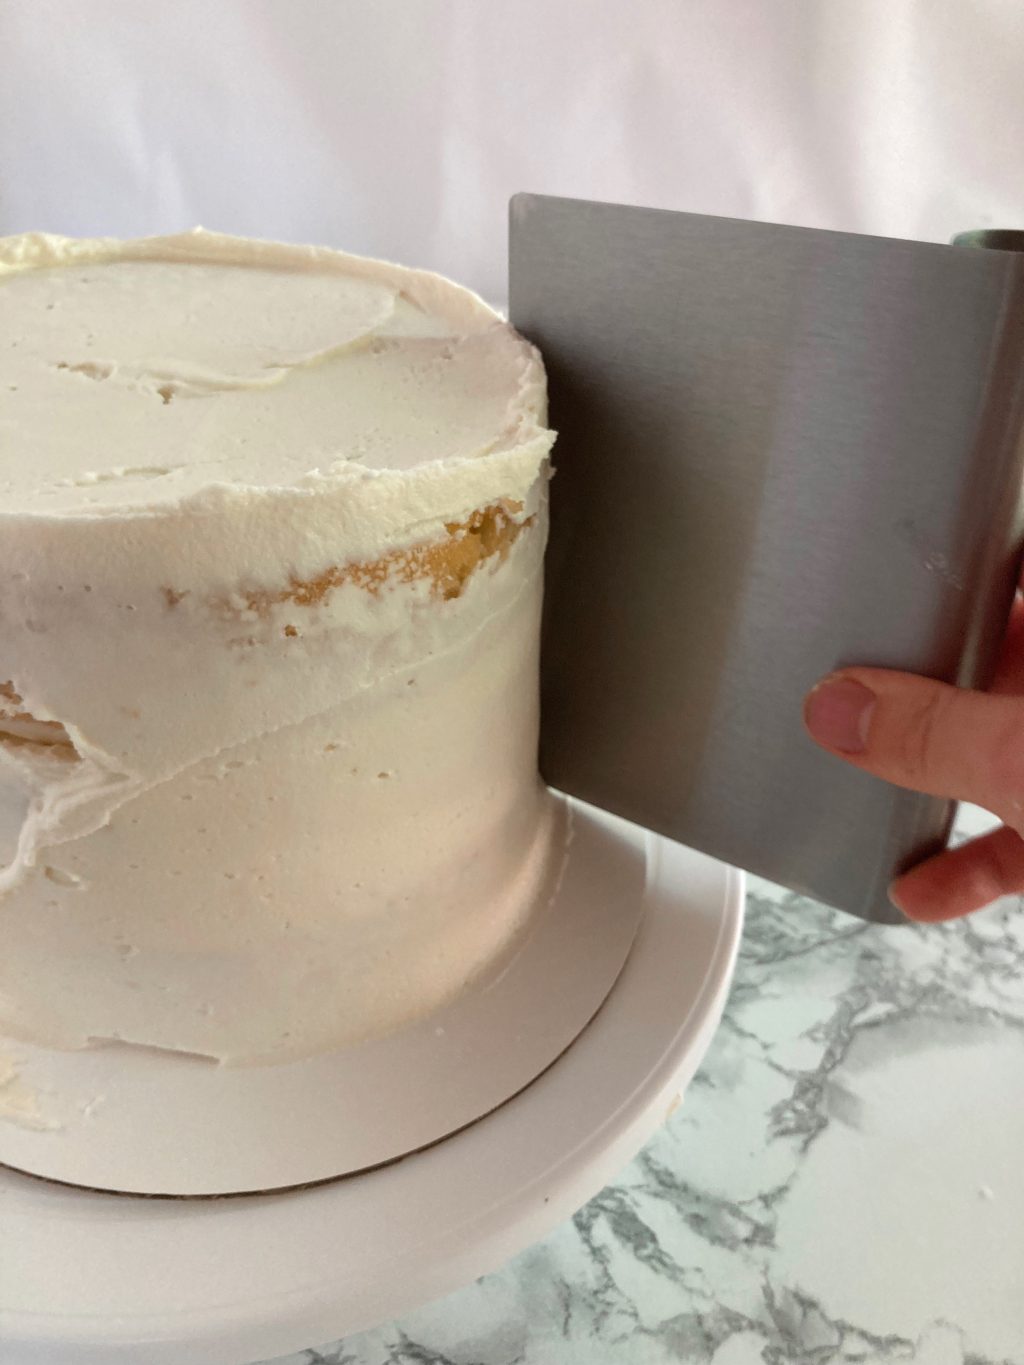
Now you’re going to take your new best friend, the bench scraper! Hold the bench scraper at a right angle to the cake, turning the turntable in one smooth motion with your non-dominant hand.
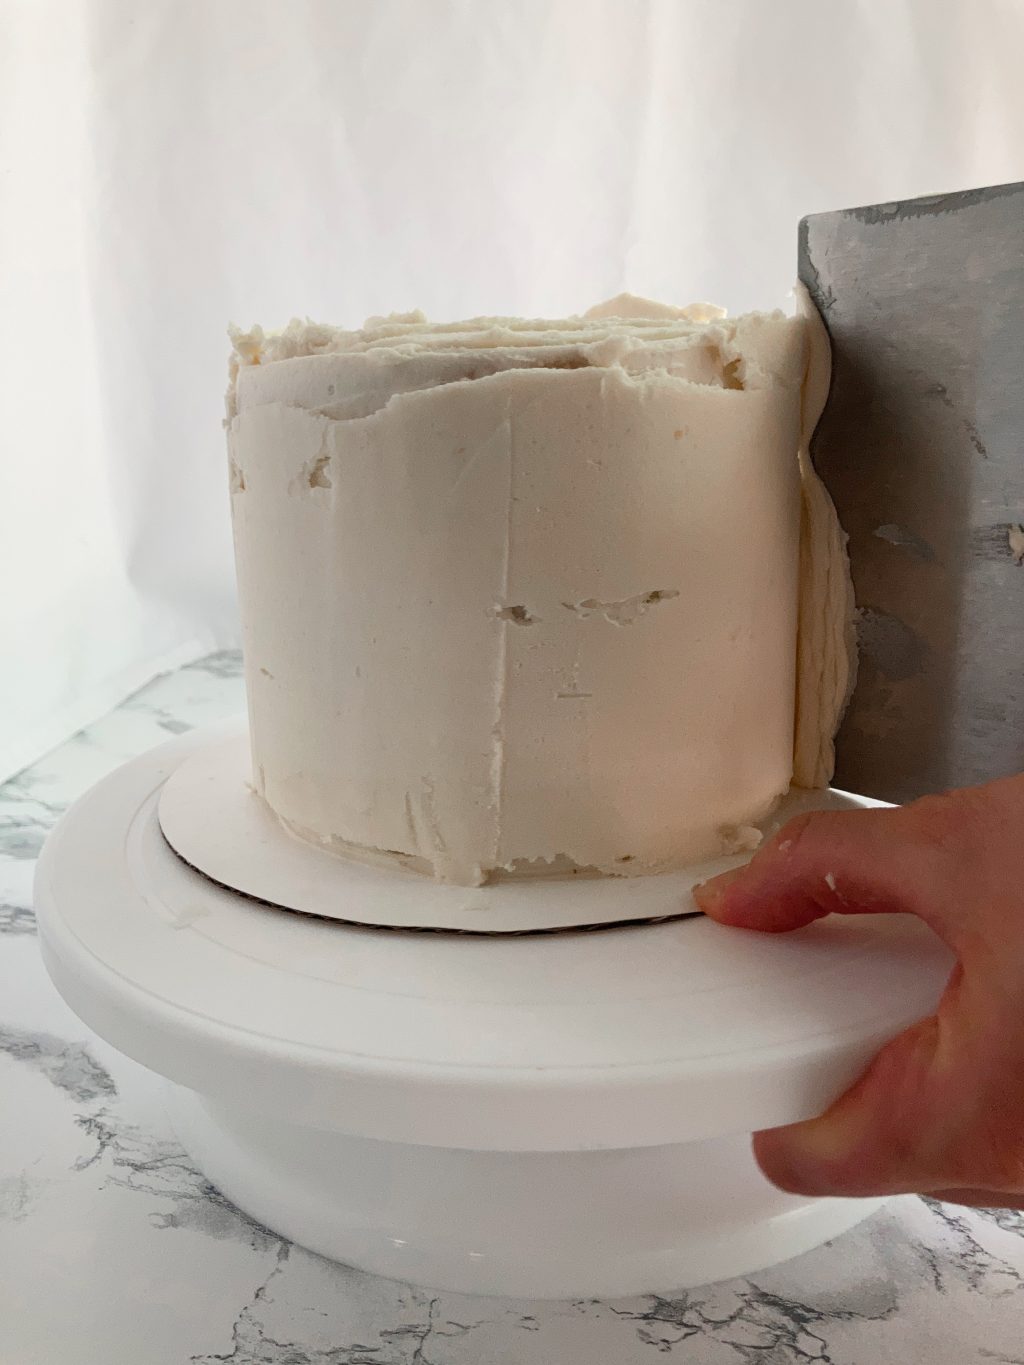
Clean the bench scraper, and repeat the same brushing motion on the top edges to remove any excess. Finally, smooth out the top surface with the bench scraper.
If there are any imperfections, you can fix them by freezing your cake for 10-15 more minutes, piping a little more frosting in the gaps, and smoothing out again using the bench scraper.
Putting It All Together
Now I’m going to show you a few techniques you can use to bring together all that you’ve learned!
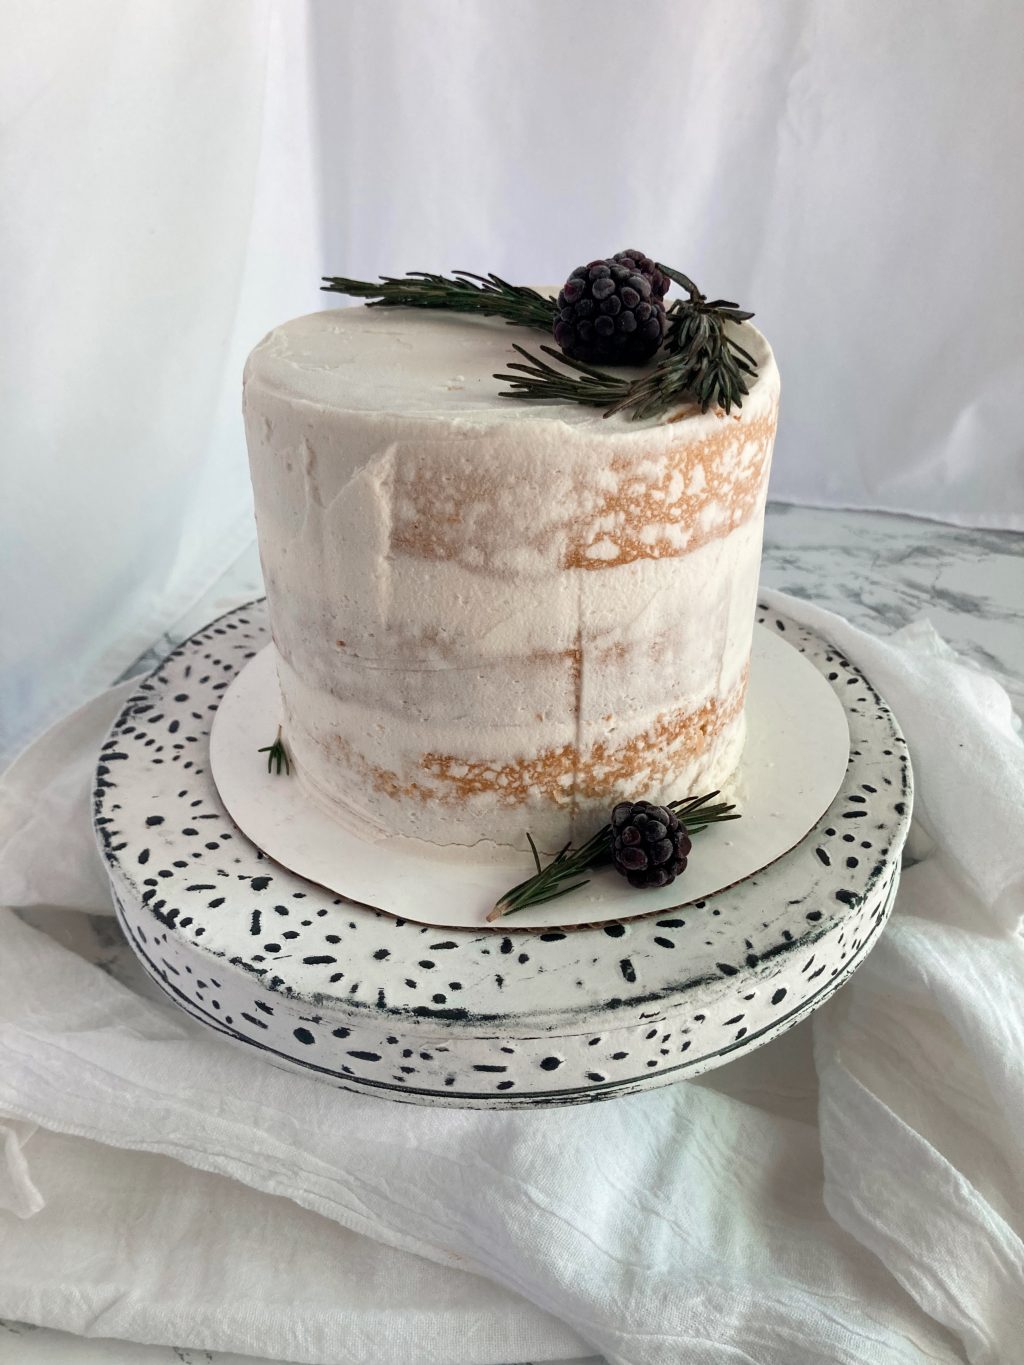
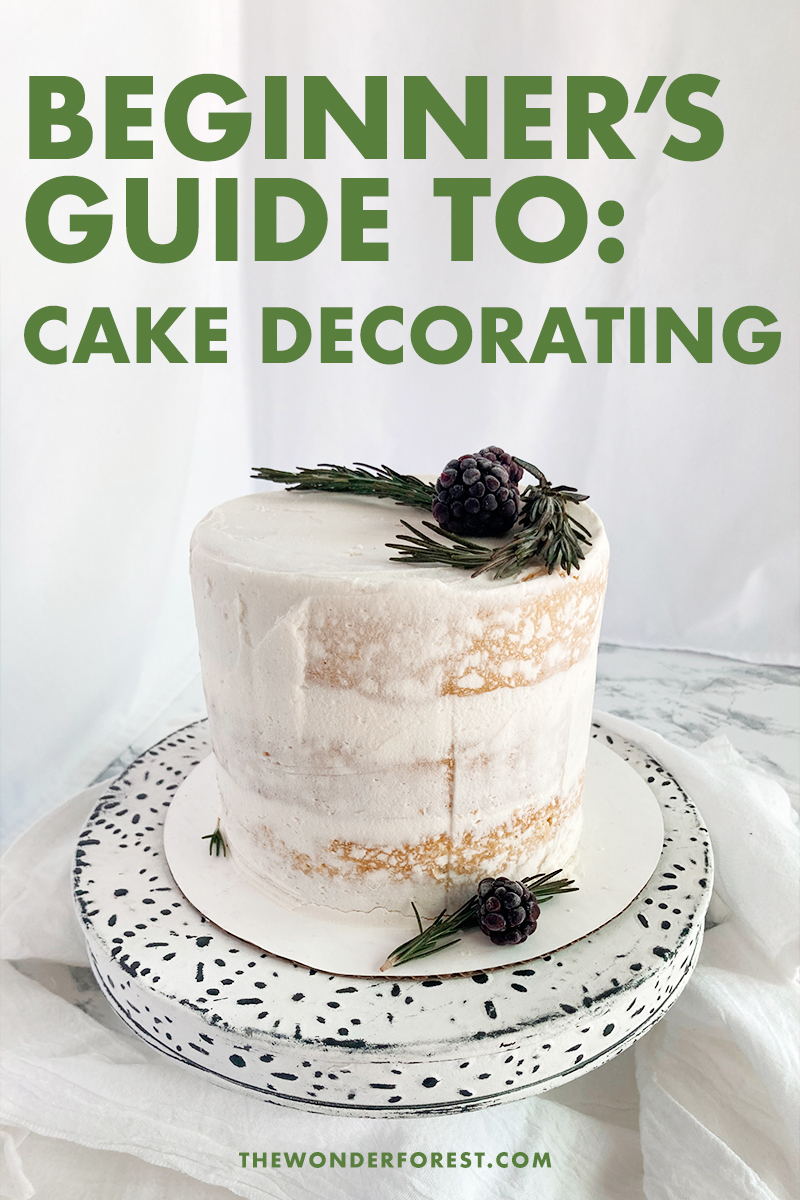
How To Make a Semi-Naked Cake
If you’d like to make a semi-naked cake, stop after the crumb coat. All you need to add is some food-safe flowers, greenery, or berries. I used rosemary and blackberries. It’s much easier than you’d think to make beautiful naked cakes!
Cake Decorating: Textured Technique
This rustic technique is extremely popular for weddings!
Immediately after base icing your cake, use a spoon or a small spatula to press an indentation into your cake while spinning the turntable. Stop when you reach the top to clean the spoon/spatula. On the top of the cake, repeat the same technique in a spiral.
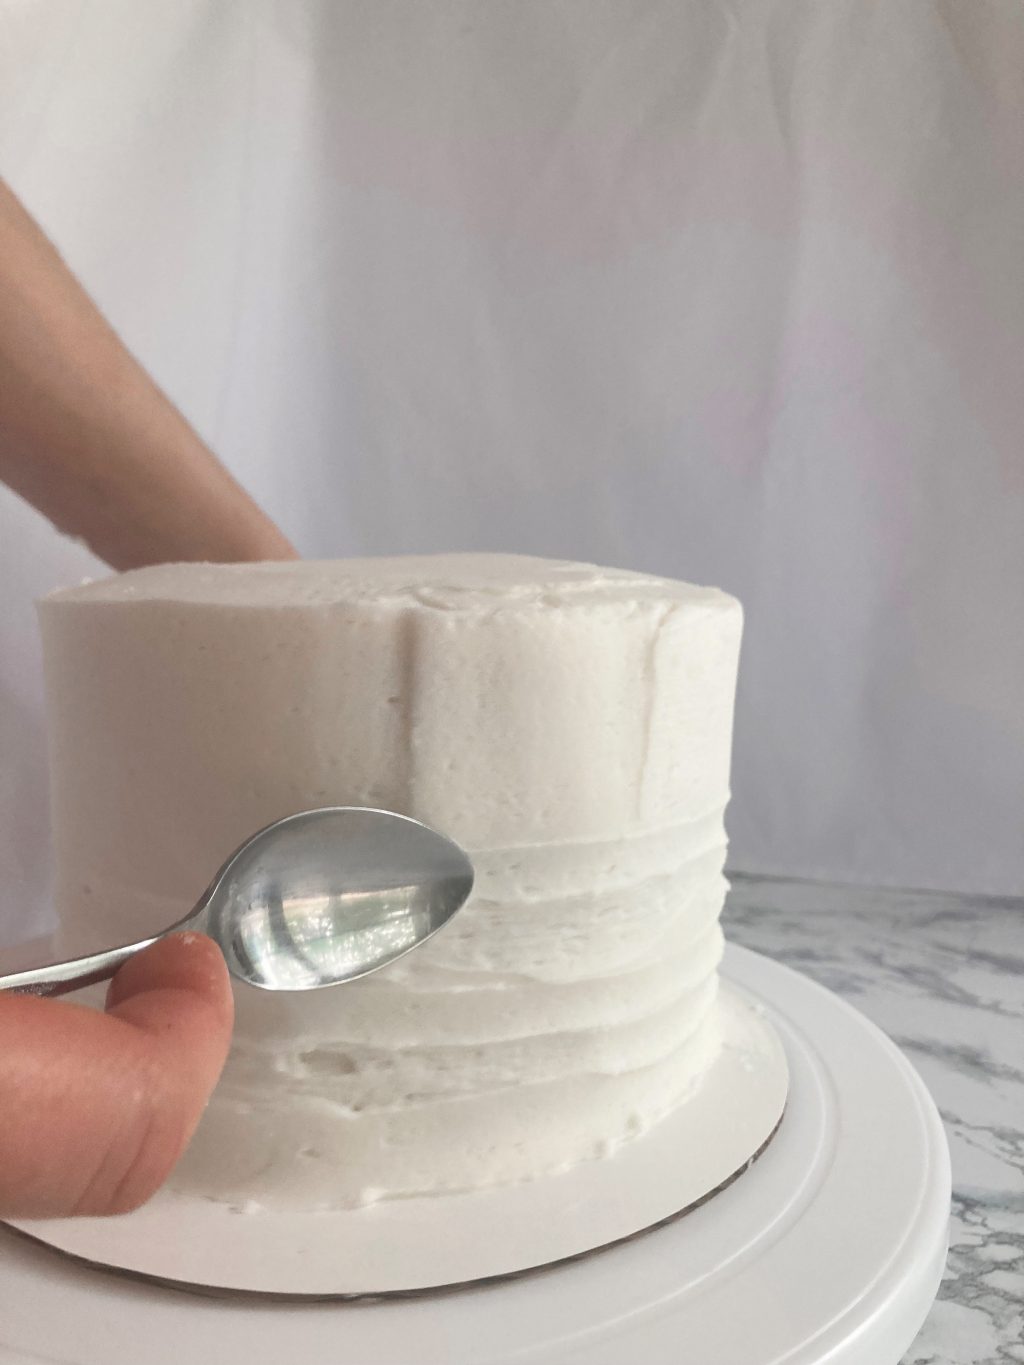
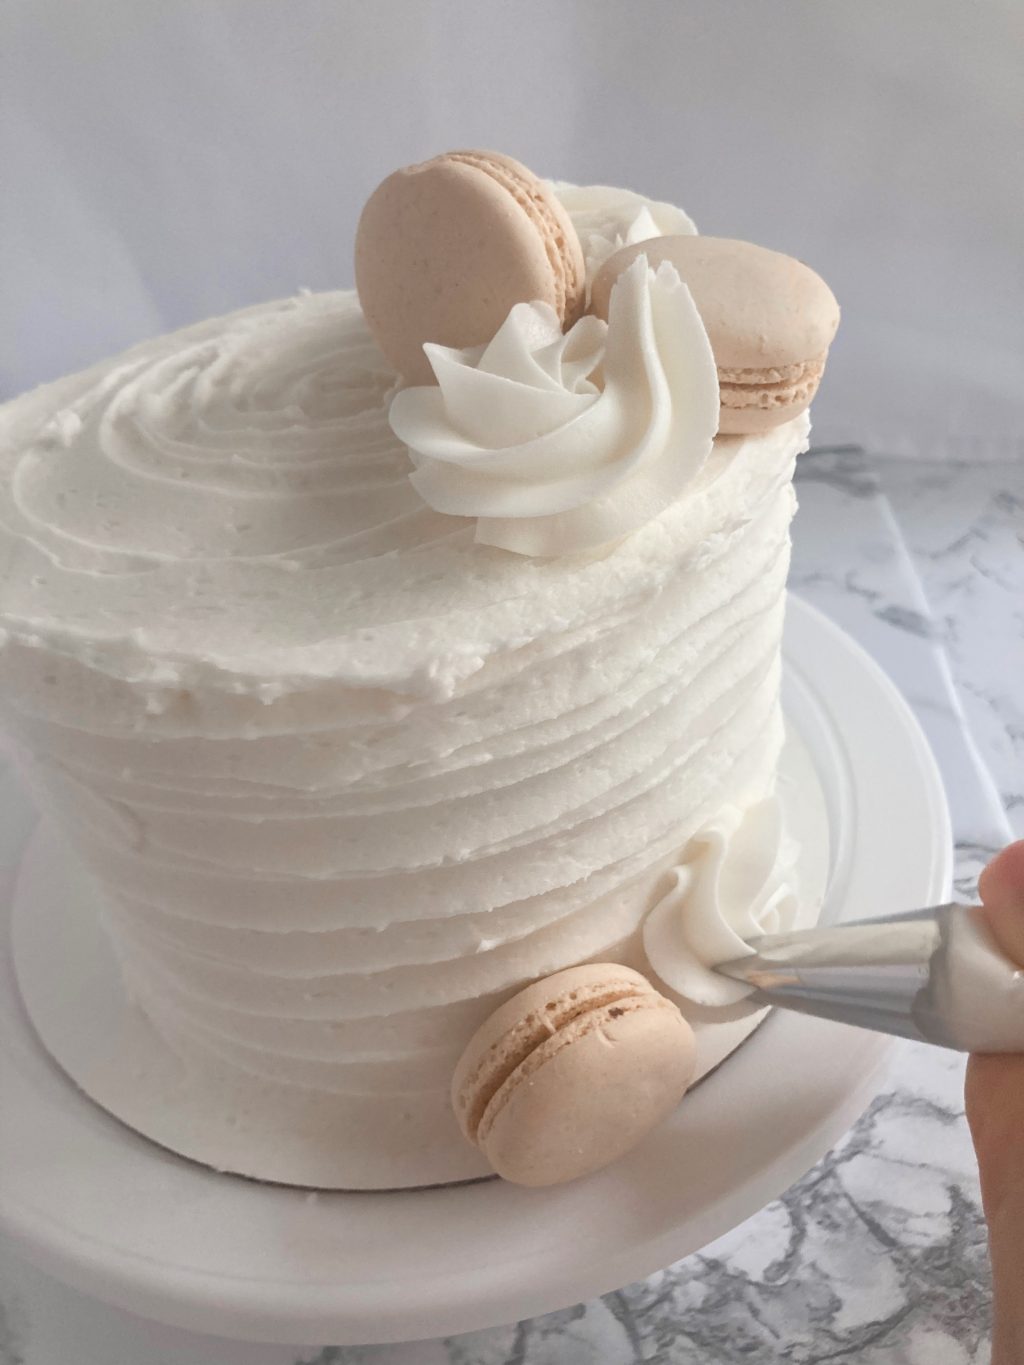
You can touch up the edges by running your spoon one more time over the top side at the corner if needed. This technique is perfect for beginners because the rustic, imperfect look is just what makes it so striking! You could use flowers, greenery, or berries (as with the naked cake) to top this cake, and it would be beautiful. I opted for some store-bought macarons and rosette swirls.
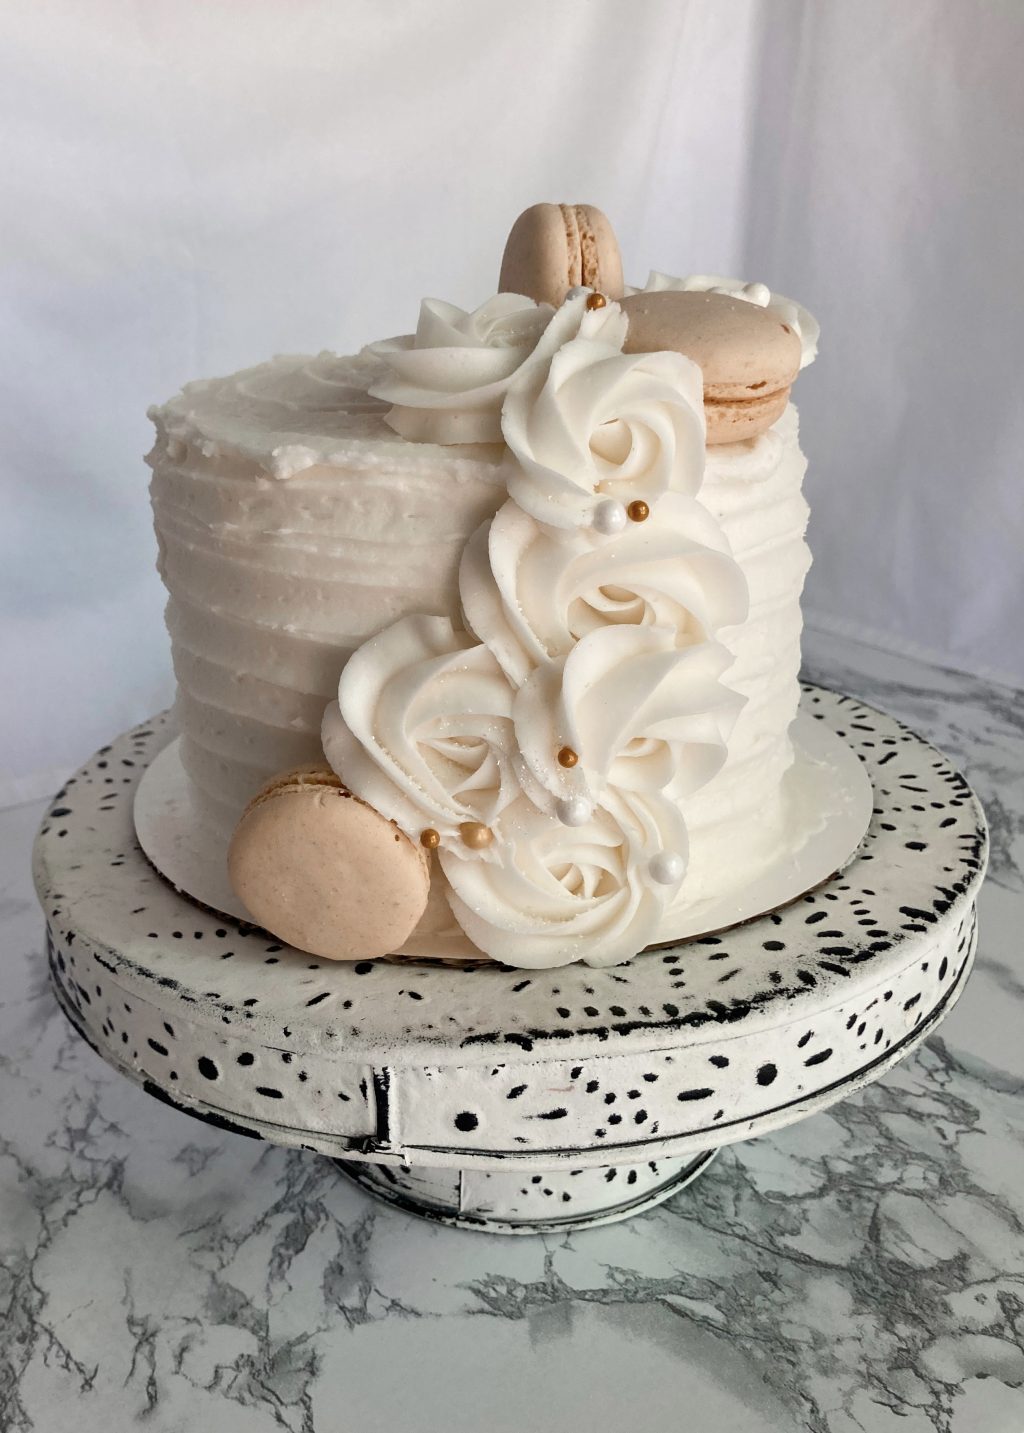
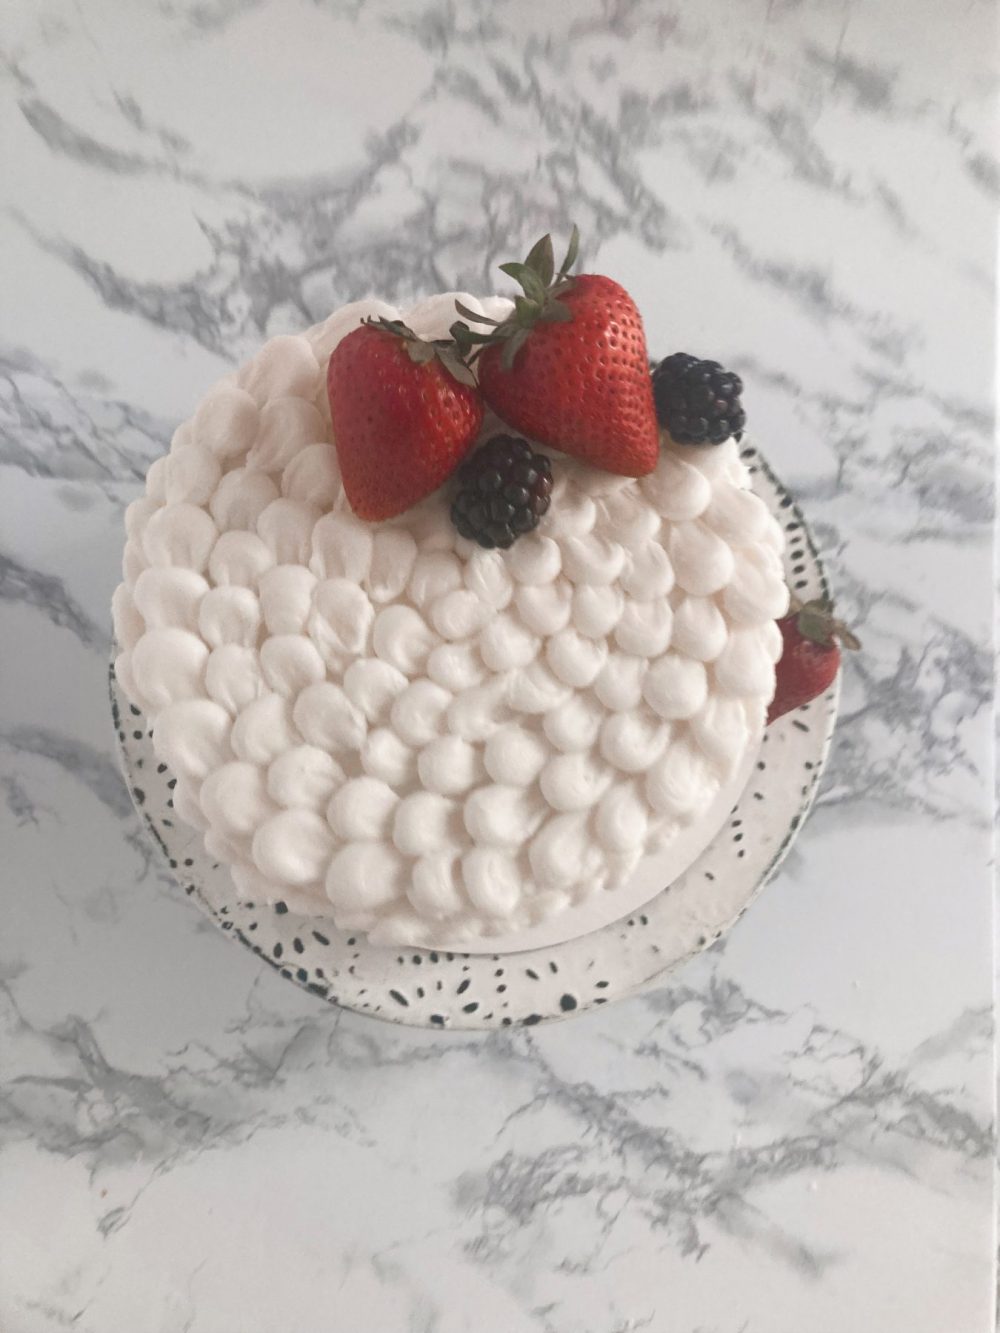
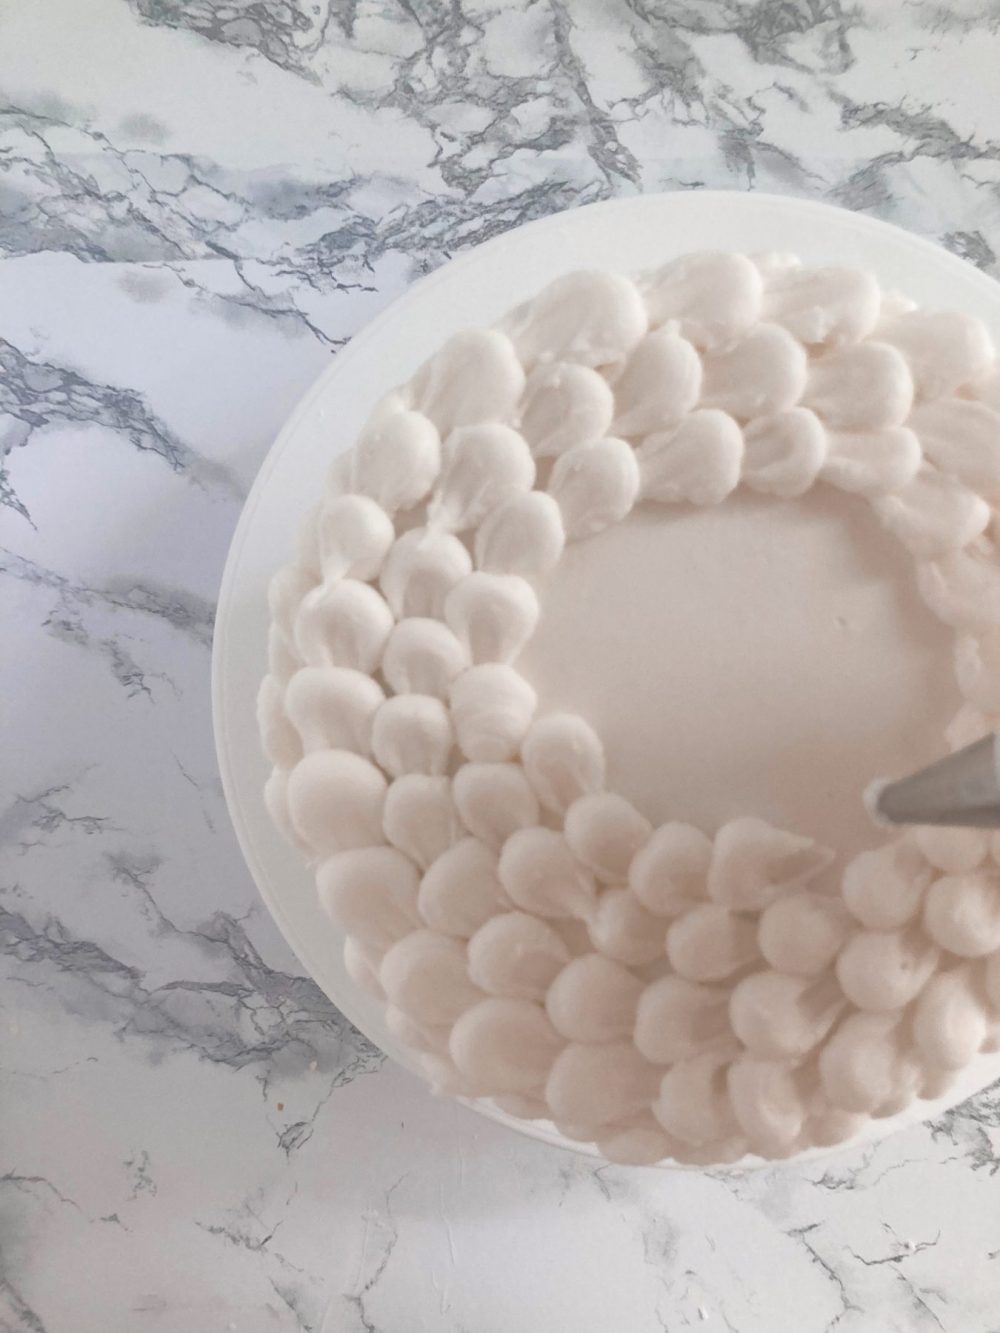
Cake Decorating How to: Petal cake
For this technique, crumb coat your cake, but stop before the base ice. Prep a piping bag in your base colour (I used white, but pink or mermaid colours also look beautiful with this technique!) with a coupler and a round tip. You could use any size from 8-10, or even an open coupler.
Pipe a column of dots up the side of the cake. After each row, using a small spatula or spoon, press down and swipe on each dot, cleaning after each swipe. Since I used a smaller size tip for the petal, I simply brushed the decorating tip sideways after each dot, as with the beaded border.
Repeat all around the cake and on top!
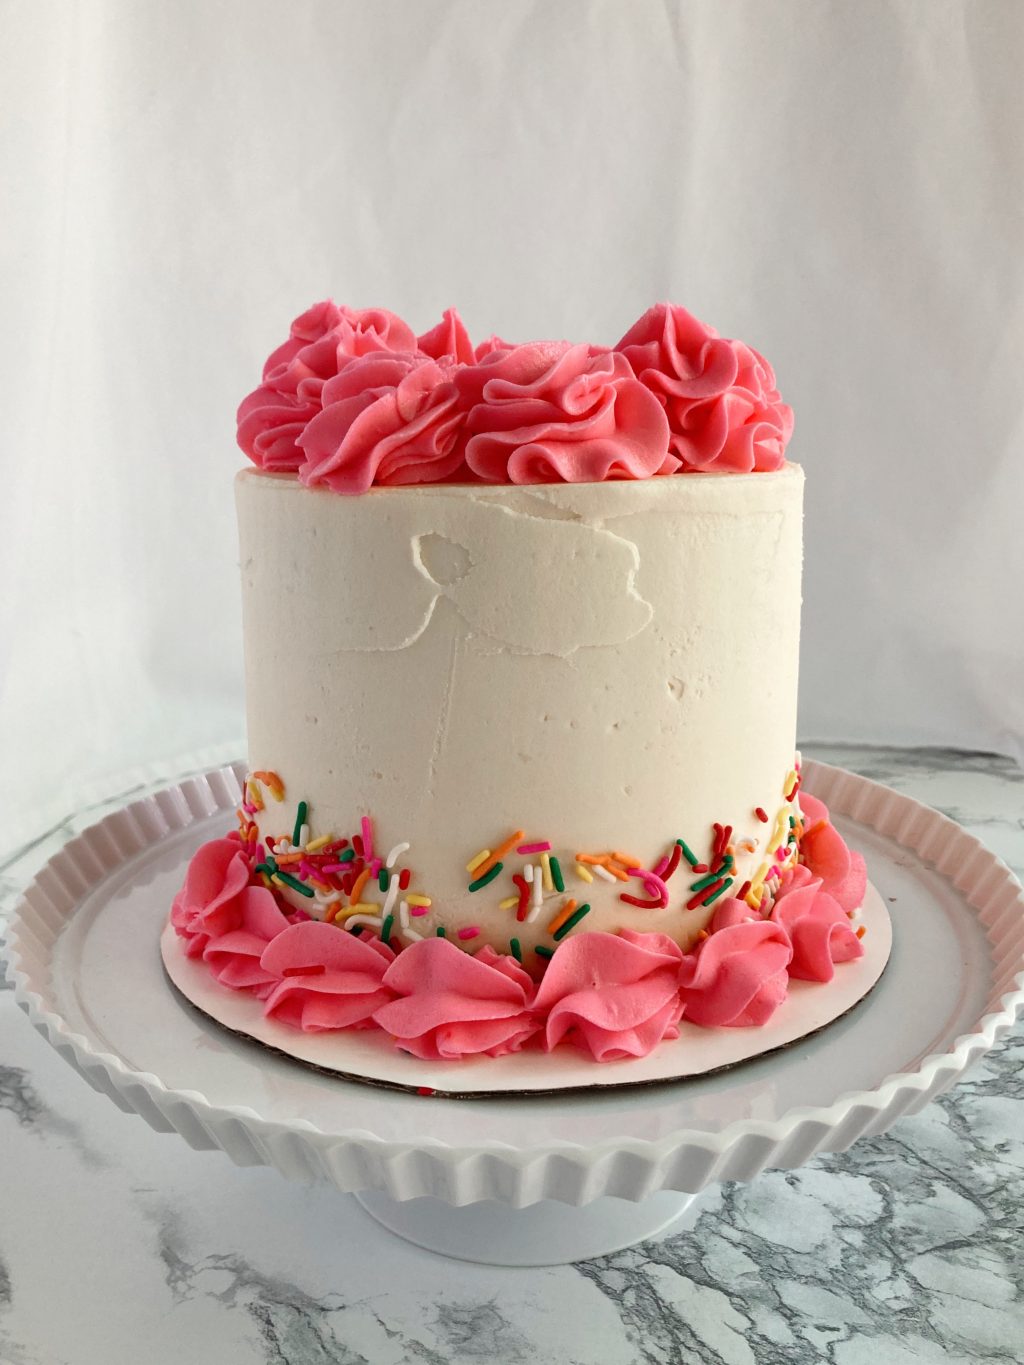
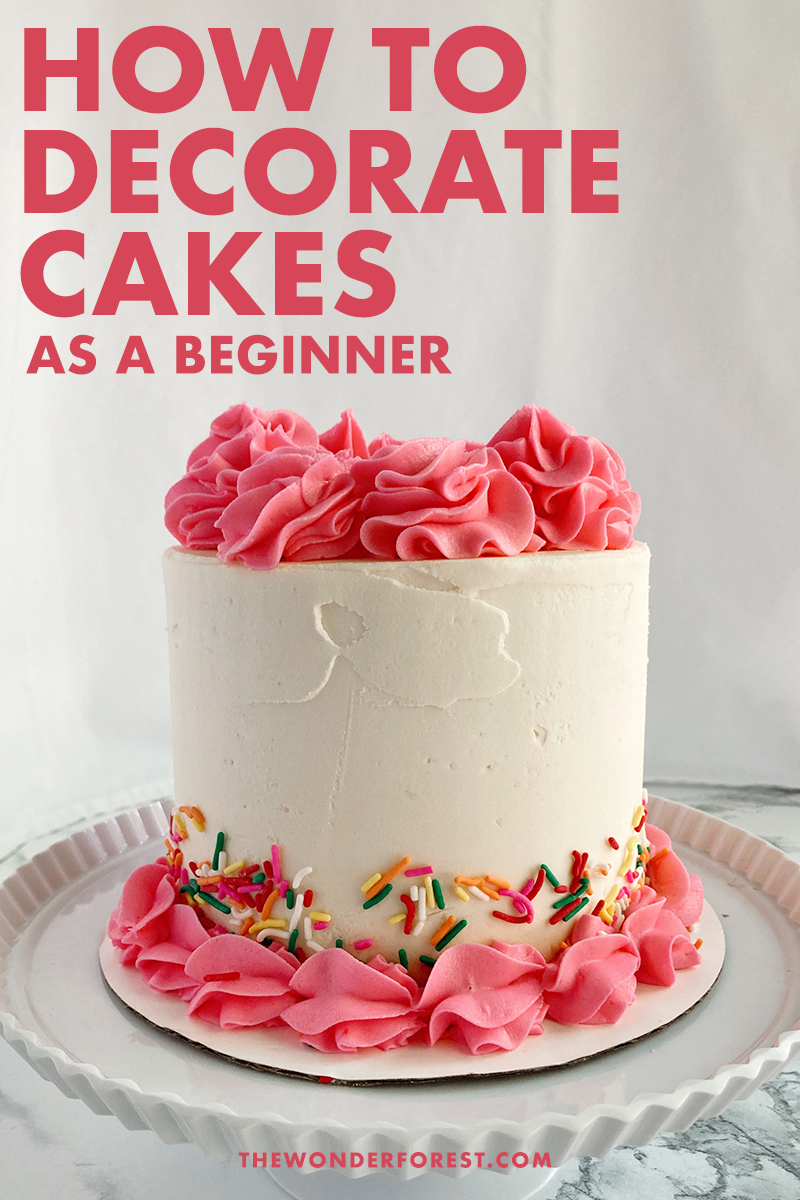
Sprinkle Border and Swirls
This technique leaves so much room for creativity! The template is just a starting point as you can be creative by adding stripes, changing out the swirls for a rope or shell border, adding a drip, adding in the watercolour technique–pretty much whatever you can imagine!
After base icing the cake, chill in the freezer for about twenty minutes.
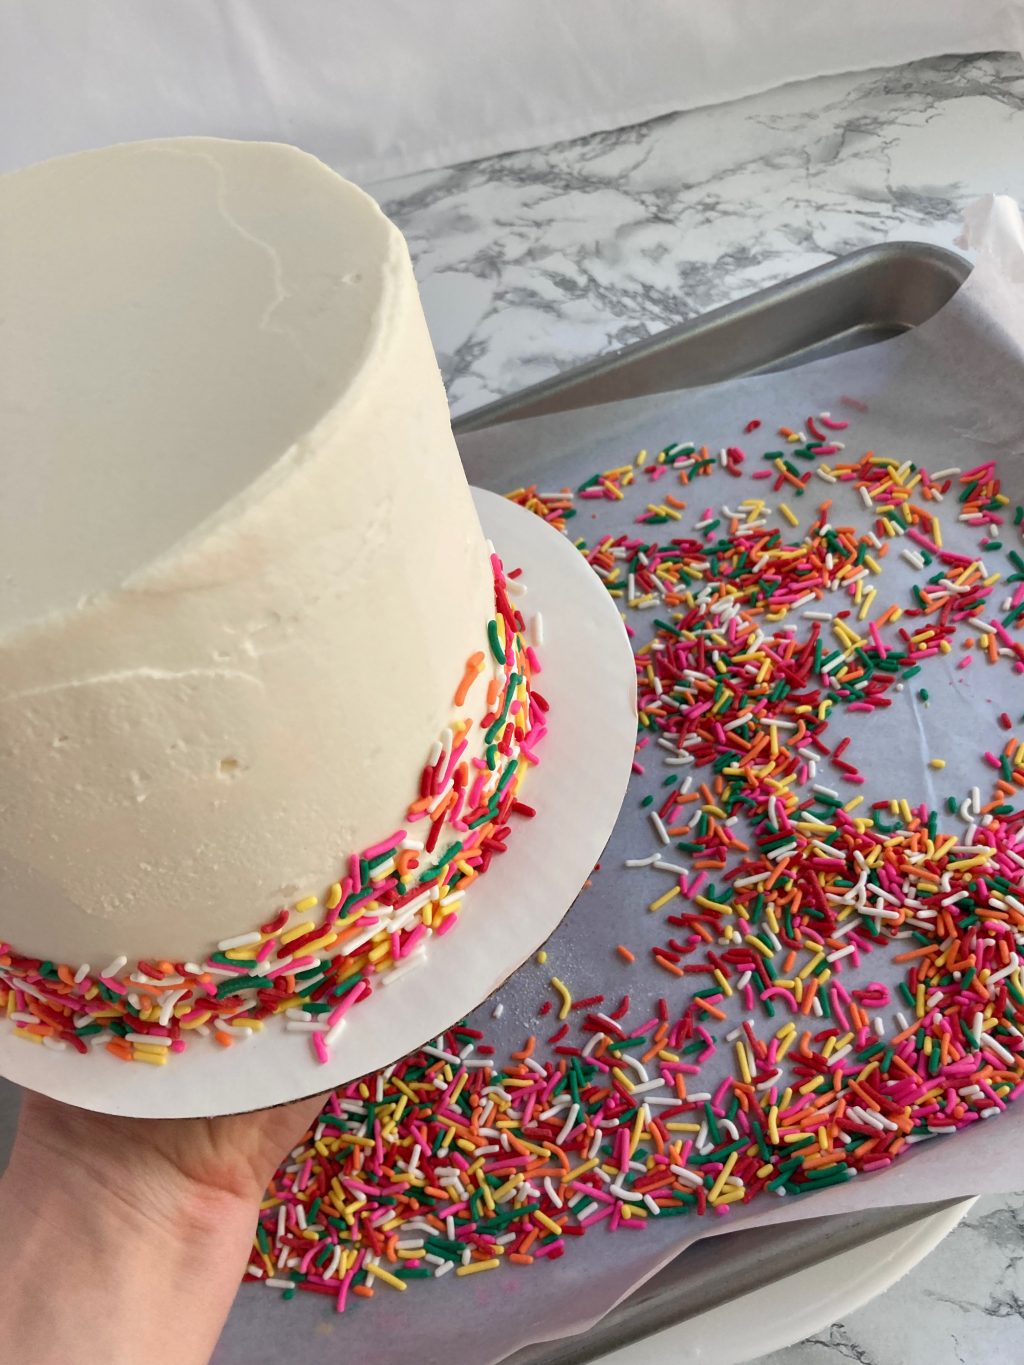
Place your sprinkles in a wide-mouthed bowl or on a sheet pan lined with parchment. When chilled, hold your cake in one hand, while your other hand scoops the sprinkles and presses them onto the bottom inch or so of the cake, creating a border. (I love the imperfect look of a jagged sprinkle border, but for a clean border you can also wrap a strip of parchment around the top of the cake where you want the sprinkle border to end.)
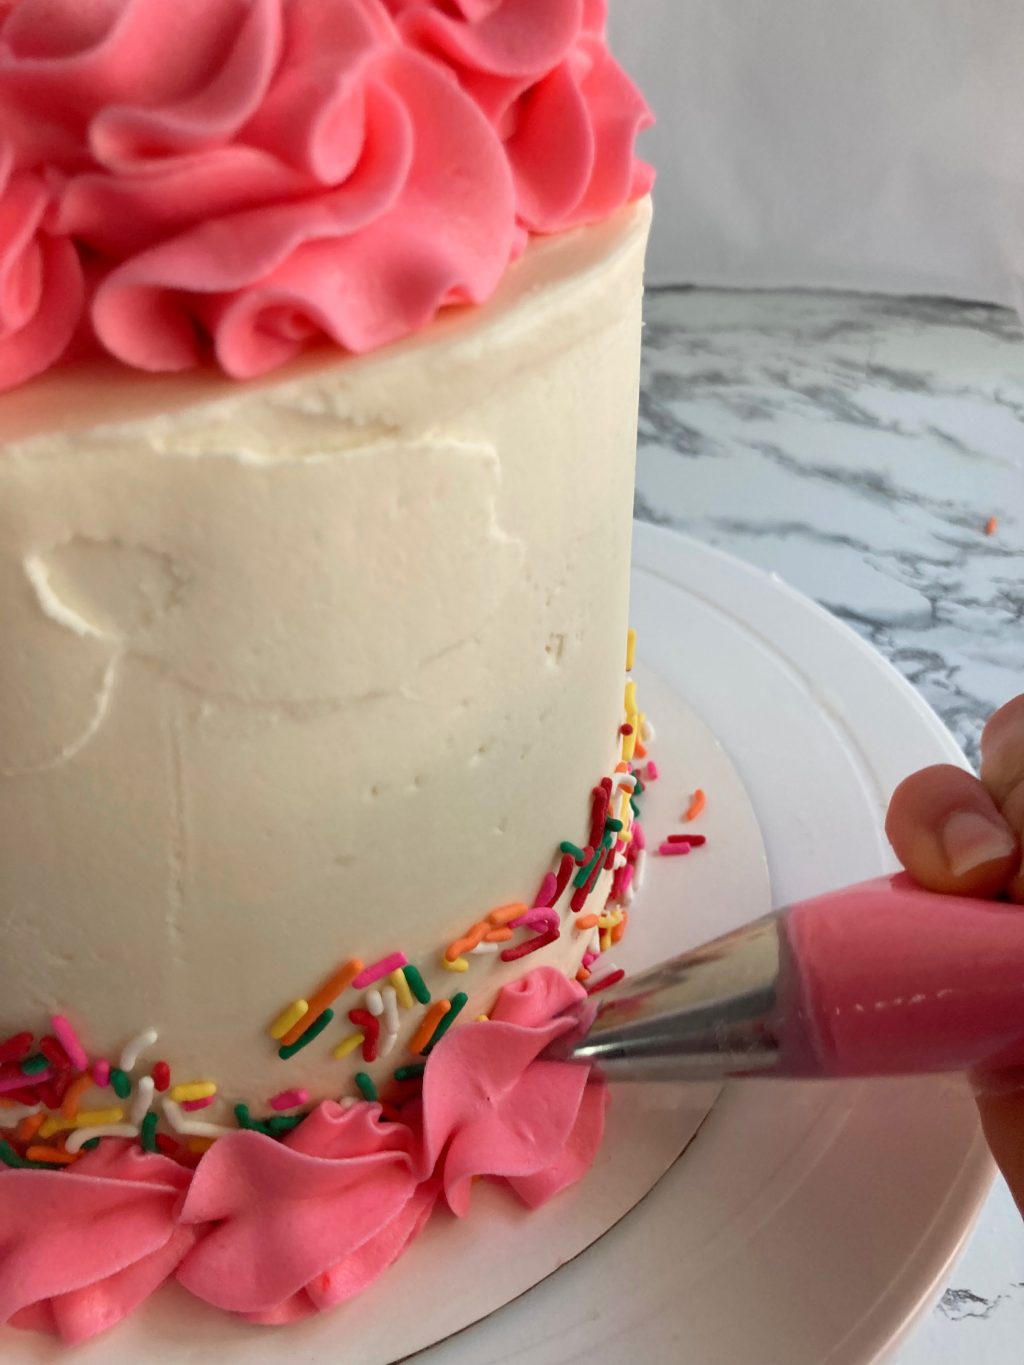
I finished this cake off with swirls on the top and a shell border on the bottom.
We hope these decorating ideas spark your imagination! Happy decorating!
PIN THIS:
Last Updated on