
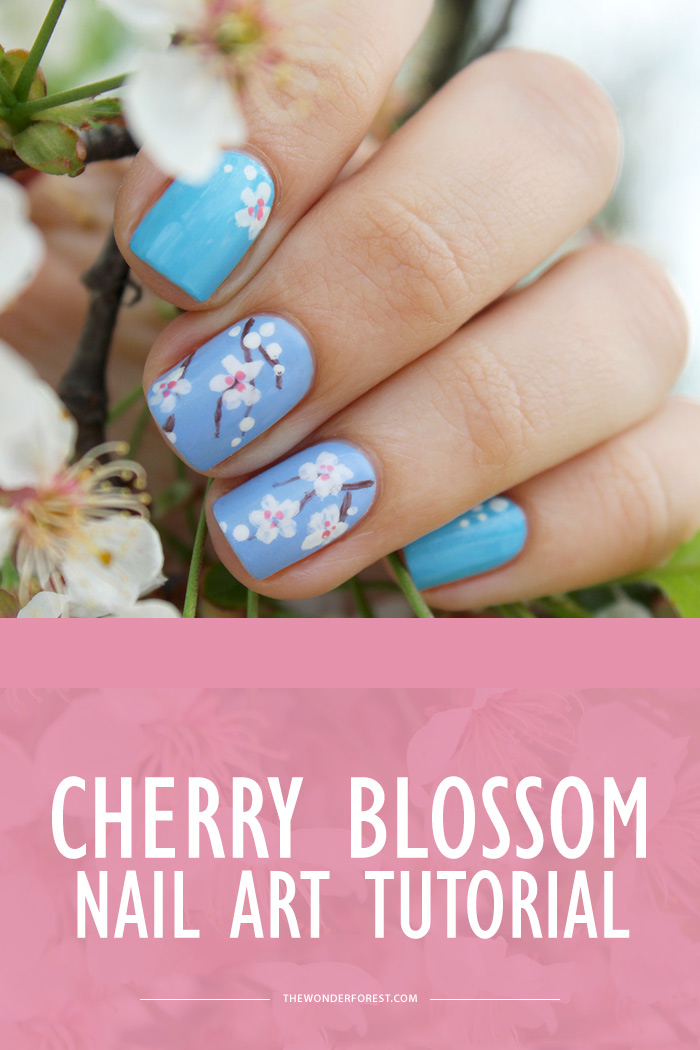
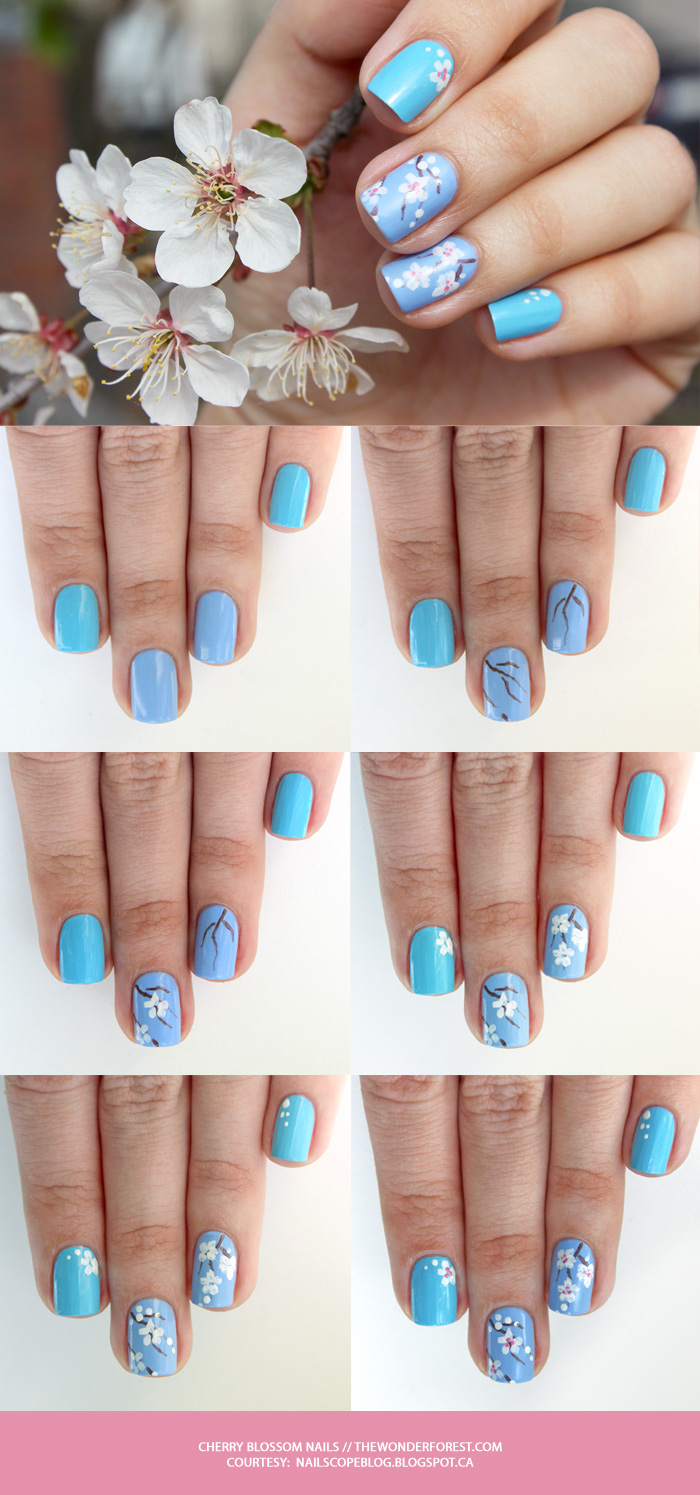
It’s the time of the year when everything is beginning to bloom. It’s so beautiful outside, and I just love to wander around the neighbourhood, take photos and get inspired. And that’s how Cherry Blossom Nails were born! These nails are inspired by delicate blooms and blue sky.
You Will Need
- Base coat and top coat
- Blue, brown, white and pink nail polishes
- Striping brush
- Detailing brush
- Dotting tool
Instructions
- Paint nails light blue. Mix two different blues for more interesting look.
- Using a striping brush and brown nail polish, draw some thin branches.
- Then take white nail polish and start to draw flower petals with the detailing brush.
- Continue with more flowers on other nails.
- Add some dots with white nail polish to your nail design.
- In the end, put small pink dots in the center of each flower and apply fast drying top coat.
Used
- OPI Nail Envy
- China Glaze Bahamian Escape (blue)
- Elixir #62 (blue)
- OPI Wooden Shoe Like To Know? (brown)
- OPI Alpine Snow (white)
- KineticsBossa Nova (pink)
Tip
Don’t overdo this design. Small imperfections will give to it a light and airy feeling.
Last Updated on
Oh how this is gorgeous, must try and recreate it!
Parie x
classandglitter.com
I love this! What a gorgeous sky blue shade, too <3
Jess xo | The Indigo Hours