
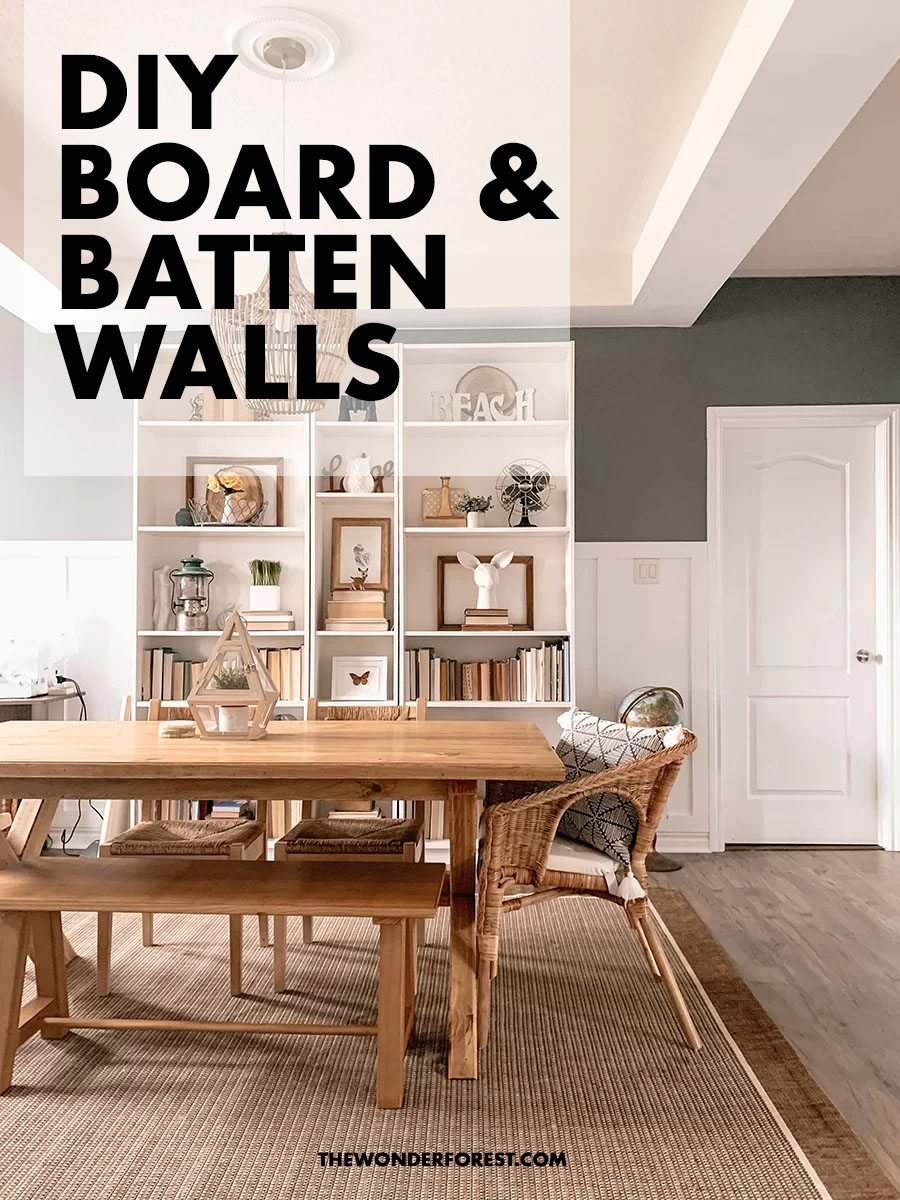
Is your room in need of a refresh? My dining room definitely was. After lots of contemplation, my husband and I decided to try our hand at some DIY board and batten walls — and the result is unbelievable!
This room in our house was previously coined “the front room” because it was one of those extra rooms that didn’t really serve a purpose besides being another place to sit.
Although technically it was supposed to be a dining room as it was built, we never had the need for a dining space because our eat-in kitchen satisfied the two of us just fine.
That said, we started to outgrow the space and my bright, eclectic style started to change over the years. I wanted a more “grown up” space for entertaining.

If you want to see what this room looked like previously, I have a whole post about the makeover that I completed a while ago.
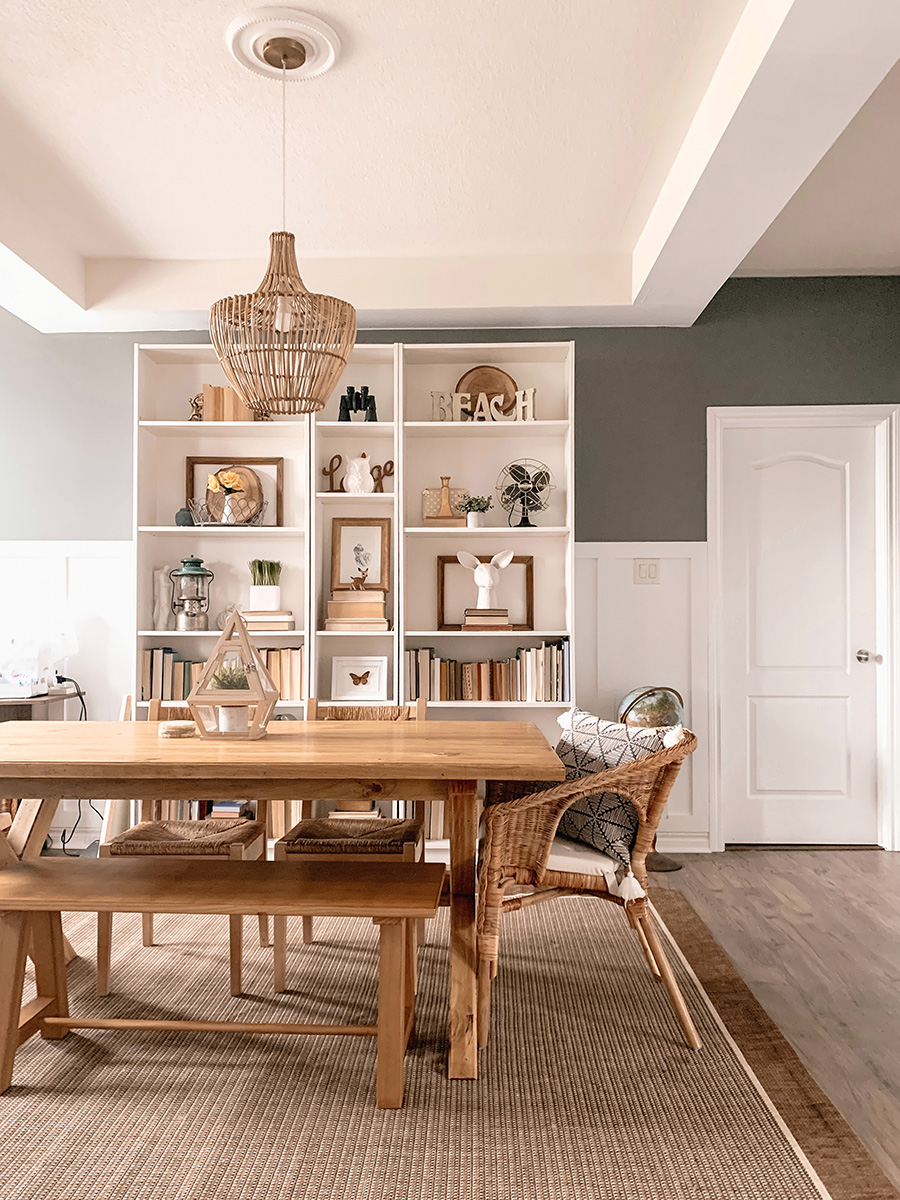
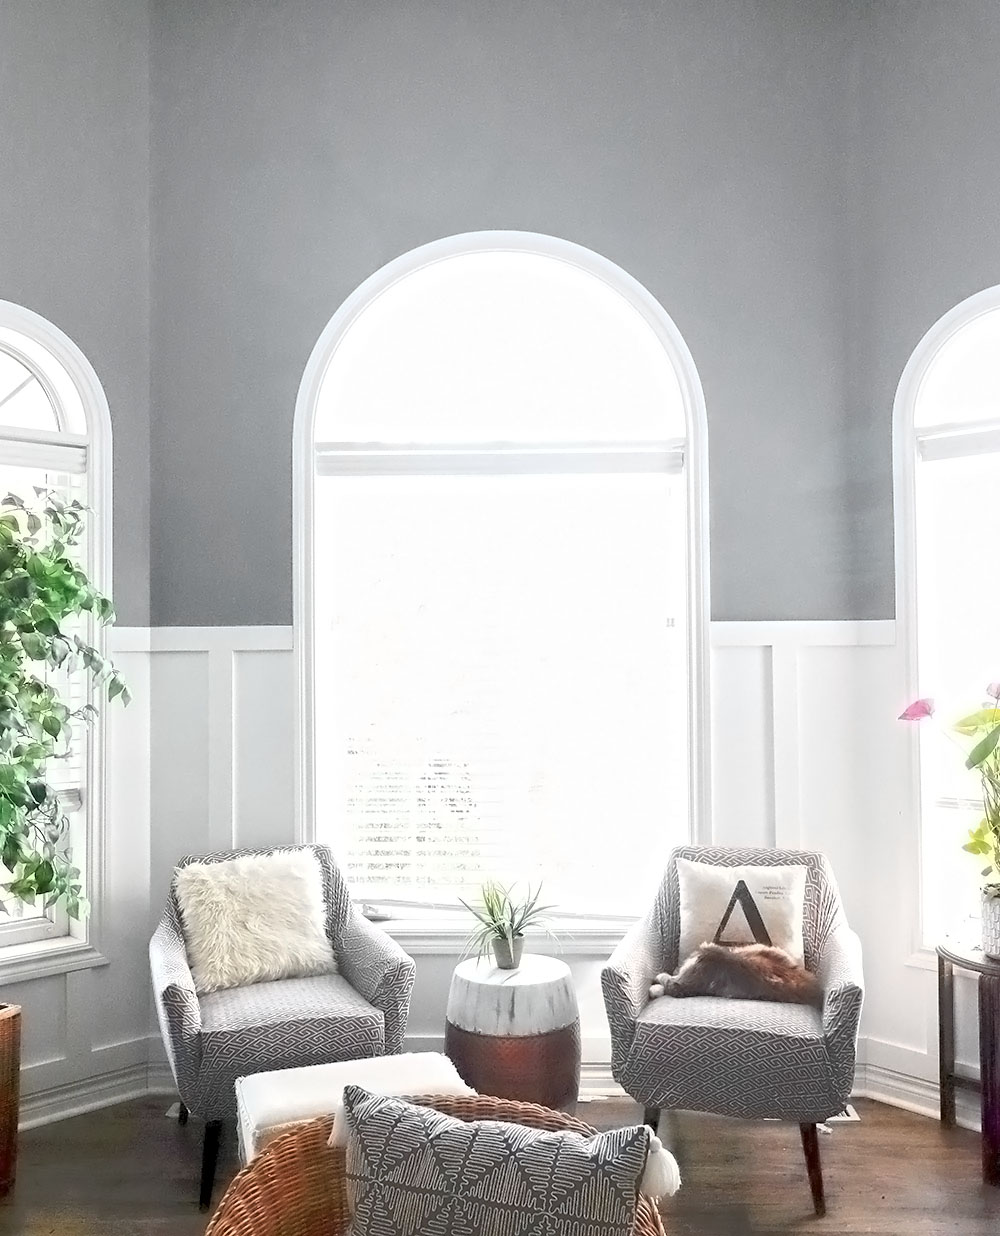
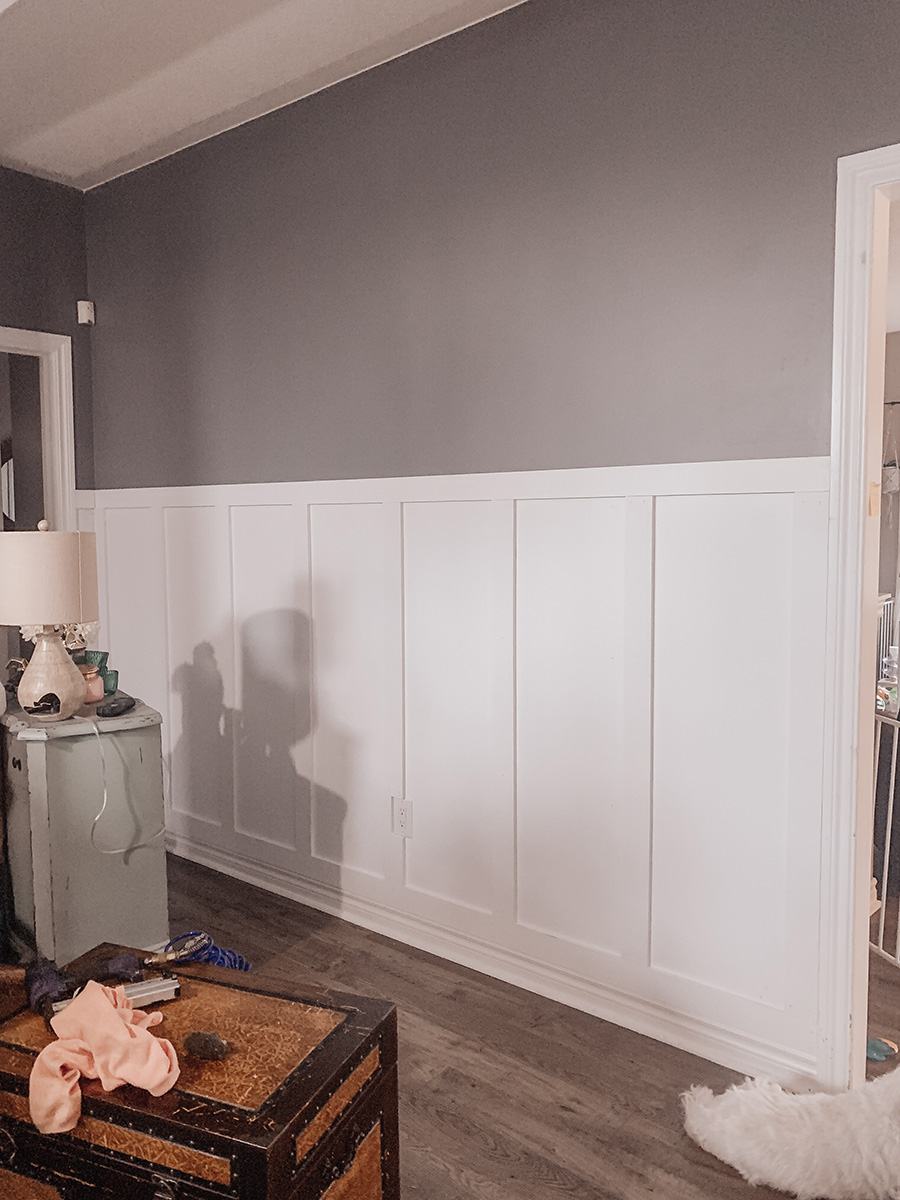
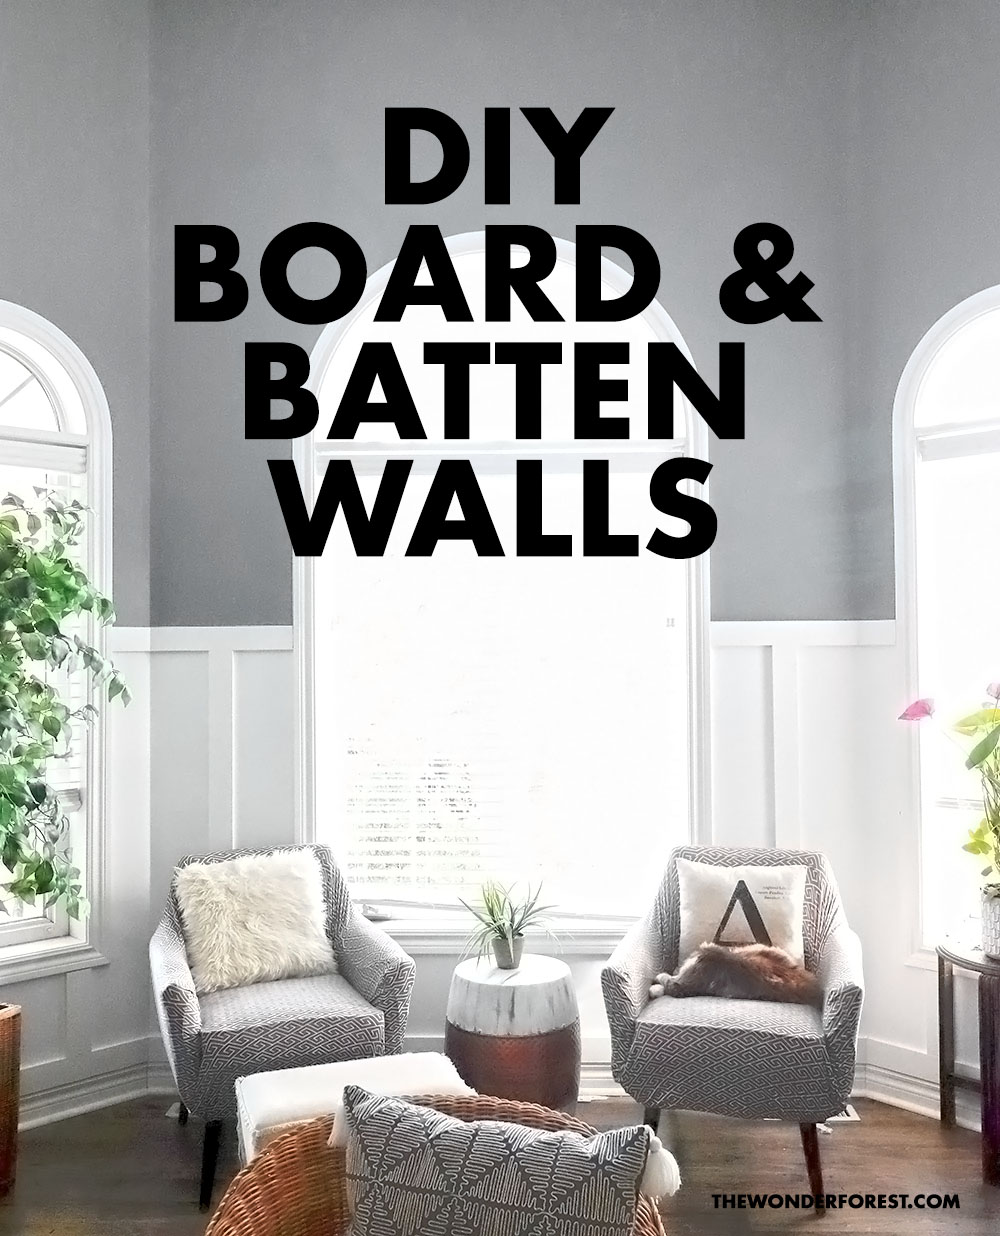
I decided to go with a boho neutral palette with natural wood textures. This room is fairly large with great big, bright windows, so I knew that adding white to the bottom two thirds of the walls would open it up even more and make it look a little livelier.
Supplies we used
- Two 8’x4′ MDF boards
- Brad nail gun and finishing nails
- Paint & primer
- Mitre saw
- Level
- Measuring tape
- Wood filler
Prepping the walls
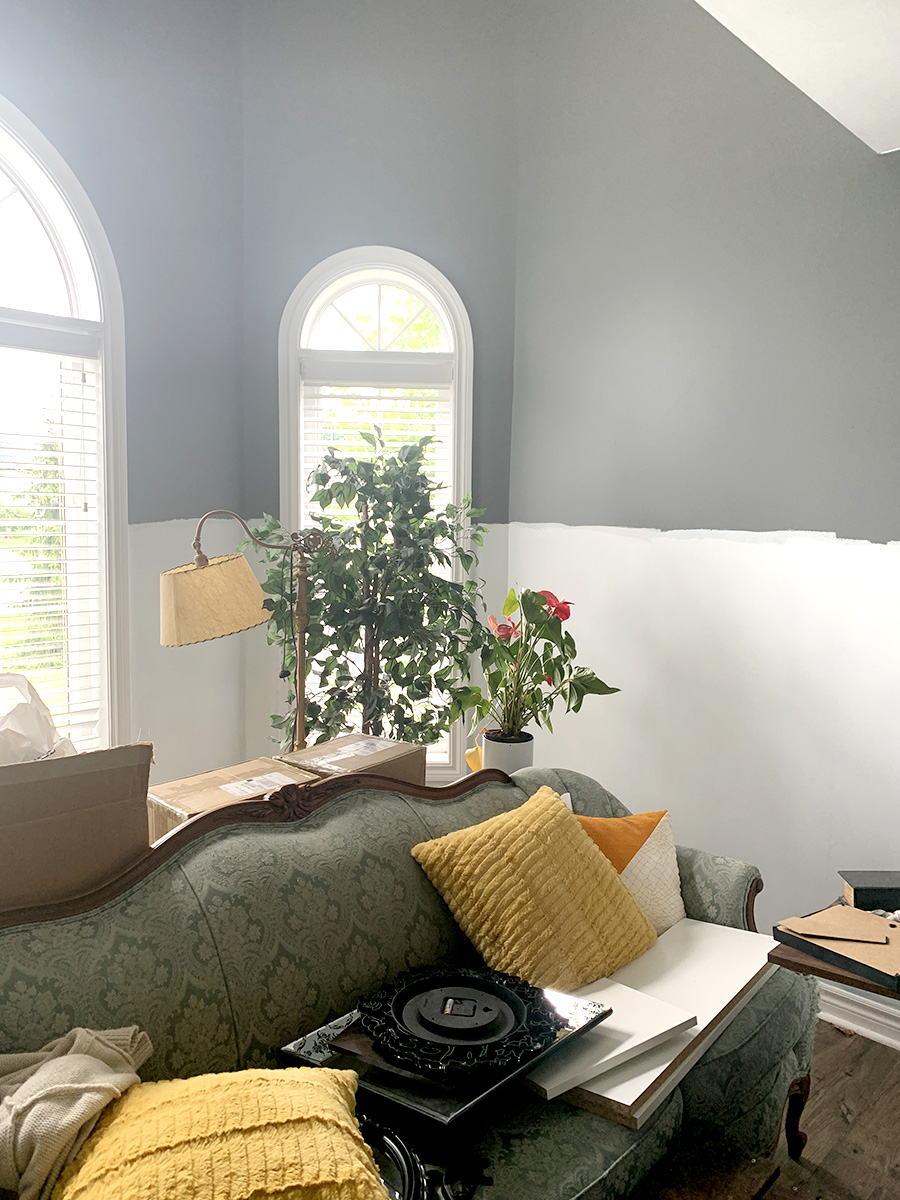
Before we could get started, we needed to paint the room. I got rid of the teal shade that started to haunt me and replaced it with a nice neutral grey. The shade I chose is a BeautiTone paint called Rugged Terrain.
I only painted the upper portion of the walls in this colour, and then finished the bottom with lots of primer and plain white un-tinted paint (BeautiTone’s Here Comes The Bride is a WHITE WHITE that is essentially just the can of un-tinted paint that you can grab from the shelf, no colour adding needed as it’s the base for their paints already).
To figure out the height of the painted white board and batten portion, I basically just used my eyeballs and common sense.
I liked the look of it being 2/3 the height of the door frames, and because the walls in this room climb higher in one area I didn’t want it to look too short.
I also considered the light switches. Having the light switches inside of the white area looked much better than having them sit above the board and batten walls.
DIY Board and Batten
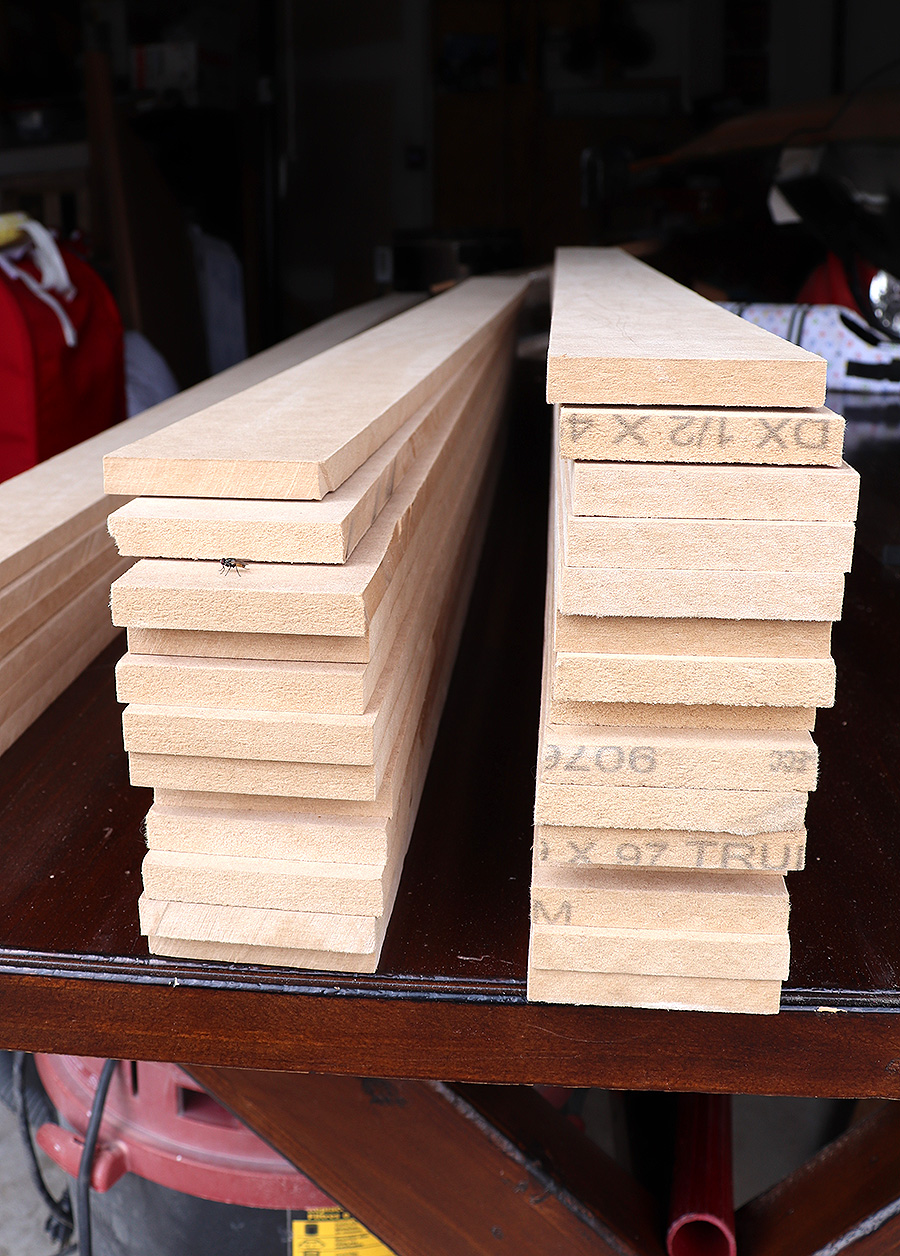
It was time to figure out what we would use for the board and batten wood. You could easily buy 1×4 slats of wood, but with the size of the room it would cost us a small fortune.
I also wanted to make sure that the wood was the proper depth to sit flush with the existing baseboards and door frames so we wouldn’t have to replace them. The 1×4 pre-cut wood would have been too thick.
We opted to purchase two sheets of 4×8 foot MDF boards that were 1/2″ thick and simply cut them into strips.
With a little mathematics, we figured that we could use the 8 foot length of the board cut into 3″ strips for the top and bottom rails.
We then cut the other 8 foot board in half so we had two 4 foot sheets. Those sheets were then also cut into 3″ strips for the vertical slats.
The half inch thickness was perfect for aligning with our door frames and baseboards perfectly.
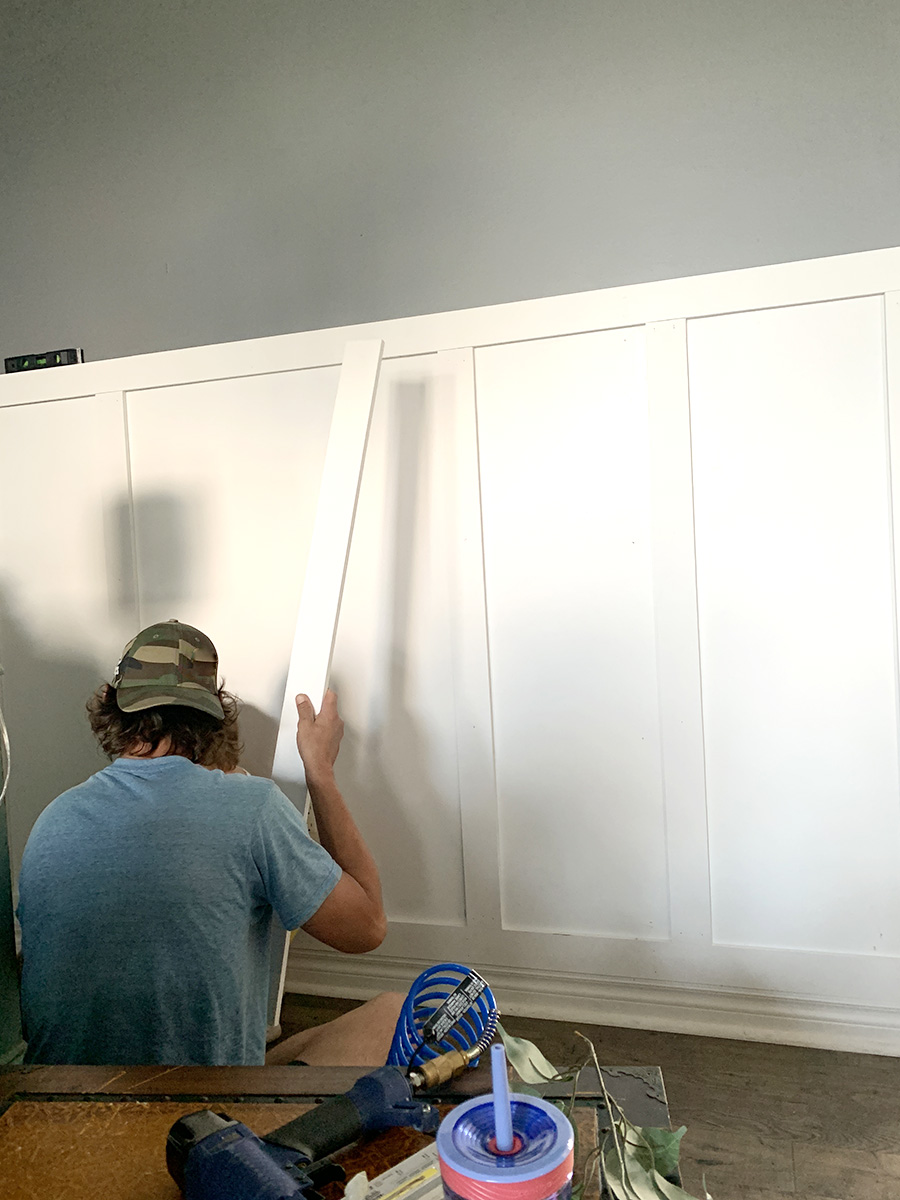
Once everything was cut, we decided that painting them before hanging them would be much easier than painting everything while on the wall.
Either way would be fine, really, but this let us get a nice even coat of primer and paint on each piece. We painted the tops and all of the edges.

Attaching the board and batten to the walls
Once dry, we were able to go ahead and nail them to the walls. We used our handy brad nailer and tried to nail the top and bottom nails directly into the studs.
We started with the bottom rails which just sit on top of the baseboards. As I said, we didn’t want to tear out our baseboards, so choosing a board depth that made them look like they blended right into the new wall feature was key.

Once the bottom boards were attached, we used the cut 4′ boards to measure where the top horizontal board would sit. Those were then leveled and nailed into the studs.
After the horizontal boards were hung, it was time to attach the vertical slats.
Figuring out the spacing
Sorting out the spacing of the boards required a little math division which isn’t my specialty, but luckily the husband is a whiz.
I wanted each corner to begin with a board for visual symmetry. We placed some of the boards against the longest/main wall to get a feel for how many boards and how much space between them looked best.
He then measured the length of the wall and figured out that the boards would have a space of 14″ between them. The length of the wall, divided by the number of boards we had mocked up, minus the width of the end boards.
The formula
Length of wall – (minus) 6″ (the 3″ boards on each end)
/ (divided by) the number of boards you want on the wall
= the number of inches in between each board (14″ in our case)
Since each wall is a different length, we wanted to try to keep the same amount of spacing between them so the whole room looked cohesive.
We only needed to adjust the 14″ spacing by small increments to make the boards appear to fit properly and evenly. So, while some walls may have an exact 14″ spacing, others might be spaced 14.5″ apart or even smaller at 13.75″, which really isn’t noticeable unless you’ve got a tape measure on hand!
All of the boards were brad nailed into the wall. We didn’t worry so much about hitting all of the studs.
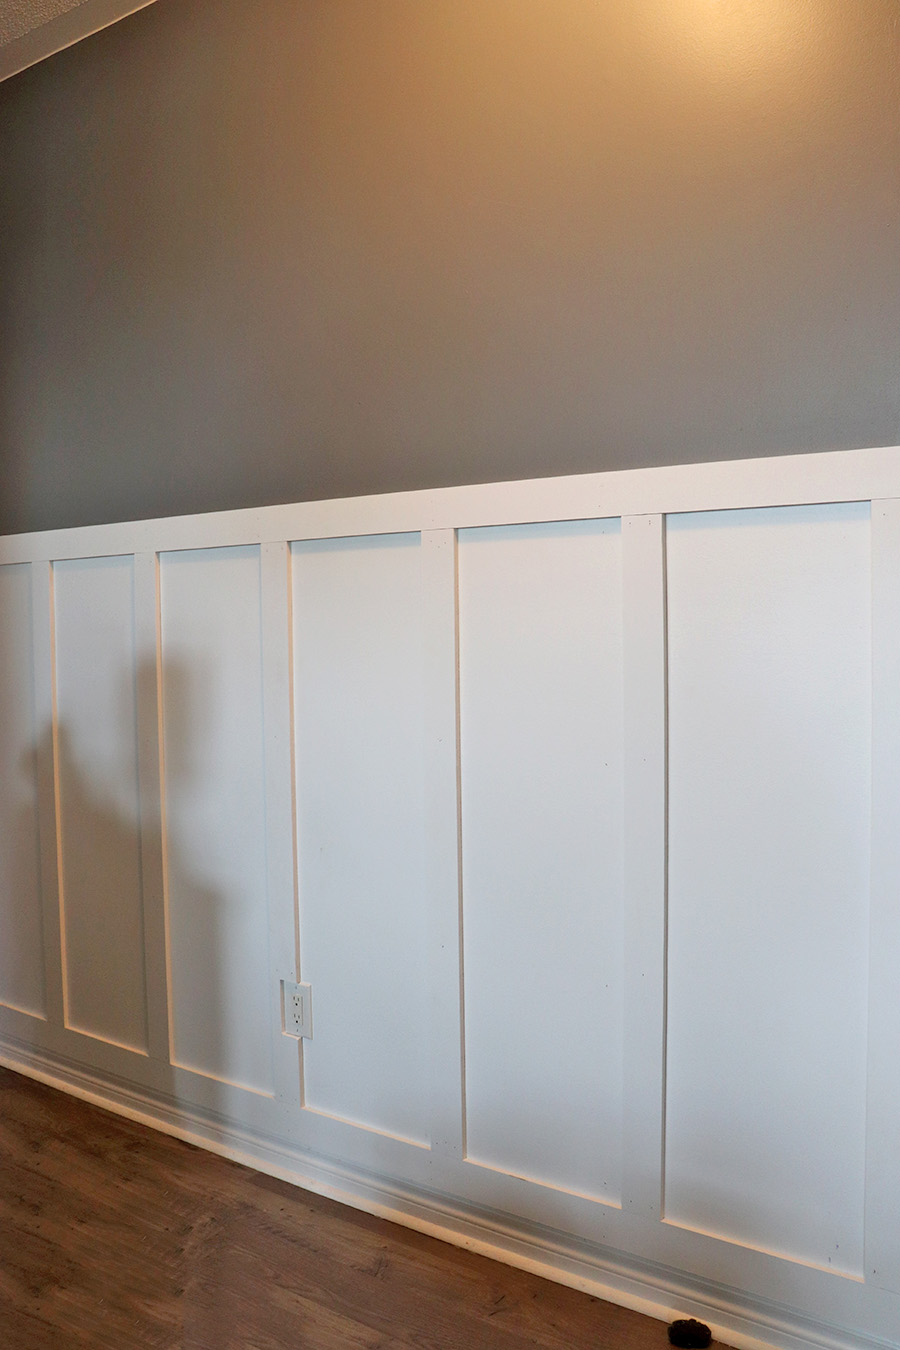
After everything was attached, we filled the nail holes, sanded and painted one final coat on everything.
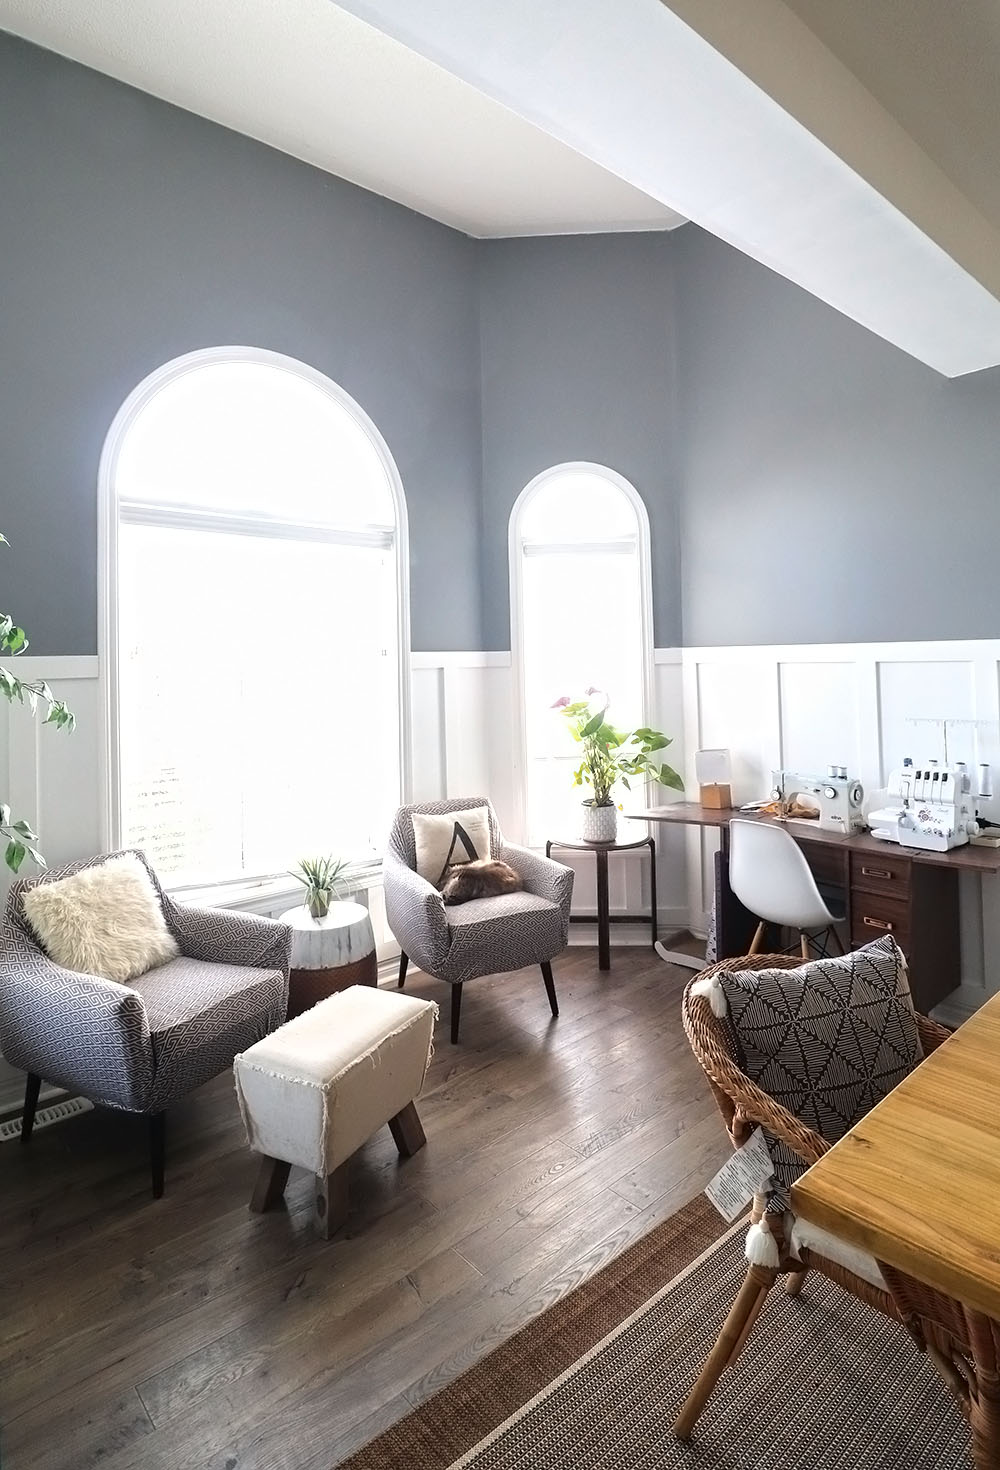
This room turned out better than I had imagined and I am so happy we took the time to create this totally affordable board & batten feature.
Pin this!
Last Updated on