

Late last year, I purchased a second property with intentions of fixing it up and making an income from it. Although I had fixed up my own home, I had never taken on something like this before and I was super excited to get started.
The place was pretty much a decor nightmare. It was previously used as a cottage, so it definitely had that old mix-and-match cottage charm! It was built sometime in the 50’s and had paneling and wallpaper EVERYWHERE. I seriously counted at least 6 different types of wallpapers and 4 different styles and colours of paneling.
While it looked like a mess, there was really nothing majorly wrong with it and I was confident that I could use some paint, upgraded fixtures, and a minimal budget to get it looking nice.
I worked on this place on and off for about 8 months, using my own two hands and the help of one awesome contractor for the larger things that I was inexperienced with. I thought it was about time to show you what I was able to accomplish… (excuse the crappy “before” cell phone pics)
The Living Room
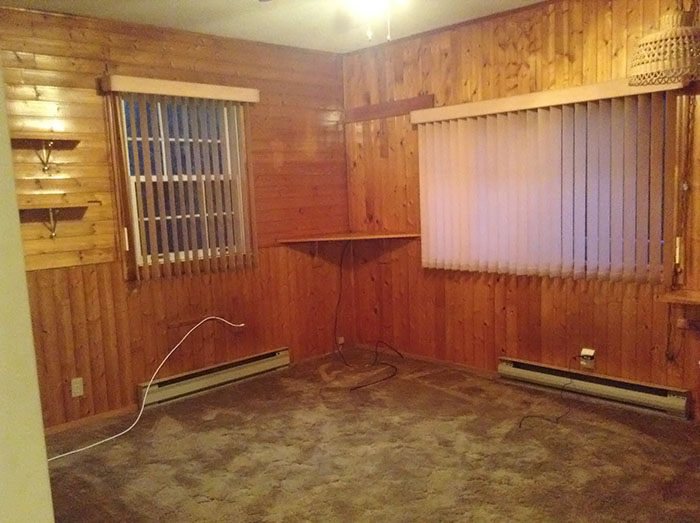
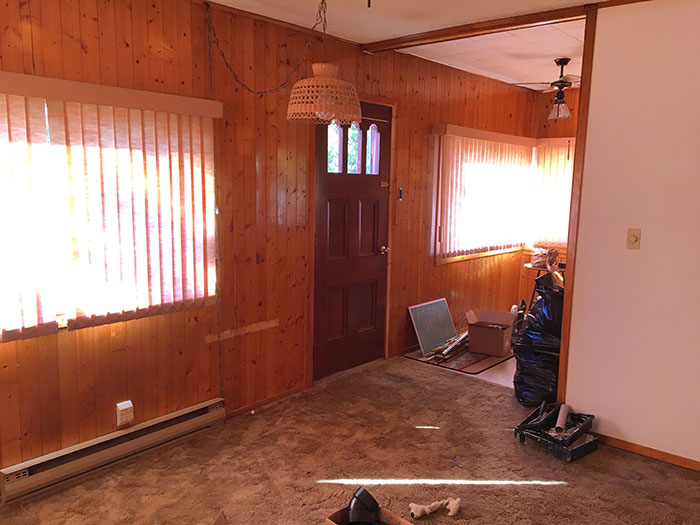
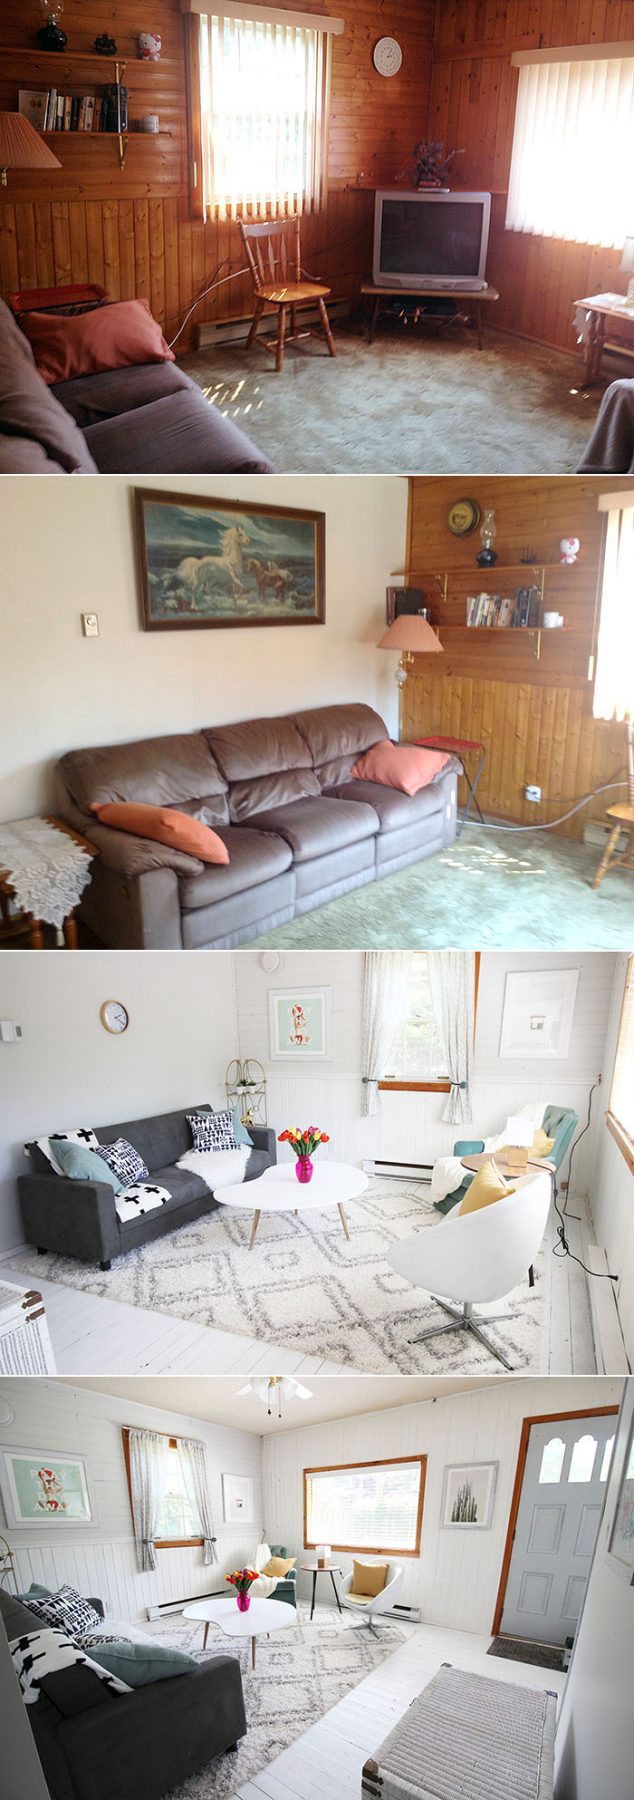
The living room was an ugly mess and there was way too much wood for my liking. The cedar paneling in this room was the first thing to go, with multiple coats of white paint, transitioning to a light grey on the horizontal slats. While the carpet was in good shape, it was ugly as anything, so we tore up it up to expose the original wood flooring underneath. The original wood flooring was a welcome surprise as I had originally planned on laying down laminate. Instead, I decided to keep that old charm and paint it out white as well. Sanding and restoring it would have been quite the job (and quite costly) as it ran all the way through the house. So, paint it was!
I replaced the old vertical blinds with new 2″ ones, tore down all shelving and strange ledges that were all over the walls (and hooks! the previous owner was OBSESSED with hooks!), and brought in a bunch of furniture both new and old.
Artwork and curtains: Minted
Sofa: Leons
Printed Pillows: Wonder Forest shop
Rug: Wayfair
Coffee Table: DIY by me
White chair: spray painted existing chair from my own home
Teal chair: Re-use center
The Bathroom
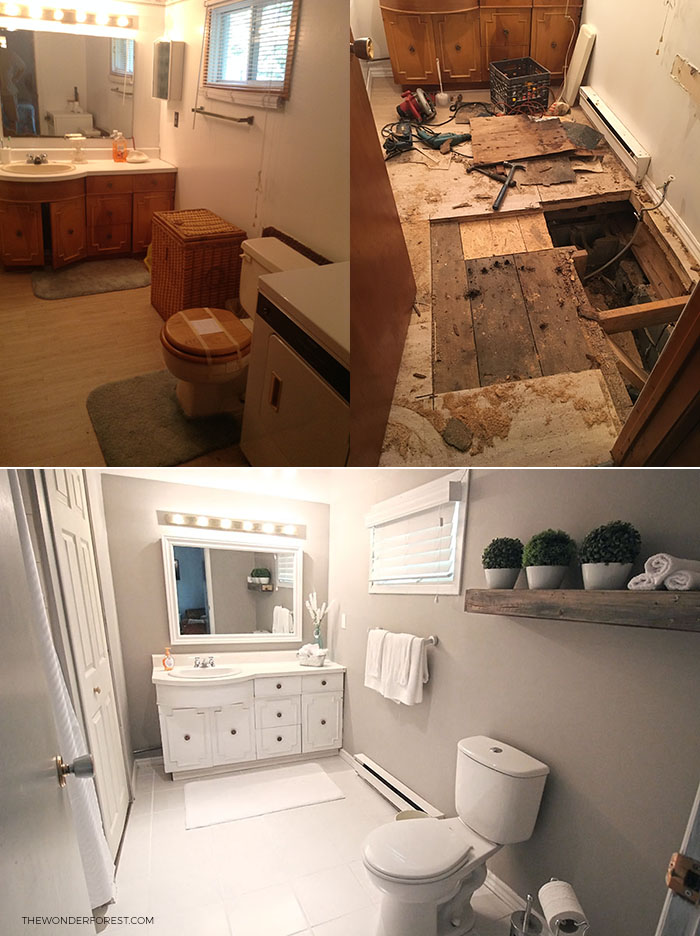
The bathroom probably needed the most work in the house. The old toilet was installed incorrectly and had been leaking underneath for quite some time. So much so that you would feel like you were going to fall straight through the floor if you were anywhere near it. I had my contractor pull up the floor and rebuild the framing underneath, which had all rotted out. Then, I tiled it with new ceramic tile, painted the walls, installed a new sink and faucet (call me Miss. Plumber!), installed a new bi-fold closer door, new toilet, shelving, new blinds, and of course all other decorative accessories. I framed the existing mirror as well, because mirrors are expensive, guys!
The Kitchen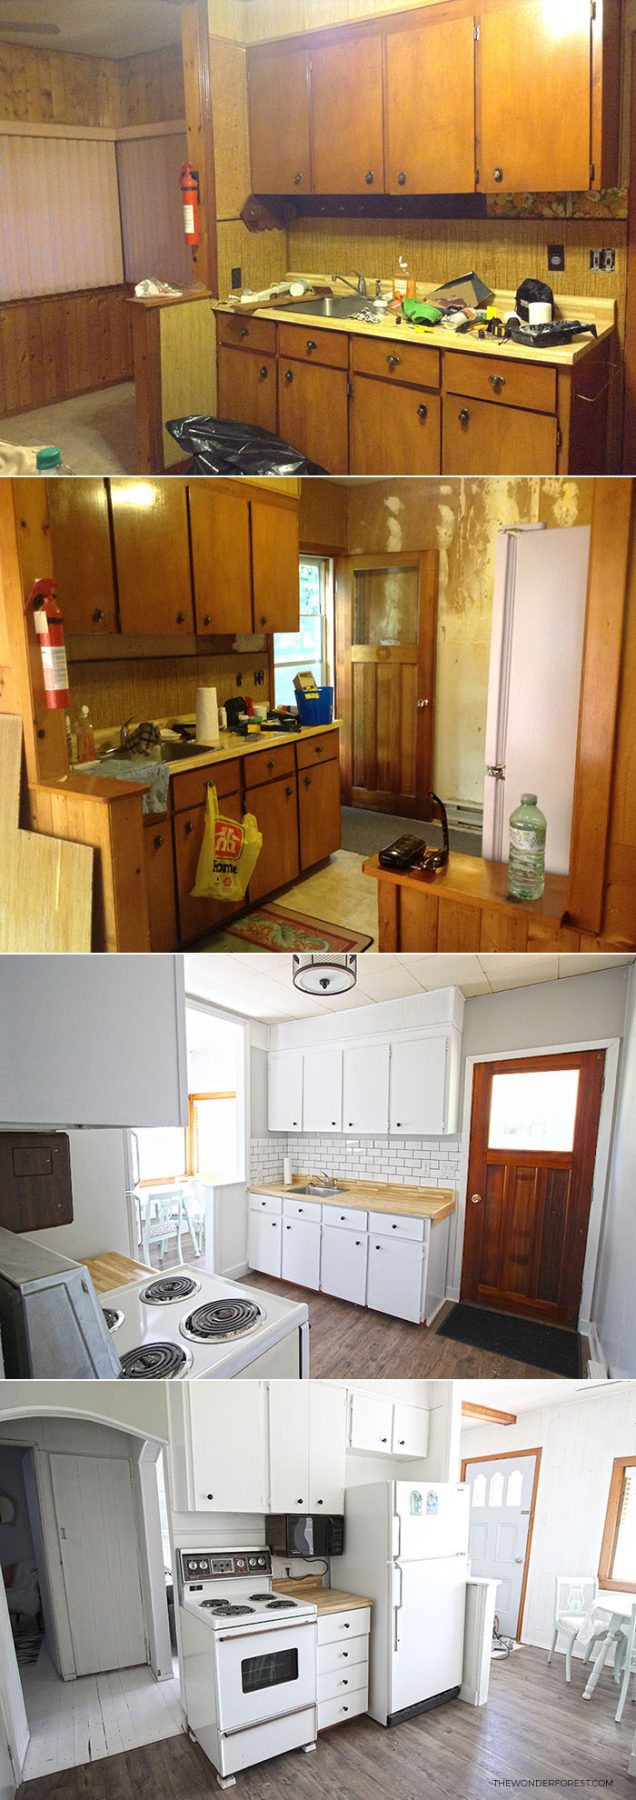
The kitchen was the first room I started working on because it was in desperate need of some love. I started by removing all of the weird wall coverings and bamboo-like paneling and painted the whole thing out. Paint can really do miracles! The one main wall that you see in the second photo on the right was a little bit of a pain. After tearing the wallpaper off, the wall underneath was like an oldschool beaver board, sort of like cardboard with a weird texture that would look awful under paint. I decided to grab some drywall plaster and plaster the whole thing to a smooth finish by hand. After that, I was able to add some tile to the backsplash, install new knobs on the cupboards (which were also just painted out), add a new light fixture, and have my contractor install some leftover laminate flooring that I had from my own house.
Bedroom One

Both bedrooms were a mess to begin with. They both contained a mix of paneling and wallpaper, and since the wall underneath was that weird soft beaver board stuff, I was limited in what I could do. It was either: tear the walls down and drywall them, or work with what I had. I decided to work with what I had and brought in an army of paint cans. Once again, the carpet was removed from these rooms.
After that, I just did some minor fixes and started decorating! The light fixture here was one that was a hanging light in the living room. The old owners left it and I loved it for some reason, so I kept it. I decided to use it in this room and hardwired it to the ceiling.
Rug, pillow cases and shams: Urban Outfitters
Chair: Family hand-me-down
Fur rug/throw: Walmart
Duvet cover: Target
Foot stool and gold table: Thrift store
Light fixture: Came with the house
Bed frame: DIY from pallets
Bedroom Two
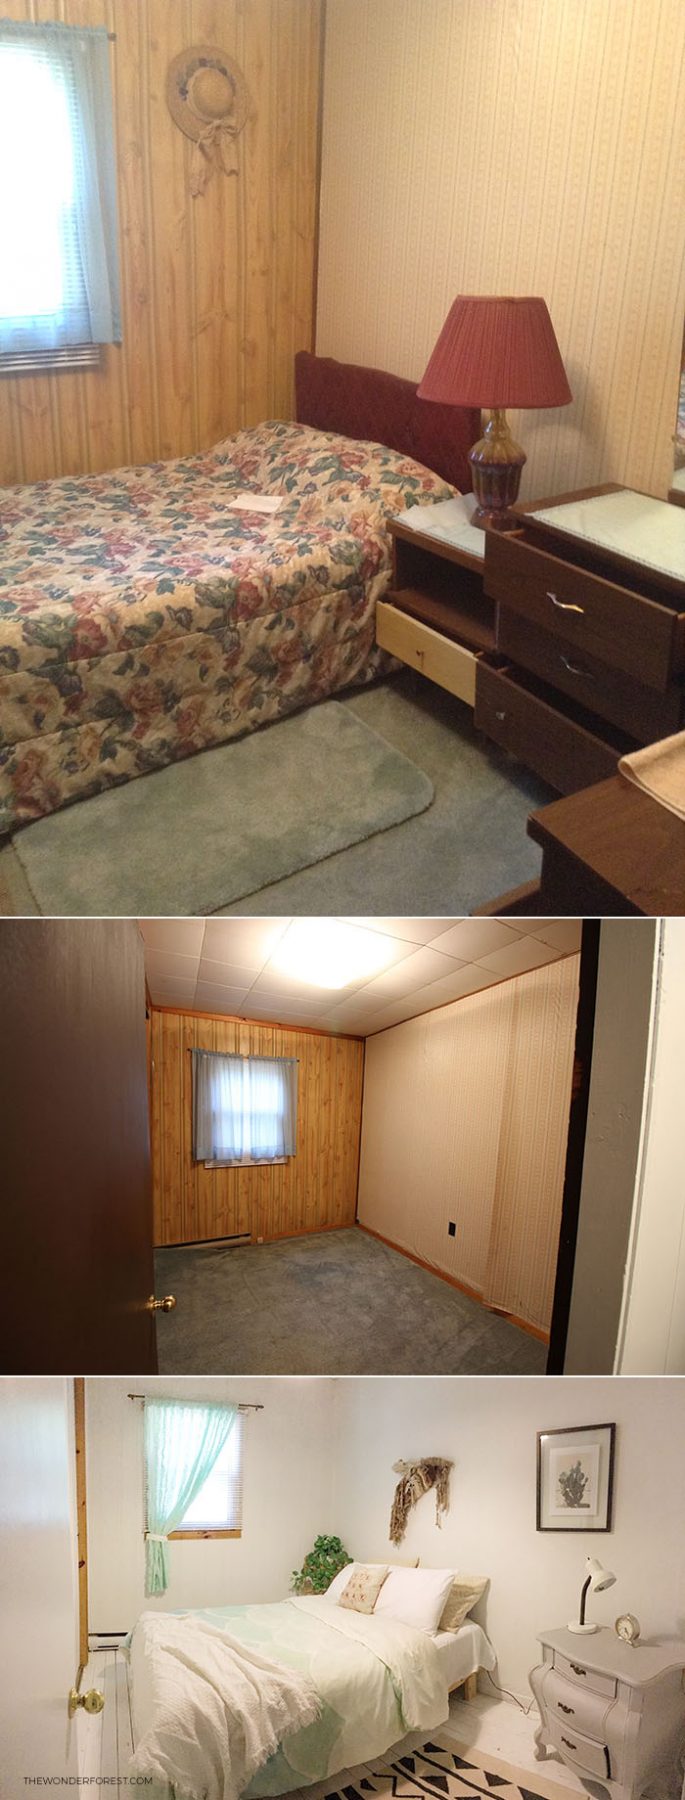
If I had a bigger budget, I would definitely have drywalled the bedrooms, but I think it turned out okay anyway. I used some “wall liner” in this room after ripping the wallpaper down. It is pretty much like a thick wallpaper that is supposed to mimic drywall and be a good prep for hard-to-cover walls. I got it at Home Depot and wouldn’t recommend it at all! It was such a hassle to install as it doesn’t come with adhesive and left so many bubbled spots. I should have done what I did in the first bedroom and just painted the wallpaper.
Rug and curtain: Urban Outfitters
Duvet cover: the Wonder Forest store
Wall hanging: auction find
Small drawers: Family hand-me-down
Breakfast Nook
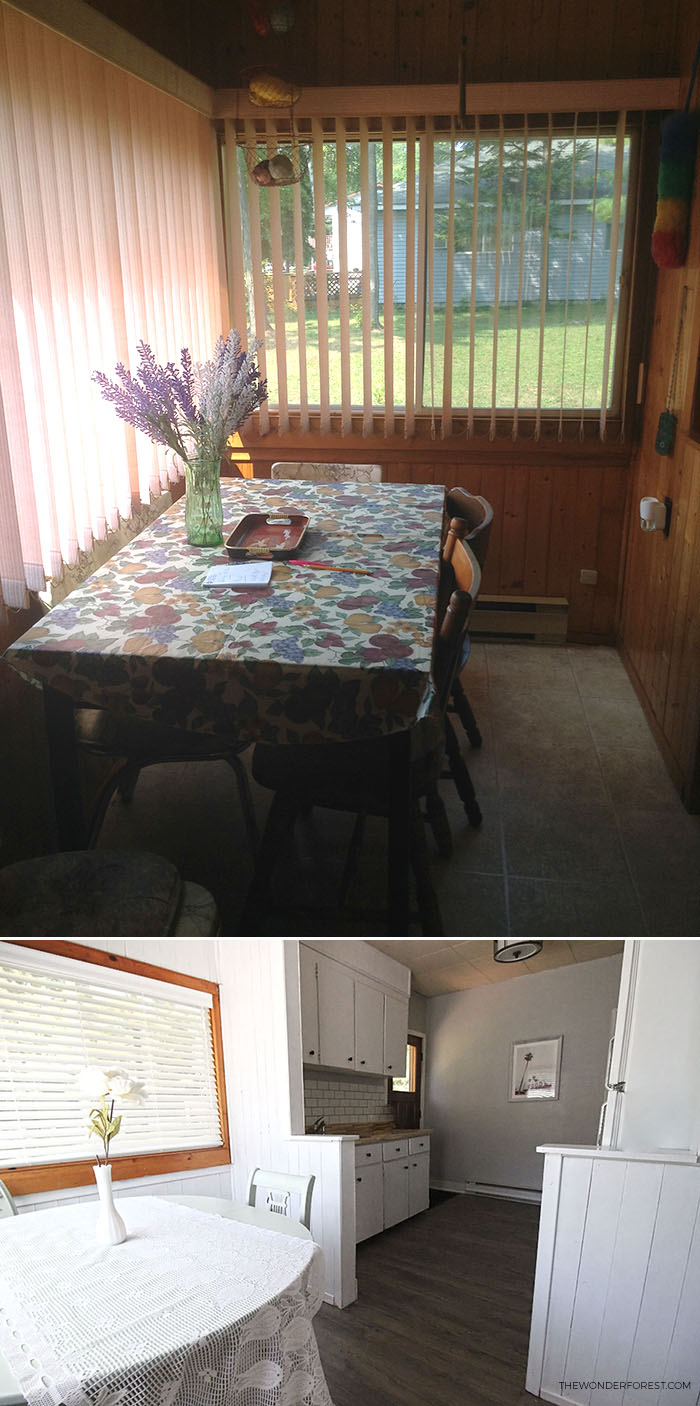
The breakfast area is attached to the kitchen so the flooring was continued throughout. This room was pretty easy: some new blinds, and yes, more paint!
Exterior
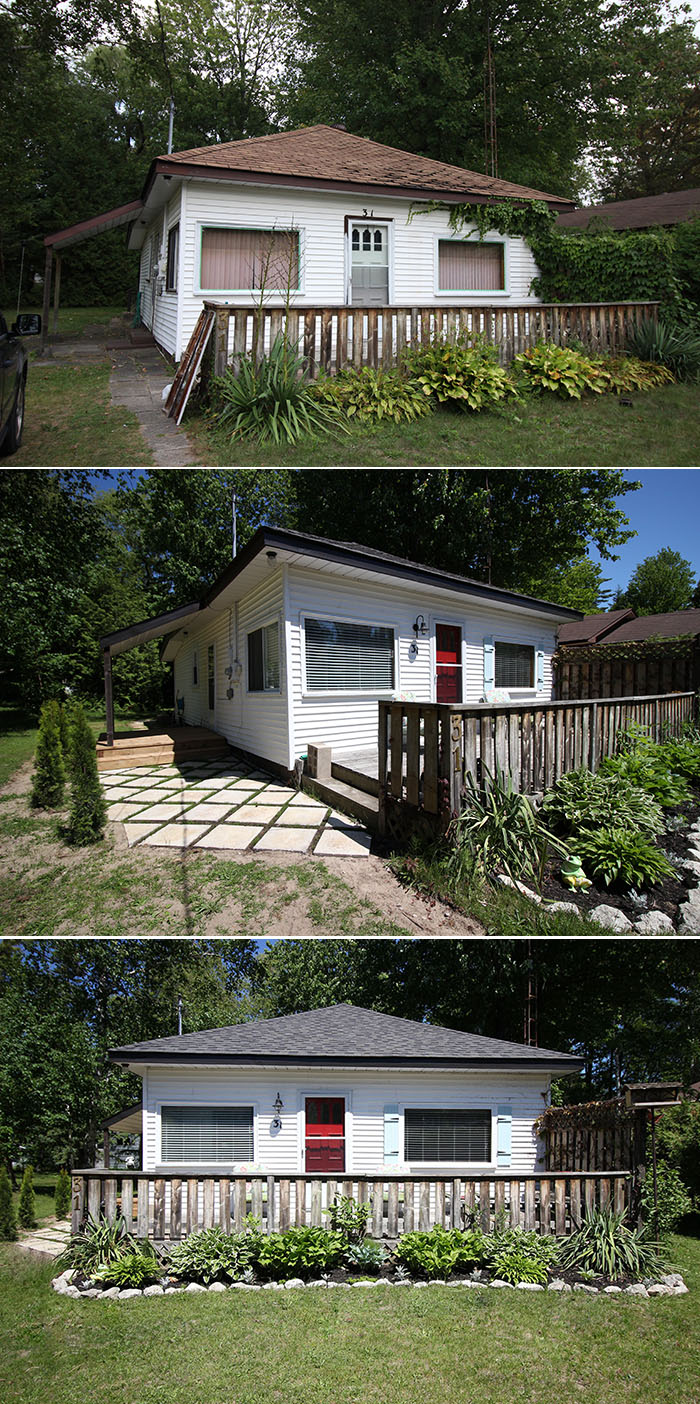
The exterior underwent some huge changes as well including a new roof, paint job, landscaping alterations, a new deck area, a shed renovation, and more! I reused all of the existing old patio stones at the side of the house to create this diagonal pattern walkway that I am a little obsessed with. I flipped them over to reveal a more natural, lighter tone stone, flattened out the ground, and started positioning them. I wanted the maintenance to be easy, so I decided to add soil and grass seed in between the cracks to be able to just mow right over it. I never thought I would be able to lift and move 60 patio stones on my own, but I got a good work out in, that’s for sure!
The changes from what it was to what it is still surprise me and I am so in love with this little house. SO much work and love went into it and I hope it shows. Now that it’s done, I can’t help but think of what my next project will be.
Last Updated on
Oh wow! You wouldnt have even thought that was the same house from the inside! Love the changes that you made!
xx Chelsea
http://www.organizedmessblog.com
Thank you Chelsea!!
This looks absolutely stunning!!! I’m seriously impressed with the amount of work you did yourself. I also bought a fixer upper and definitely would not be able to refinish walls by hand!! Kudos, girl!
Plus your interior design is fantastic. ♡
Ohh that’s exciting!! I am so ready to move onto another one haha. I just love doing this 🙂 Thank you! <3
Wow, I’m impressed that you did most of this on your own (and that a such a young age you have two properties, something impossible in my country!). It’s a huge improvement, I love the exterior! Congrats!
Thank you so much Maira! <3
This looks so great!!! You can really see all the work and love you put into this place! It looks more modern and clean and just open. I’m excited to see future posts on the house!
http://www.rosegoldfox.com/
Thank you Deanna!! I’m so happy with it!
Oh my god, I love projects like this one! It just shows everyone how much you can make out of a place no matter how bad it may look in the beginning.
Norina xx
la-piccola-me.blogspot.com
Totally! Isn’t it crazy how much you can transform a place!? 🙂
Ahhhh I am sooo impressed! It’s so beautiful. You just gave me hope not to give up on renovating our little home. Amazing what dedication, hard work, and creativity can do!
Don’t give up! I know it is tiring after a while haha
Wow, that panelling in the living room was something else! I love the subway tiles you’ve fitted in the kitchen. Good job!
Jess xo | The Indigo Hours
Haha I know, the whole house had wood everywhere, all in different shades. It felt good to finish painting it all!
It looks amazing!!
xo Kitten ♥ The Howling WolfHeart
What an excellent makeover! I love home much you did with the existing house!
Wow, what a transformation!
Ali x http://alibourke.blogspot.com
Wow! I am so impressed! You did an amazing job on this cottage!
Beautiful transformation, Dana! It looks great, so cozy 🙂
WOW. One of the best before/afters I’ve ever seen. You did a fabulous job!!
AGREED! Saw this thru your tweet! What an inspiration! Pinning all of them!
You did a wonderful job, Dana. The house looks much more modern, but still cozy. Love it!
Wow im allways amazed by your talent. Its really great what you do!! I have never been a fan of interior makeover but yours looks so much fun!!! Great job!
http://www.halloresi.de
Absolutely love it.
Wow, this turned out amazing – congrats!!
Laura
http://www.blackcoffeebeautiful.com
Looks amazing!!! Gave me lots of ideas for my home! ❤
Your cottage looks amazing! XX
http://www.fashionatic.be
Impressive amount of work with gorgeous results!